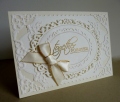
See SCS Tutorials for directions to make the card.
Here are directions to make the Pinecone Spray: Punch 17 mini pear shapes and shape with the Flower Toolkit.
Row 1 - Center of the pinecone: Cut a piece of floral wire 1” long and dip the tip in Hot Glue. Roll 1 pear around the wire. Put a drop of hot glue on the wrapped pear and adhere to the 2nd pear. Wrap the 2nd pear around the first one to make the center of the pinecone.
Row 2: Evenly space 3 pears around the center. Dip the stem of the pear in Hot Glue and adhere it to the wire so that it is the same height as the center of the cone.
Row 3: Evenly space 5 petals around Row 2, but move them down just a tiny bit
Row 4: Adhere 7 petals around Row 3, but move them down a tiny bit.
To finish the Pinecone, use your tweezersÂ’ to bend the petals out to shape the cone. Remove all glue webs.
Sponge the edges using Cloud White Chalk Ink. Add Stickles Frosted Lace to some of the edges for glitter.
Cut the pine branches, seed leaves and digi leaves. Cut 3 loops from a wired ornament and adhere to the spray. Adhere spray to card using Hot Glue.
Date: Friday, October 11, 2013 GMT Views: 1147
Favorited:5
Paper: Red; 2 different sheets of DSP for card and box; Brown; Green; White
Paper Size: 8" x 12"
Ink: VersaMagic Red Magic Chalk Ink; Memento Cottage Ivy; Tsukineko VersaMagic Chalk Ink: “Spanish Olive”, “Hint of Pesto”, “Cloud White” and “Key Lime”
Accessories: Spellbinders 5” x 7” Enchanted Labels 28 –smallest die;Marianne Creatables Anja Leaves 2-Seed and Head; Marianne Creatables Pine Branch; Decorative Labels 8; Martha Stewart Frond Punch; Punch Bunch Mini Pear Punch for the Pinecones; ScorPal; Paper Cutter;