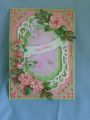
The finished card is 5” Square. For the card base cut Cream Cardstock 5” x 10”; score at 5” and fold in ½. Round the corners using a Large Corner Rounder. Cut Creamy Carmel Cardstock 2” x 5”, round the top corners with the Large Corner Rounder. Adhere to top of card base. Cut Cream Cardstock 3” x 5”, round the bottom edges with the Large Corner Rounder and adhere to card base.
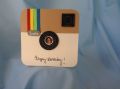
Eye Piece: Lay Large Square #2 on Black Cardstock. Lay Small Square #2 inside. Tape in place. Cut out. You now have a frame. Take Small Square #2, cut out the center using a Large Square #1. Punch a Black Circle with a ½” round punch. Cut/Emboss Large Square #2 on Black Cardstock. Use a White Colored Pencil to go around the lines of the frames and the circle, so they stand out. Glue the frames onto the solid square and glue the Circle inside it. Add Dimensionals and set aside.
Lens: Lay Small Circle #3 on Black Cardstock. Lay Large Circle #2 inside, tape in place, cut out. Lay Large Circle #2 on Cardstock, Lay Small Circle #2 inside, tape in place, cut out. Lay Small Circle #2 on Black Cardstock. Lay Large Circle #1 inside, tape in place, cut out. Cut/Emboss Small Circle #3 out of Black Cardstock. Adhere the circle frame over the sold circle. Use a White Colored pencils to go around the edges of the frame so they stand out. Cut out small photo using a ¾” punch; Adhere photo the center of the Black Circle using a glue dot. Add Dimensionals and set aside.
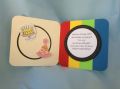
Stripes: Cut ¼” x 2” strips of Blue, Green, Yellow, and Red. Print “Insta” on Light Gray cardstock and emboss in white. Before gluing, place all pieces on the card where you want them.
Date: Wednesday, July 24, 2013 GMT Views: 355
Favorited:2