Masking Alternatives
by Jennifer McGuire
Learn some tricks for masking detailed images without fussy-cutting.
Supplies
- Stamps (Mama Elephant Pandamonium, Clearly Besotted Celebrating You, My Favorite Things You’re Super, Hero Arts Enjoy Today used here)
- White cardstock (Neenah used here)
- Coloring medium of your choice (Copic Markers used here)
- Ink and inking tool (Ranger Distress Inks and Ink Blending Tool used here)
- Mists (Hero Arts Silver and Unicorn White, Perfect Pearl + water mix used here)
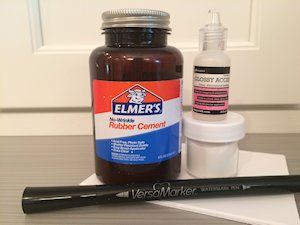
- Glossy Accents
- Embossing pen (VersaMarker used here)
- Clear embossing powder
- Heat gun
- Rubber cement (Elmers brand used here)
- Tape for masking (Painters Tape or Micropore Tape recommended)
- Other supplies as needed to complete the project (Avery Elle Finished Frames dies, thin paint brush, and die cut machine used here)
Step-by-Step
-
Step 1
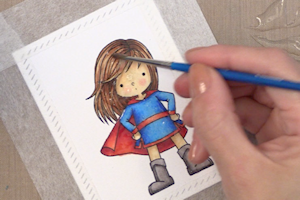
Color a stamped image on white cardstock.
TIP:
To create a white border around the image and keep the panel in place while coloring, mask the outer .25” of the cardstock with tape.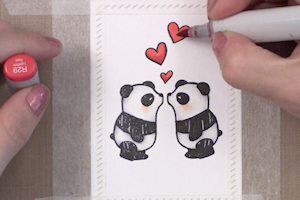
-
Step 2
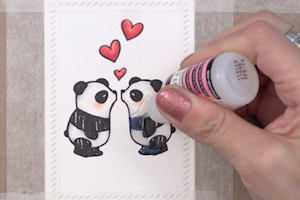
Cover the stamped image with Glossy Accents, being careful to stay within the lines. Let dry completely.
-
Step 3
Apply ink over the cardstock using a sponge, dauber, or other inking tool. The Glossy Accents will resist the ink and therefore mask the stamped images.
Remove the tape masks and buff off the excess ink from the Glossy Accents with a cloth.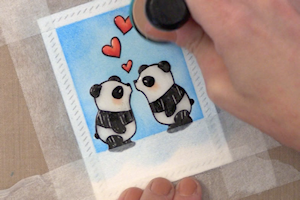
-
Step 4
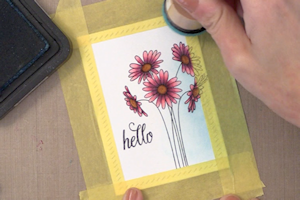
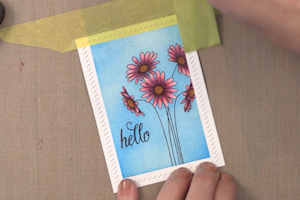
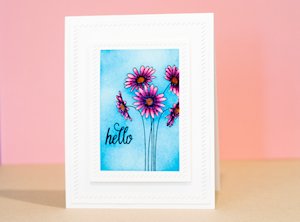
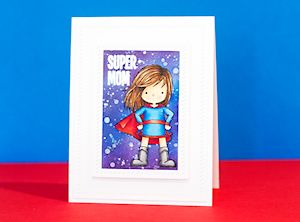
Use the panel to complete a card.

-
Step 5
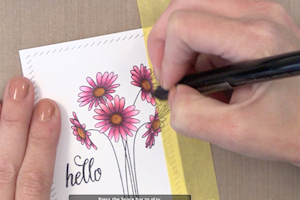
For another way to mask images, cover a colored image with an embossing pen such as a VersaMarker, being careful to stay within the lines.
-
Add clear embossing powder and heat set.
If needed, add another layer of embossing ink and powder.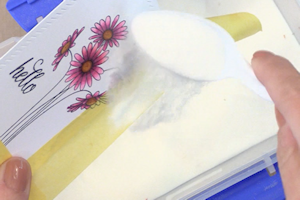
-
Step 6
Apply ink over the cardstock. The heat embossing will resist the ink and therefore mask the stamped images.
-
Remove the tape masks and buff off the excess ink from the heat embossing with a cloth.
-
Step 7
Use the panel to complete a card.
-
Step 8
A third method is to cover the stamped images with a thick layer of rubber cement, being careful to stay within the lines. Use a thin paint brush that has been designated for this technique to get into tight spaces. Let dry completely.
-
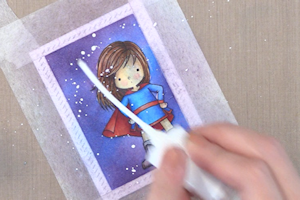
Step 9
Apply ink over the cardstock, and flick on various mists if desired. The rubber cement will resist the ink and therefore mask the stamped images.
-
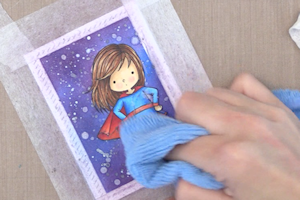
Step 10
Remove the tape masks and use a clean cloth to rub away the rubber cement.
-
Step 11
Use the panel to complete a card.
Video!
Your Turn
You've seen the tutorial, now you try it! We've got a section of the gallery set aside for Masking Alternatives. Try this technique, then upload your artwork to the gallery. Show us your creations!
***Please note - Internet Explorer/Edge is not a supported browser, and will not allow you to see the videos. Please use Chrome, Firefox or Safari to view our tutorial videos.

Questions and Comments
We'd love to get your feedback or questions. Leave your comment below.
shirley
Can you tell me what removable tape that was you used to mask the borders?
Anyway......NEVER thought of using it as a mask....I can't wait to try it. Thanks so much for sharing!!
Jo
Page 1 of 2 pages 1 2 >