Felt Succulents
by Dina Kowal
Use common shaped dies to create faux succulents for embellishments and decor.

Supplies
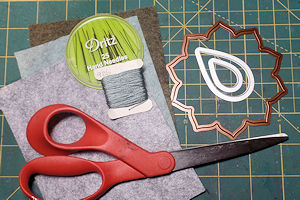
- Felt in various colors (wool/rayon blend "Earthy Heathers" felt from etsy seller sweetemmajean used here)
- Shaped dies (anything with a rounded or pointed edge or repeated pattern will work – circles, ovals, leaves, hearts, ornaments, labels, etc.)
- Scissors
- Sharp embroidery needle
- Embroidery floss
- Other supplies as needed to complete the project (used here: empty tape roll, patterned paper, chipboard, circle dies, tacky glue, hot glue gun)
Step-by-Step
-
Step 1
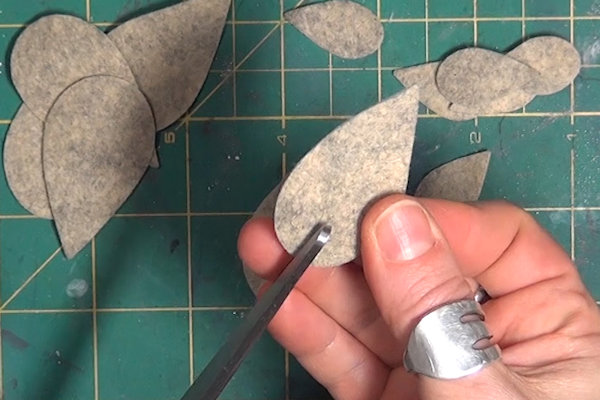
Choose a die shape for your succulent leaves, mainly keeping in mind which edge will be to the outside of each leaf. Shown are some everyday dies that will work.
-
Step 2
Single shapes can be used, such as this set of nesting leaf dies. For the sample, 6 large leaves and 6 small leaves were cut from wool blend felt. Ovals, ornaments, or other shapes with a rounded inside edge can also be used.
-
Cut a slit at the center of the inside end of each piece. The larger leaves here were cut in about 1/2", and the smaller leaves about 1/4”.
-
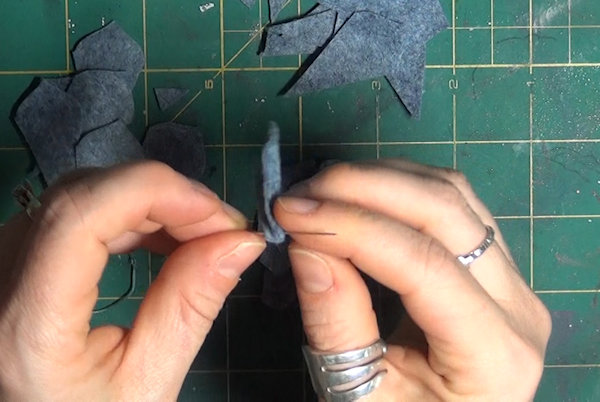
Step 3
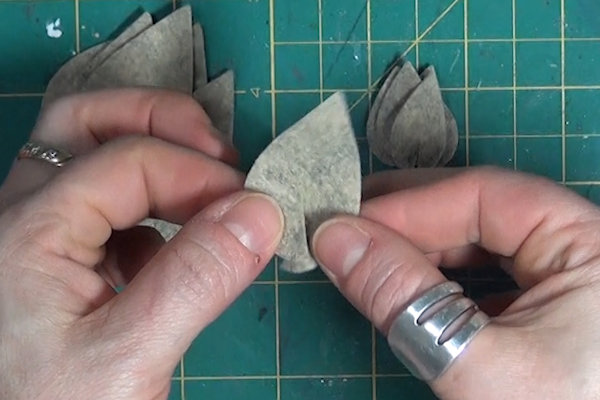
Overlap the edges of the shape on either side of the slit. This gives the leaves some dimension and helps them curl upward.
-
Thread a sharp embroidery needle with a length of embroidery floss, and tie a knot at the end. Bring the needle up through the overlapping area of felt from the bottom to the top of the piece to secure it.
-
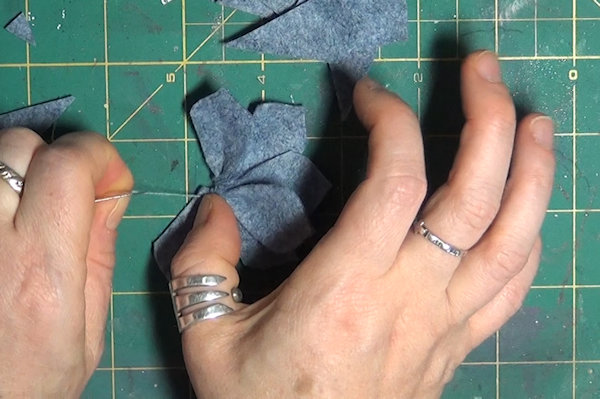
Step 4
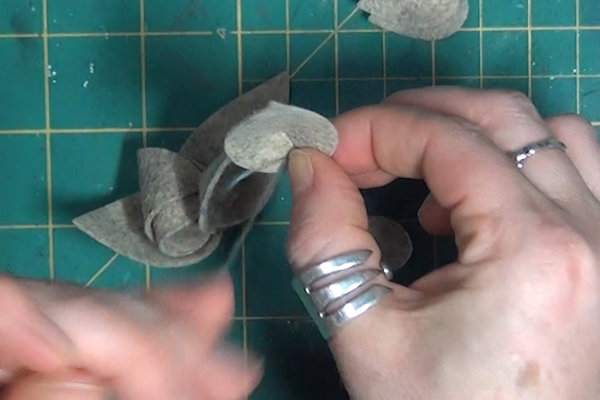
Repeat this step for the remaining large pieces, overlapping the edges, and stringing them together one on top of the other.
-
Step 5
Repeat the process with 5 of the smaller leaves, layering one on top of the other.
-
Fold the remaining leaf in half, and then in half again. Run the thread through the central corner fold to attach it to the others.
-
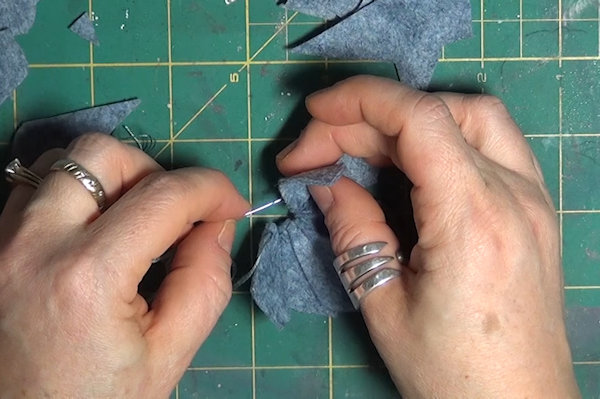
Step 6
Arrange the leaves so that they are symmetrical.
-
When you are satisfied with the arrangement, bring the needle down through the center of the piece to the bottom.
-
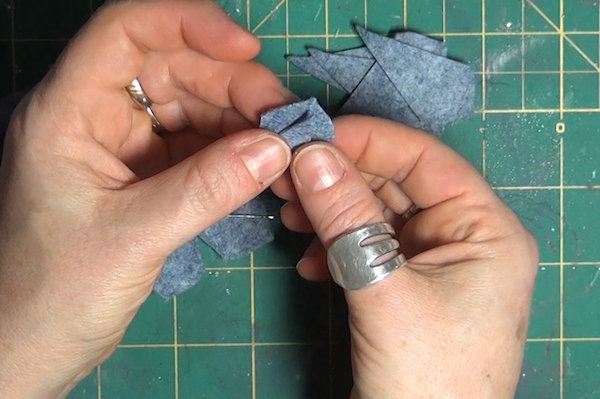
Step 7
Pull the thread tight to secure all the layers. Secure the shape by making a few stitches through the bottom layers from side to side near the center, pulling tightly each time. Knot the thread and cut away the excess.
-
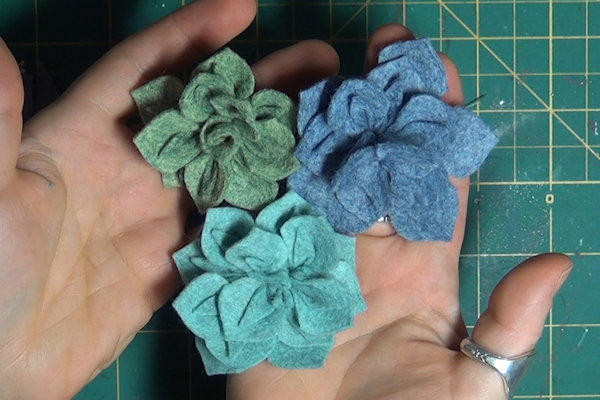
Step 8
Complete the piece.
-
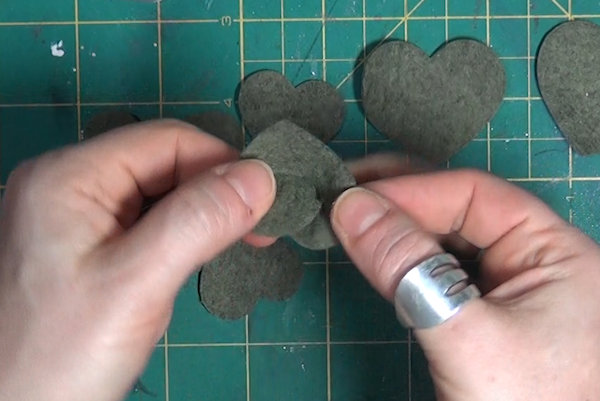
TIP:
Hearts make great leaves for this type of plant, and you don’t need to cut slits! -
Step 9
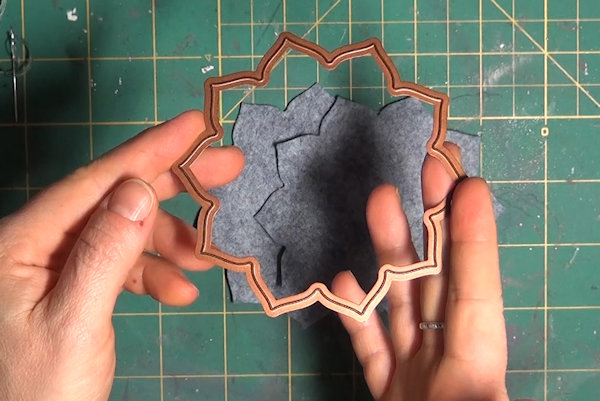
For a rosette type plant, try using a symmetrical flower die, cutting two large shapes from felt. (If you don't have a flower die, individual die cuts can be used, as above.)
-
Step 10
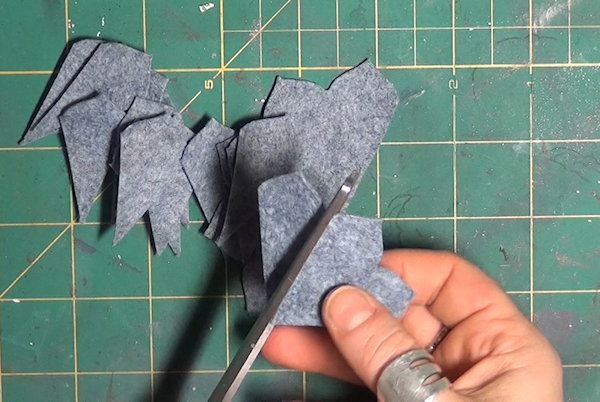
Cut the flower in half.
-
Mark the center and cut each petal into an equal sized wedge.
-
Step 11
Separate 6 wedges for the outer, larger leaves. Cut off the tips to create a straight center edge.
-
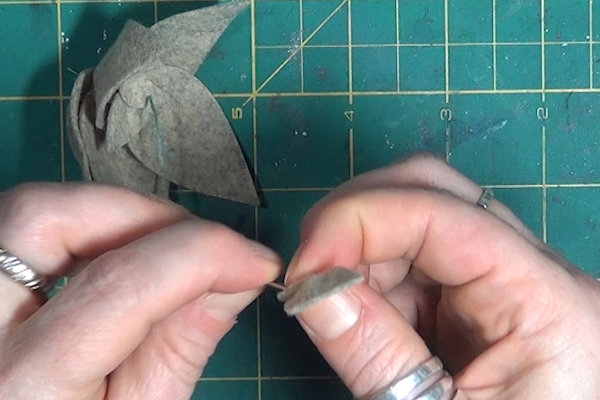
Step 12
Thread a length of embroidery floss and knot the end. Pinch the bottom of a leaf into a fold. Run the thread through with the needle from one side to the other to secure the fold.
NOTE:
For pieces with a wider base, use a running stitch across the cut line. See the video for an example. -
Continue with the other 5 pieces, stringing them together side by side.
-
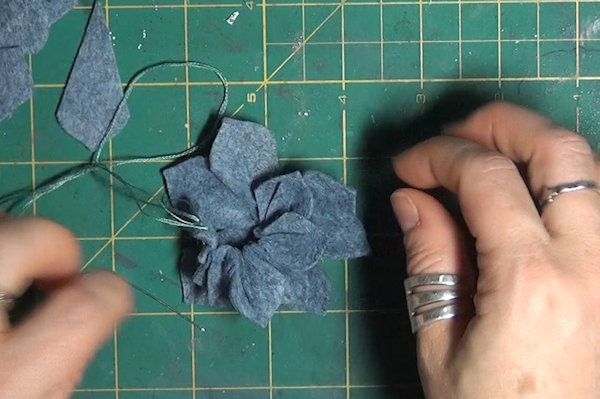
Step 13
Pull the pieces together on the thread, arranging them symmetrically. When you are satisfied with the arrangement, run the thread back through the first piece to secure the ring of leaves.
Bring the needle through to the top of the piece.
NOTE:
You can skip this step and string all the pieces of the plant together side by side, but as they tend to flip around when tightened, it may be easier to work with one layer of the plant at a time. -
Step 14
With the remaining petals, fold the point up, then fold the piece in half again at the fold.
-
Again, run the needle and thread through the piece from side to side to secure the folds.
-
Step 15
Continue with the remaining pieces, stringing them together side by side.
-
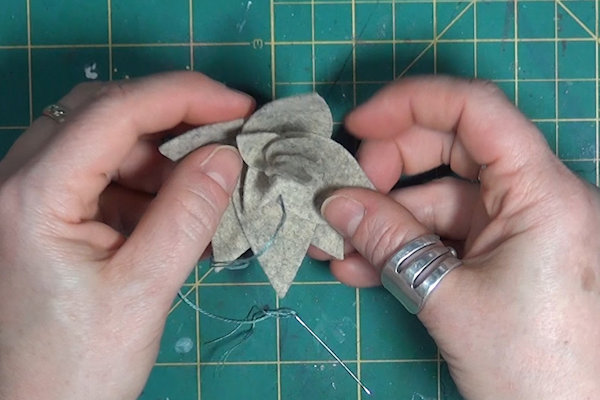
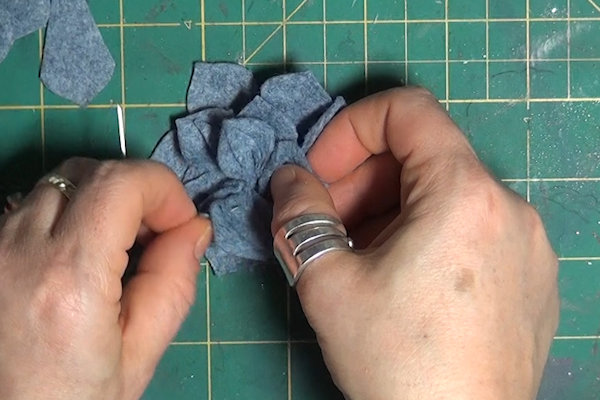
Step 16
After you have put 6 pieces together, take time to arrange them symmetrically.
Run the thread back through the first piece to secure the ring of leaves. -
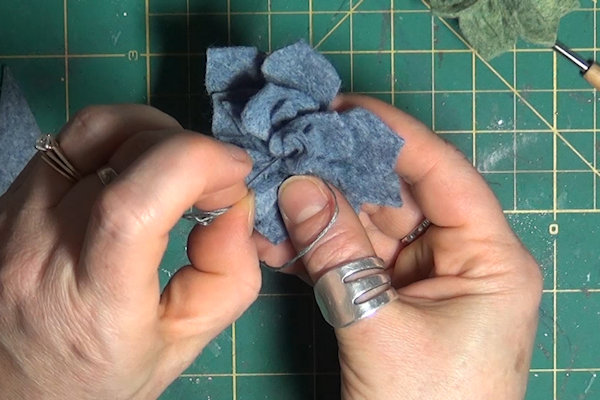
Step 17
Bring the needle through to the top of the piece.
Add more leaves as desired to fill in the center. -
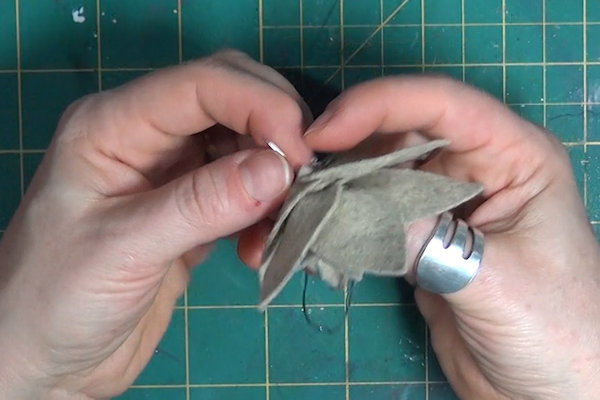
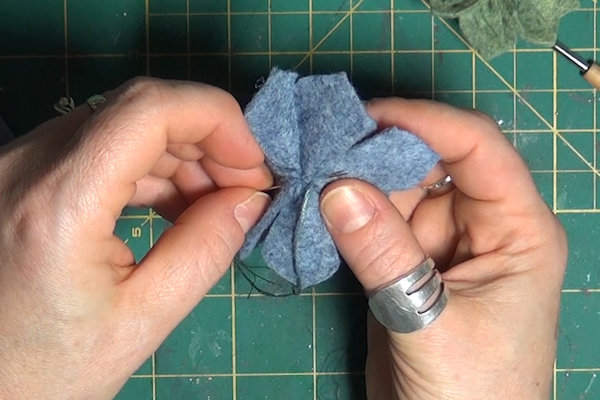
Step 18
When you are satisfied with the shape and fullness of the piece, bring the needle to the bottom. Pull the thread tight to secure all the layers. Secure the thread by making a few stitches through the bottom layers, pulling tightly each time, then knot the thread and cut away the excess.
-
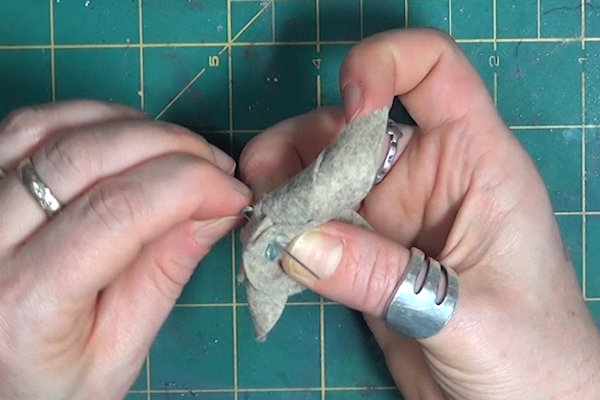
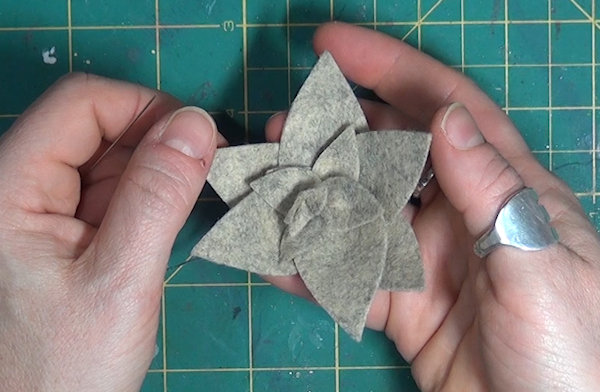
Step 19
Complete the piece.
-
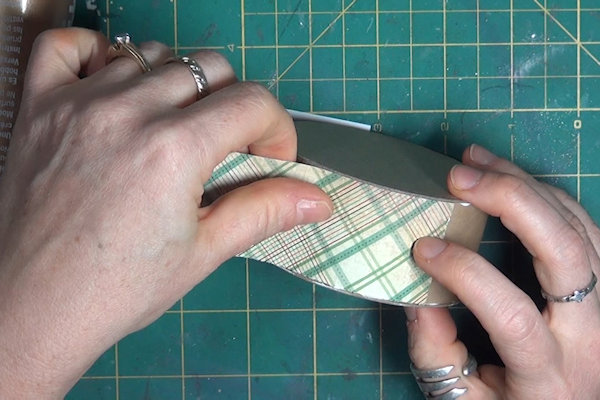
Step 20
Prepare a box or other piece for decoration. In the sample, an empty tape roll was covered with decorative paper and round chipboard bases on the bottom and top.
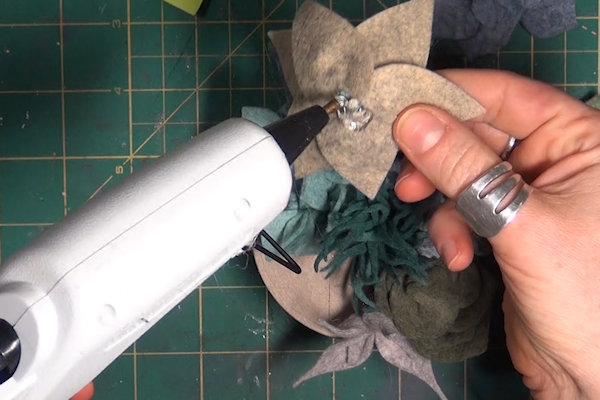
-
Use hot glue to attach the felt succulents to the top of the piece.
-
Step 21
Complete the project.


Video!
Your Turn
You've seen the tutorial, now you try it! We've got a section of the gallery set aside for Felt Succulents. Try this technique, then upload your artwork to the gallery. Show us your creations!
***Please note - Internet Explorer/Edge is not a supported browser, and will not allow you to see the videos. Please use Chrome, Firefox or Safari to view our tutorial videos.

Questions and Comments
We'd love to get your feedback or questions. Leave your comment below.
Page 1 of 1 pages