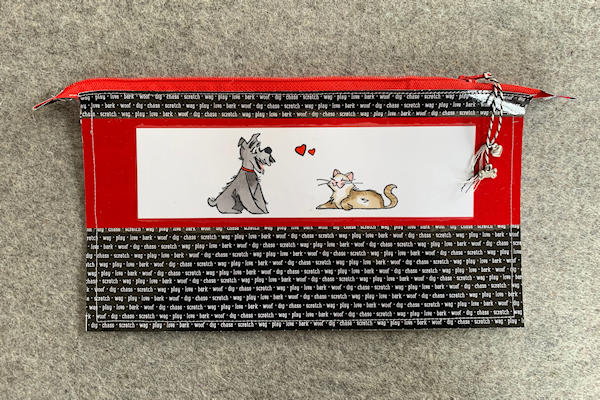
Zippered Paper Pouch
by Betty Traciak
Cover paper with vinyl and create a handy pouch.
Supplies

- Lightweight scrapbook paper
- Clear iron-on vinyl (Pellon 100R or 102RM)
- Polyester zipper
- Painters tape
- Scissors
- Clips (small Wonder Clips by Clover)
- Supplies for decorating
- Paper trimmer
- Iron
- Ironing surface
- Sewing machine with zipper foot
Step-by-Step
-
Step 1
Decorate 12" x 12" scrapbook paper with stamps or coloring. Cover both sides with iron-on vinyl following manufacturer's instructions.
-
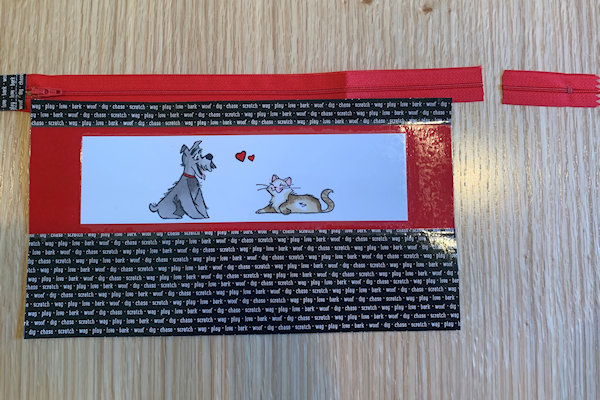
Step 2
Trim 1 1/8” x 12” piece from edge of paper. Cut two 1-1/2” pieces from this strip for zipper tabs. Cut paper in half to make two pieces 6” x 10 7/8”.
-
Step 3
Cut zipper with scissors so it extends 1 1/2” to 1 3/4” beyond the scrapbook paper on each side.
-
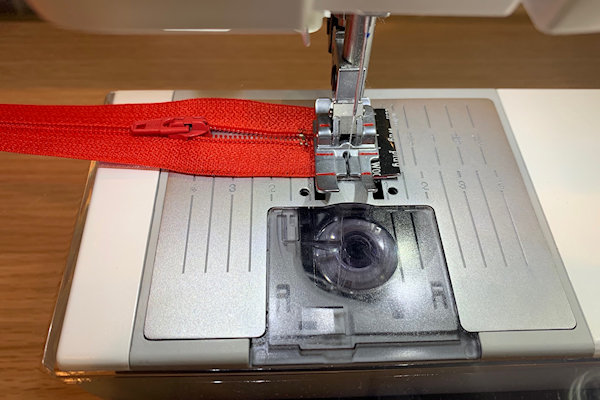
Step 4
Fold the zipper tab in half. Cover the end of the zipper and stitch close to the edge. Repeat for the other end of the zipper.
-
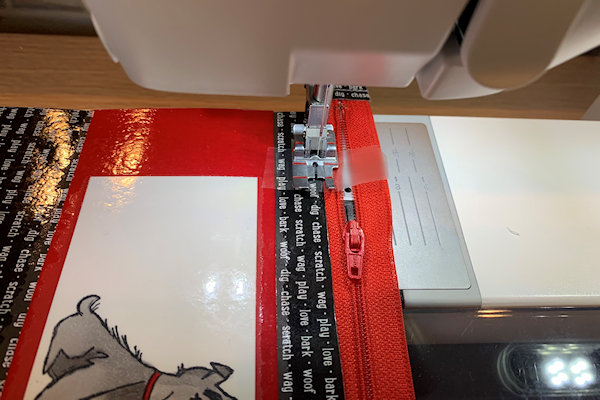
Step 5
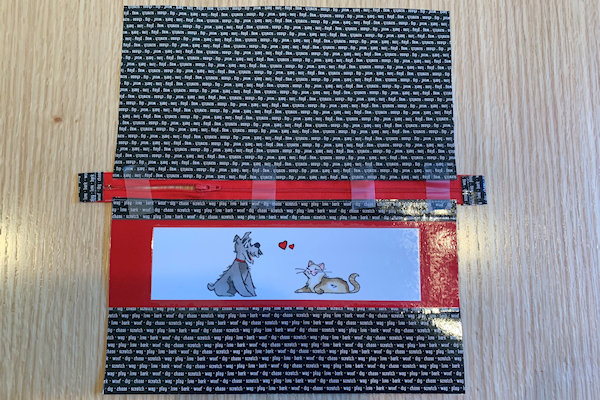
Center the front of the pouch on the zipper with enough space for the zipper to slide past the edge of the paper. Use Painters Tape to secure.
-
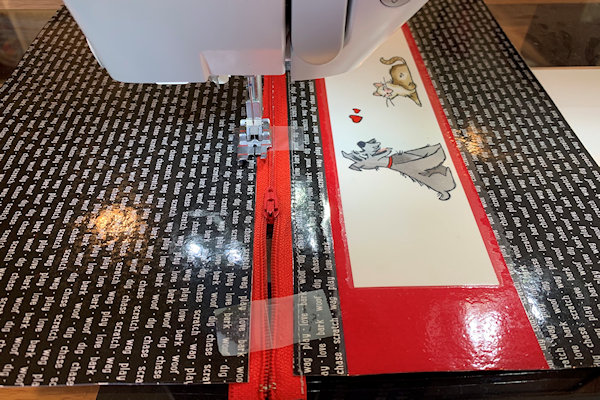
Step 6
Sew close to the edge of the paper. Back up to lock the stitches at each end.
-
Step 7
Center the back of the pouch and secure with Painters Tape.
-
Step 8
Sew close to the edge of the paper.
-
Step 9
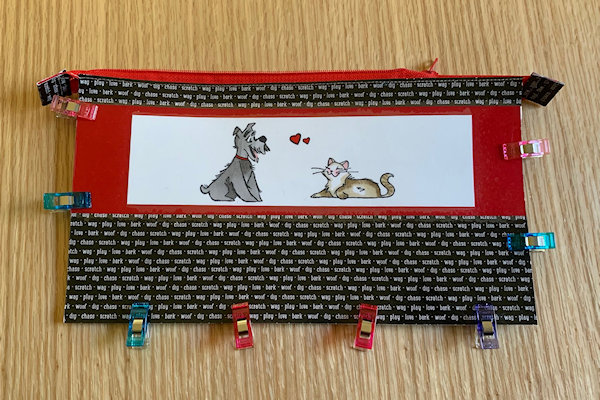
Fold the pouch and clip the edges.
-
Step 10
Sew around the edges leaving 3/4” unsewn at the top edge of the paper nearest the zipper.
-
Step 11
Complete the project.


Video!
Your Turn
You've seen the tutorial, now you try it! We've got a section of the gallery set aside for Zippered Paper Pouch. Try this technique, then upload your artwork to the gallery. Show us your creations!
***Please note - Internet Explorer/Edge is not a supported browser, and will not allow you to see the videos. Please use Chrome, Firefox or Safari to view our tutorial videos.

Questions and Comments
We'd love to get your feedback or questions. Leave your comment below.
I had no idea iron-on vinyl even existed. Thank you so much for sharing!
Page 1 of 1 pages