Window Treat Box
by Julie Buhler
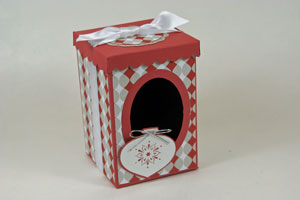
Create a box with a window to peek inside.
Supplies
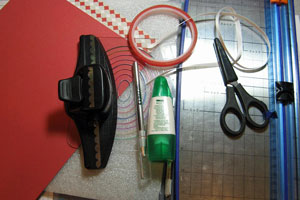
- Paper Cutter with scoring tool
- Scissors
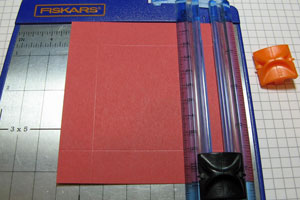
- One 6 5/8" x 11" piece of cardstock
- One 4 1/4" cardstock square
- Four pieces of patterned paper measuring 2 1/2" x 3 7/8"
- 20 inches of ribbon
- Oval Coluzzle, or other oval cutting tool
- Self healing mat
- Craft knife
- Glue
- Sticky Strip™
- Scallop Edge Punch
- Scrap cardstock for decorating
Step-by-Step
-
Step 1
Line up your 6 5/8" x 11" piece of cardstock vertical with your paper cutter and score at 2 5/8".
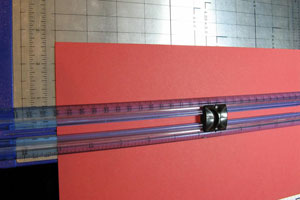
-
Step 2
Turn your cardstock and score at 2 5/8", 5 1/4", 7 7/8" and 10 1/2".
-
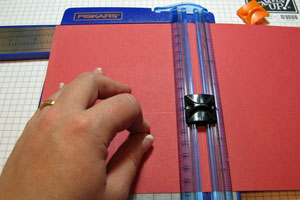
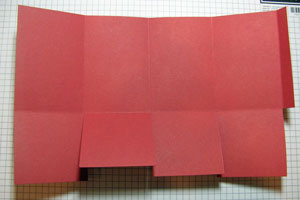
Step 3
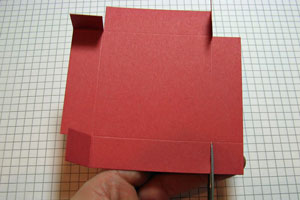
Fold all the score lines, and then cut on them to make flaps along the bottom. Cut off the smallest end piece.
-
Step 4
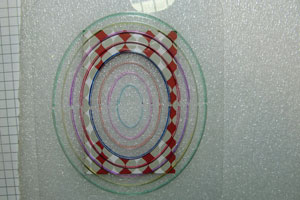
Center your Coluzzle™ between the score lines and the top of the box (I marked my score lines with a black marker) on one of the box side panels and cut out an oval.

-
Step 5
Centering your Coluzzle™ over one of your your patterned paper pieces, cut out a slightly bigger oval from the center. You want the hole to be bigger for matting purposes.
-
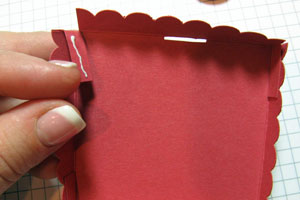
Step 6
Adhere your patterned paper pieces to the box front and add some Sticky Strip™ to the flap on the end.
Optional:
Adhere a piece of Acetate on the inside box to cover the window to keep loose treats from falling out.
-
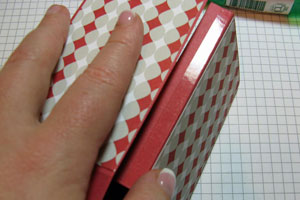
Step 7
Remove the red liner and adhere the box together.
-
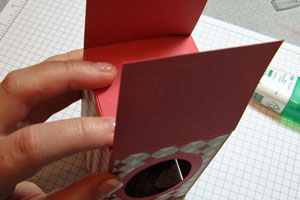
Step 8
With the box upside down and the oval facing toward you, fold in the 2 side flaps.
-
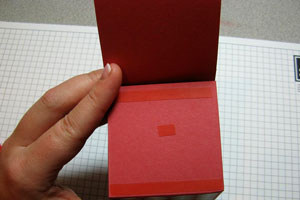
Step 9
Add Sticky Strip™ to the flap in the back of the box (no oval), remove the liner and fold down the front flap to finish the box.
-
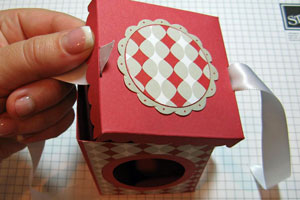
Step 10
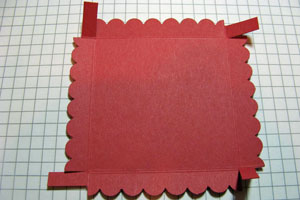
Score your 4 1/4" square piece of cardstock at 3 1/2" on all sides.
-
Step 11
Cut on the right score line on each side, creating flaps.
-
Step 12
Punch the edges off your square with the scallop edge punch, but cut the scalloped area off the flaps. You do not want them to show under the other scallops.
-
Step 13
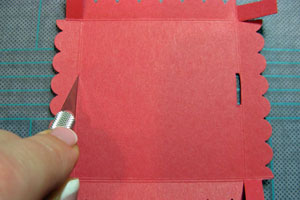
Using your craft knife, create slots in the top of the lid. You could also use a punch if you have one that works. Decorate as desired using scrap cardstock and patterned paper.
-
Step 14
Add glue on the flaps to adhere the lid together.
-
Step 15
Thread the ribbon through one slot, then go under and around the box, threading it through the other slot. Tie shut to hold the lid on.
-
Step 16
Decorate your box.
Video!
Your Turn
You've seen the tutorial, now you try it! We've got a section of the gallery set aside for Window Treat Box. Try this technique, then upload your artwork to the gallery. Show us your creations!
***Please note - Internet Explorer/Edge is not a supported browser, and will not allow you to see the videos. Please use Chrome, Firefox or Safari to view our tutorial videos.

Questions and Comments
We'd love to get your feedback or questions. Leave your comment below.
You really did a great job.
Thanks so much for taking the
time to share.
Page 1 of 1 pages