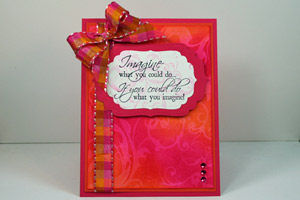
Water Stamping

by Beverly Gerard

Stamp with water to create a soft look.

Supplies
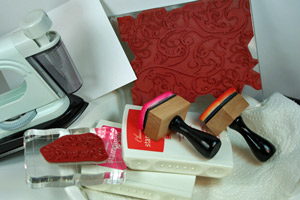
  • White cardstock

  • Background stamp

  • Dye ink pad

  • Blending tool, or sponges

  • Paper towel

  • Plate or pie plate

  • Iron (optional)

Step-by-Step

  1. Step 1

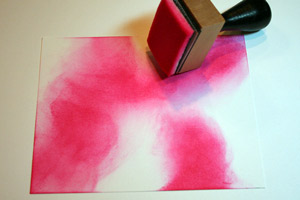
    Sponge your first color of dye ink onto random areas of the cardstock. Aim for a rich application of color.
  2. Step 2

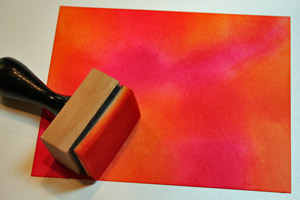
    Use another sponge ink applicator to rub the second color of dye ink onto the uncolored areas of the same cardstock piece. Again, aim for a rich color application, and be sure to blend the color edges together.
  3. Step 3

    Fold the paper towel in half & lay it in the pie plate. Add a small amount of water to completely soak the paper towel.
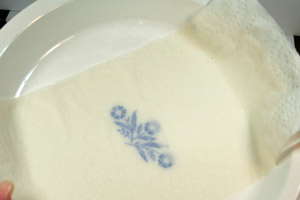
  4. Step 4

    Pat the background stamp onto the water soaked paper towel, as it is acting as your substitute ink pad. Apply the wet background stamp to the inked cardstock as you would if it were inked.
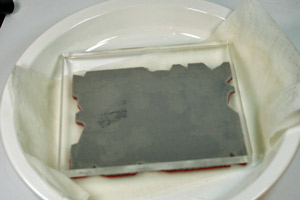
  5. Step 5

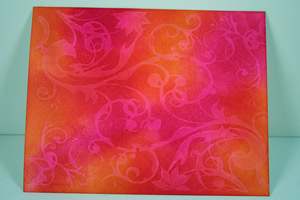
    The wet image will need to dry. As it dries, the image will become more apparent.
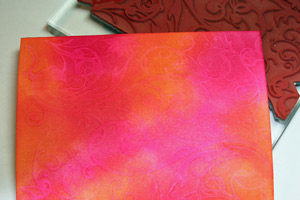
  6. Step 6 (Optional)

    Using an iron to flatten & dry the image piece is optional, but I prefer doing so. In this sample, the image was air-dried, but warped.

    Hint:
    Iron on the back side of the image, particularly if image is wet. And, keep the iron moving at all times.
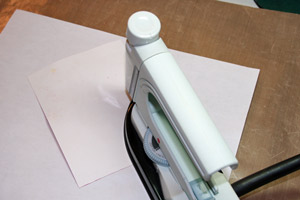
  7. Step 7

    Now you can trim your finished cardstock to the size you wish for your card design
  8. Step 8

    Finish your card.

Video!

Variations

    Be sure to try it using just one ink, or three inks, etc. & have fun! Don’t want to use a stamp? Just splatter a bit of water onto your inked cardstock for an always-unique design! Or use a mister to lightly mist the stamp … or try misting the cardstock!

Your Turn

You've seen the tutorial, now you try it! We've got a section of the gallery set aside for Water Stamping. Try this technique, then upload your artwork to the gallery. Show us your creations!

***Please note - Internet Explorer/Edge is not a supported browser, and will not allow you to see the videos. Please use Chrome, Firefox or Safari to view our tutorial videos.

Questions and Comments

We'd love to get your feedback or questions. Leave your comment below.

I am going to try this with my stamp pad I use with alcohol inks. this looks so fun! Thanks for the idea! I HAVE LOT OF BACKGROUND STAMPS, FLOWER STAMPS WILL BE NICE WITH THIS TOO. LOOKING FOR NEW IDEAS TO USE WITH MATERIAL i HAVE,
Millie Clevenger  |  Wed Aug 8, 2012 at 3:04 AM
This creates a beautiful background. Can't wait to try it. Thanks for sharing this with us.
Lorie McMullen (aka MelodyGal)  |  Wed Aug 8, 2012 at 3:08 AM
Awesome technique Bev! I never thought of ironing a "warpy" piece of cardstock before. thanks for the tip! The Rubbernecker Flourishes look fantastic on your background! I will definitely be trying this! TFS
Ellen Taylor  |  Wed Aug 8, 2012 at 3:09 AM
Hi Tex! Thanks for the tutorial! I liked your inked bkgrd B4 you even water stamped it! smile The stamping is lovely when it's dry. I will try this. Sure beats the heck out of "messin" w/re-inkers or alcohol inks. smile
Gabby  |  Wed Aug 8, 2012 at 3:37 AM
Hi Tex thank you for the Great Technique. Will have fun trying to match your creativity.
Rose O'Connell  |  Wed Aug 8, 2012 at 3:55 AM
anything to do with mixing colours in any form is heaven to me. Lovely card, thank u.
Jacqui  |  Wed Aug 8, 2012 at 3:58 AM
This is one of the most beautiful backgrounds I've ever seen. I'll definitely be trying this technique in the next few days! Thank you.
NC_Karen  |  Wed Aug 8, 2012 at 4:26 AM
This is beautiful and so simple! and elegant. I would love to know where you got your journaling stamp. That's a great phrase.
Diana  |  Wed Aug 8, 2012 at 4:54 AM
Thank you for a great tutorial.. I have to try this it looks gorgeous!! Hugs always! G
Germaine Ferrao-Lenn  |  Wed Aug 8, 2012 at 5:08 AM
Bev, what an awesome creative neat background technique! So glad you shared this with us, I can't wait to get off work and try it!!! Have a wonderful day!
Kris  |  Wed Aug 8, 2012 at 6:16 AM
Thank you Bev for sharing this awesome technique ....love it....and I'm going to give this a try.....
Gloria Westerman  |  Wed Aug 8, 2012 at 6:36 AM
Bev, I hope I get home early enough from tonight to give this a try. What a beautiful background you created with this technique. Thanks for such a great tutorial.
Kittie  |  Wed Aug 8, 2012 at 6:45 AM
This is beautiful! I can't wait to make one!
Irene Wunsch  |  Wed Aug 8, 2012 at 7:01 AM
option to ironing: hold background paper with both hands on opposite sides and roll over curved edge counter/table edge
Far North  |  Wed Aug 8, 2012 at 7:13 AM
Bev, thank you for sharing love the designs and I think it is something every stamper has handy.
Pat  |  Wed Aug 8, 2012 at 7:14 AM
Wonderful idea. Will have to try it. Love the card.
Leslie Loutit  |  Wed Aug 8, 2012 at 7:24 AM
Thanks for sharing this technique. Your card is beautiful.
Dearlane
Dearlane Buckland  |  Wed Aug 8, 2012 at 7:44 AM
Bev, wonderful technique! Your card is so soft and lovely...thanks for the great tutorial.
Cheryl  |  Wed Aug 8, 2012 at 7:46 AM
Thanks for sharing your technique. Beautiful card. Can't wait to try it myself!
Michele  |  Wed Aug 8, 2012 at 8:27 AM
Lovely technique - always glad to see something new and innovative. I absolutely love your choice of colours for this project - hot, hot , hot! This is definitely a "must try" for me. Thanks so much for sharing this idea.
Carol MJS  |  Wed Aug 8, 2012 at 8:41 AM

Page 1 of 5 pages  1 2 3 >  Last »

You need to be logged in to comment

GET OUR NEWSLETTER


Splitcoaststampers's privacy policy