Watercoloring Water
by Dina Kowal
Use layering and mixed media techniques to paint water.

Supplies
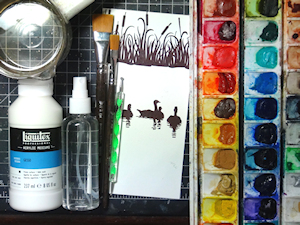
- Watercolor paper (140# Fabriano Studio hot press paper
- Watercolor paints, inks or other water soluble medium (QoR watercolors used here)
- Flat brushes, 3/4" and 1/2" used here
- Water
- Stamped images, lake or ocean theme (Impression Obsession 3263-LG Cattails & Geese used here)
- Waterproof ink (not water-based (solvent or hybrid inks work well, Versafine Clair used here)
- White colored pencil (Derwent Coloursoft pencil used here)
- White gesso or paint
- Acrylic paint pen (Posca White Extra Fine PC1M marker used here)
- Other supplies as needed to complete the project
Step-by-Step
-
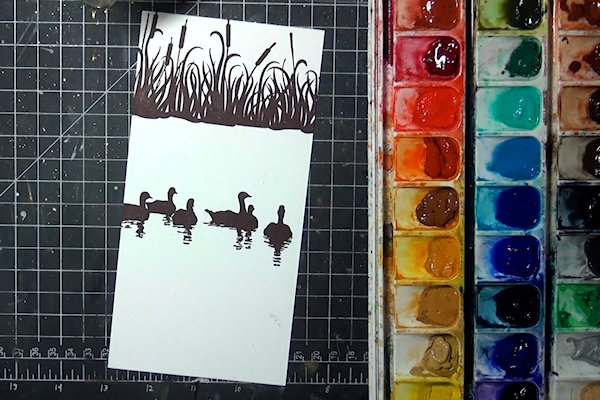
Step 1
Stamp a lake or ocean themed image onto watercolor paper.
-
Step 2
Moisten your watercolor palette and prepare the paper with clear water, either by brushing water over the area you wish to paint or by misting with a water bottle.
-
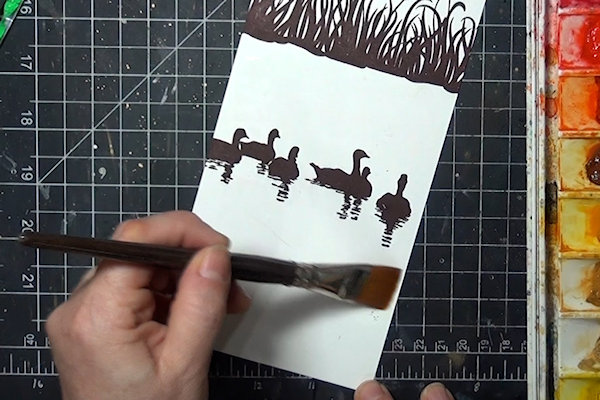
Step 3
While the paper is still wet, add a wash of the base color of your watery area. Use a wide flat brush to apply horizontal strokes of paint. Blend them together in an even layer. Dry completely before proceeding.
-
Step 4
For the next layer, repeat the same color, but with a little less water. Orient the flat end of the brush horizontally and work back and forth, leaving space between random strokes. This creates the impression of ripples and reflections in the water.
-
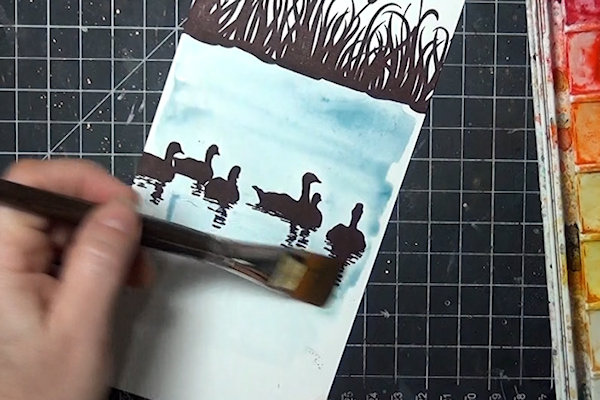
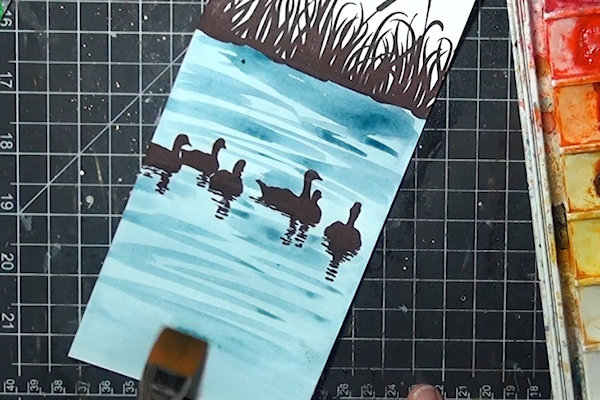
Step 5
While that layer is still wet, add in the color of anything that would reflect into the water. For the sample, the stamping is a dark brown, so a dark brown paint was added below the stamped images, using the end of the brush in a dotting motion.
NOTE:
Remember solid object have dimension so they'll reflect on all sides and not just in the direction we're looking from. -
Step 6
In the next layer repeat the same steps, but with a smaller flat brush (1/2” flat brush used here), a little less water, and more concentrated placement. Make sure your panel is really dry before you go on.
-
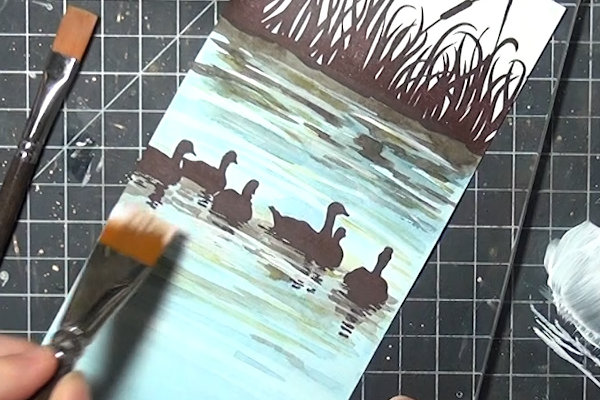
Step 7
The final step is to add white horizontal lines to the coloring. You can do this with a single medium, or more than one. In addition to horizontal lines you can follow the outline of the shape of objects in the water. White wax based pencil used here (Derwent Coloursoft).
-
Add broader strokes of gesso or white paint with the flat end of the brush.
-
Step 8
An acrylic paint pen can be used for finer lines. The white lines define the surface of the water, and the other colors in the previous layers give the water visual depth.
-
Step 9
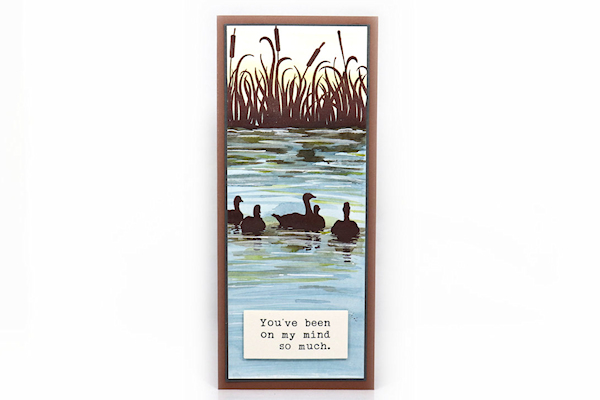
Use the finished panel on a card or other project.


Video!
Variations
-
Vary the scene by adding more colors or a masked horizon line.
Focal image: Stampin’ Up!® Summer by the Sea

Your Turn
You've seen the tutorial, now you try it! We've got a section of the gallery set aside for Watercoloring Water. Try this technique, then upload your artwork to the gallery. Show us your creations!
***Please note - Internet Explorer/Edge is not a supported browser, and will not allow you to see the videos. Please use Chrome, Firefox or Safari to view our tutorial videos.

Questions and Comments
We'd love to get your feedback or questions. Leave your comment below.
Really enjoyed you tutorial and look forward to trying it out soon. Thanks for sharing here.
Page 1 of 1 pages