Upright Diamond Fold Card
by Laura Lipe
Create a unique folded card with a diamond face. For a double diamond fold, click HERE.
Supplies
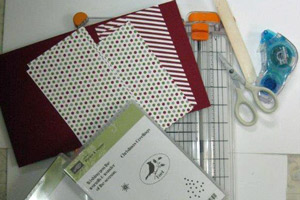
- One 6 1/4" x 11" piece of cardstock, for card base
- One 6" x 3 1/4" piece of patterned paper (pattern choice 1), for inside back
- Two 6" x 1 1/4" pieces of patterned paper (1 ea. pattern choice 1 and 2)
- Three 6" x 3 3/4" pieces of patterned paper (pattern choice 2)
- Stamps, sentiments and dies to decorate card
- Paper Cutter
- Scoring tool
- Pencil
- Ruler
- Bone folder
- Die cutting machine
- Adhesive
Step-by-Step
-
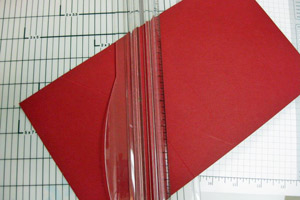
Step 1
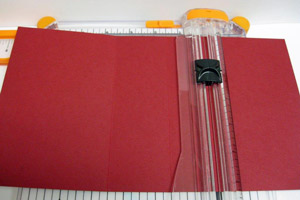
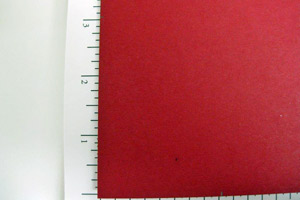
Score the 6 1/4" x 11" piece of cardstock at 4", 6" and 7 1/2" on long edge. Fold these mountain, mountain, valley folds.
-
Step 2
Make a pencil “tick mark” on long edge of cardstock at 2" (from left edge) at top and bottom. Make a “tick mark” on only the left short side at 3 1/8".
-
Step 3
Score from the 2" tick mark at top to the 6" score on the bottom. Score from the 6" score on the top to the 2" tick mark on the bottom. This will make an "X". Fold both sides of the "X" as valley folds.
-
-
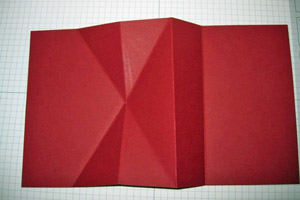
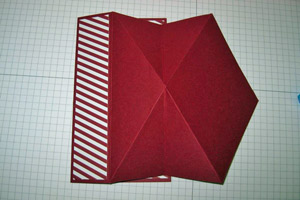
Step 4
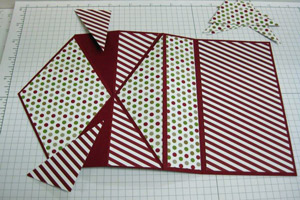
Prefold your score lines. Your card base should look like this.
-
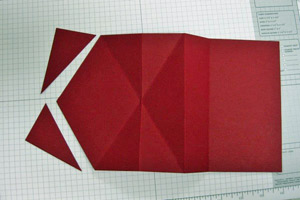
Step 5
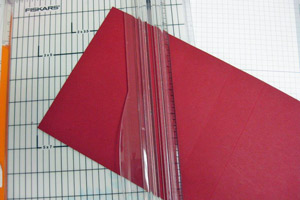
Cut from the 2" tick mark at the top to the 3 1/8" tick mark on the left edge of the card. Cut from the 3 1/8" tick mark on the left edge to the 2" tick mark at the bottom. This will make a shape like the left side of a "diamond" Now you can fold up the card and you will have a shape like a diamond almost in the center of the card but a bit to the left. You are ready to decorate your card.
-
Fold up the card and you will have a shape like a diamond almost in the center of the card but a bit to the left. You are ready to decorate your card.
-
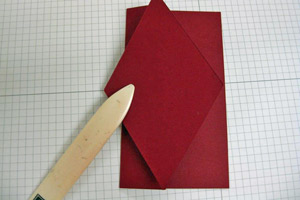
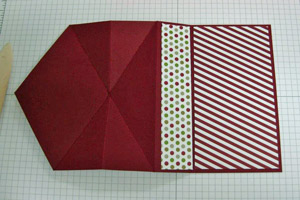
Step 6
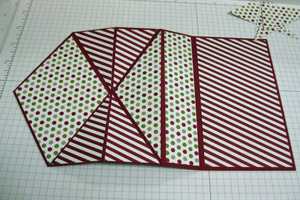
Glue the 6" x 3 1/4" patterned paper, (pattern choice 1) to the inside back of the card. Glue the two strips of 6" x 1 1/4" patterned paper (pattern choice 1 and 2) to the inside straight area, and on the front on the straight area.
-
-
Step 7
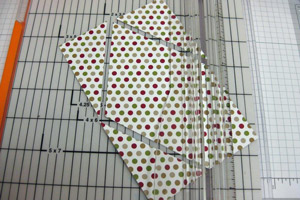
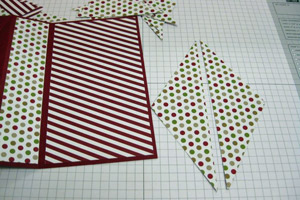
Make tick marks on each of the 6" x 3 3/4' patterned papers at 1 7/8" at top and bottom and at 3" on each side. Cut all three from the 1 7/8" mark to the 3" marks and from the 3" marks up to the 1 7/8" marks, creating 3 diamond shapes. One of these will go on the front and one inside the front.
-
-
Step 8
The third one you will cut in half from top to bottom, and those two pieces will be used on the front and inside the front.
-
Step 9
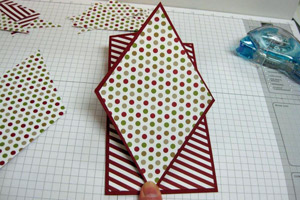
Take those little triangles you cut off the designer paper in Step 7, and trim 1/8" off the bottom of each one. These will be used to cover the small triangles on the front and inside the front.
-
-
Step 10
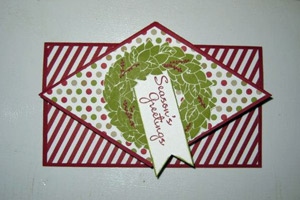
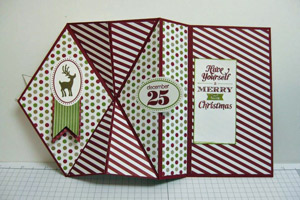
Decorate the card as desired.
-
Video!
Your Turn
You've seen the tutorial, now you try it! We've got a section of the gallery set aside for Upright Diamond Fold Card. Try this technique, then upload your artwork to the gallery. Show us your creations!
***Please note - Internet Explorer/Edge is not a supported browser, and will not allow you to see the videos. Please use Chrome, Firefox or Safari to view our tutorial videos.

Questions and Comments
We'd love to get your feedback or questions. Leave your comment below.
happy holidays, sue
cheers Shirley-Anne
Lula Tomlin
Page 1 of 1 pages