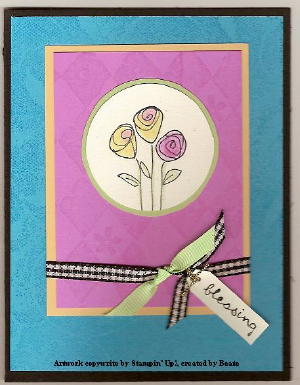
Tunnel Card
by Beate Johns
Make a spectacular card with a few cuts and folds.
Supplies
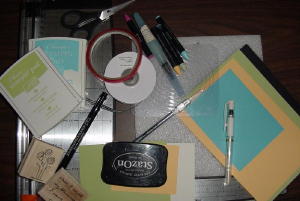
- One 5½"x 8½" piece of cardstock for the outside (here black)
- One 5½" x 8½" piece of cardstock for the inside (here celery)
- One 5½" x 8" piece of cardstock (only needed when outside cardstock is dark) here apricot
- Coluzzle™
- Paper cutter with scoring edge
- Scissors
- Sticky Strip™
- Regular tape
- Ink and extra paper scraps to decorate the card inside and out
Step-by-Step
-
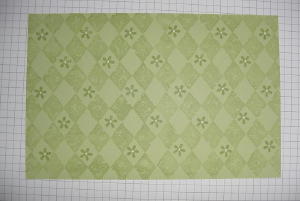
Step 1
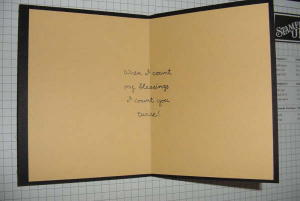
Take one piece of 5 1/2" x 8 1/2" piece of cardstock and stamp it all over. This will be your inside piece.
-
Step 2
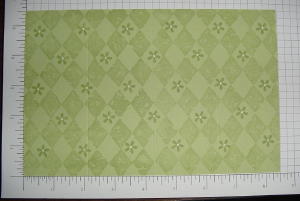
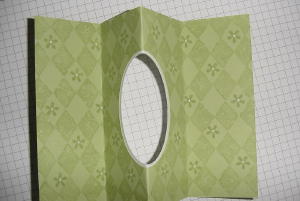
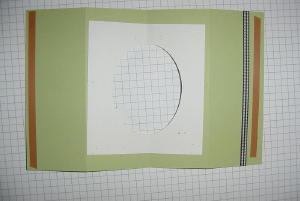
Slide your cardstock into your paper cutter horizontally. Score at 2 1/8", 4 1/4" and 6 3/8"
-
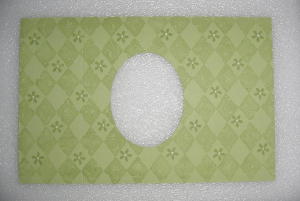
Step 3
Take your Coluzzle™ or any other cutting device and cut out an oval or a circle in the middle of the cardstock.
-
Step 4
(Optional) Take a piece of complimentary color cardstock about 1 1/2" inches bigger than the window you cut out. Now cut the next size smaller oval out of this piece.
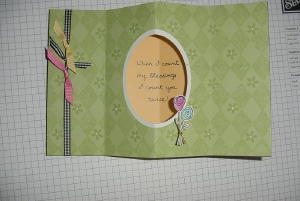
Tape this behind the window of the inside cardstock. It will create a frame for your window.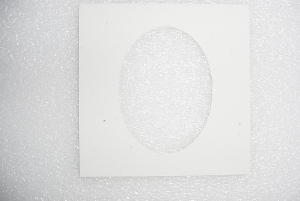
-
Step 5
Fold your cardstock: The first score is a mountain fold, the next a valley, the last a mountain again.
-
Step 6
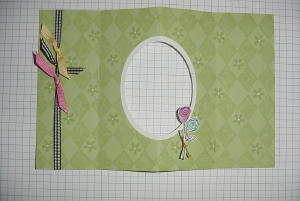
Finish decorating your inside.
-
Step 7
(only neccessary if your outside cardstock is a dark color)
Take your 5 1/4" x 8" piece of cardstock and fold in half. Stamp an image or a saying in the center of it.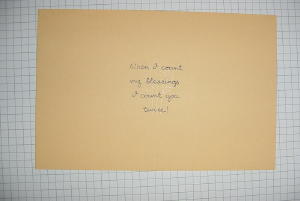
-
Step 8
Fold your 5 1/2" x 8 1/2" piece of cardstock for your outside in half and decorate.
-
Step 9
Tape the smaller piece of cardstock to the backside of the outside piece.
-
Step 10
Add Sticky Strip™ to the 5 1/2" ends of the back of your inside piece.
-
Your card is finished!
Video!
Variations
Try different shapes
Cut different shapes out of the inside center.
Change the Tunnel View
Have your main image behind the window, instead of a saying.
Tie it
Tie it closed with a ribbon.
Opt out the third layer
When using lighter colored cardstock for the outside piece, stamp directly on the back, instead of using a third piece of cardstock. (in my example the apricot)
Your Turn
You've seen the tutorial, now you try it! We've got a section of the gallery set aside for Tunnel Card. Try this technique, then upload your artwork to the gallery. Show us your creations!
***Please note - Internet Explorer/Edge is not a supported browser, and will not allow you to see the videos. Please use Chrome, Firefox or Safari to view our tutorial videos.
Questions and Comments
We'd love to get your feedback or questions. Leave your comment below.
What do the initials ATG gun stand for ? A crafter
called her tape gun ATG.
Do you ever use dreamweavers stencils and
paste in your creations?
beate johns
your very sweet. I like you and your crafts. Thanks for your tutorials.
Thanks
http://zacksnanaat.blogspot.com/2011/11/fresh-n-fun-with-beate-tunnel-card.html
Page 1 of 1 pages