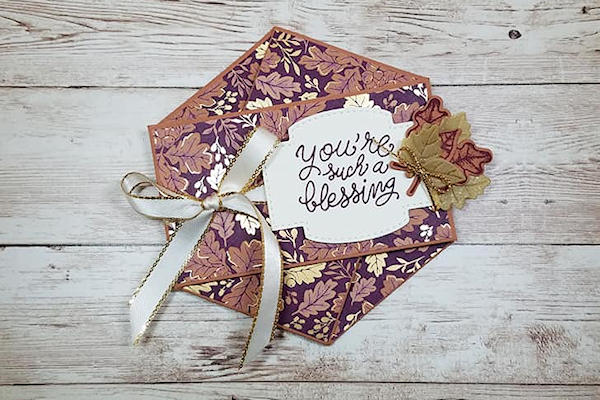
Triple Pocket Twist Card
by Twila Davis
This special fold card opens to reveal three inside pockets.
Supplies
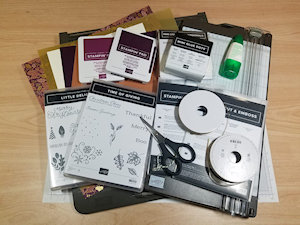
- Cardstock (Stampin' Up!® Cinnamon Cider, Blackberry Bliss and Very Vanilla cardstocks used here)
- Coordinating papers (SU Blackberry Beauty Specialty, Gold Shimmer Vellum papers used here)
- Stamp sets with various phrases (SU Time Of Giving, Little Delights, Flowers of Friendship and Make It Happen sets used here)
- Inks (SU Blackberry Bliss and Rich Razzleberry inks used here)
- Paper trimmer
- Scoring tool
- Adhesive
- Gift card (optional)
- Other supplies as needed to complete the project (SU products used here: Metallic Edge Ribbon, Gold Cord, Diecut Machine, Giving Gifts Dies, Stitched So Sweetly Dies, Scissors, GlueDots)
Step-by-Step
-
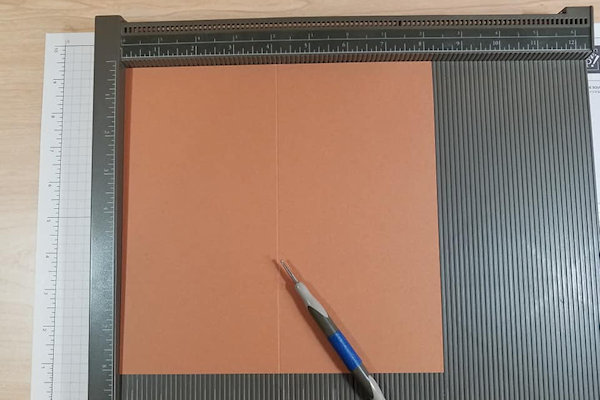
Step 1
Cut base cardstock to 8 1/4" x 8 1/8". Score on the 8 1/4" side at 4 1/8".
-
Step 2
Rotate and score on the 8 1/8" side at 1/2", 2 7/8", 5 1/4", & 7 5/8".
-
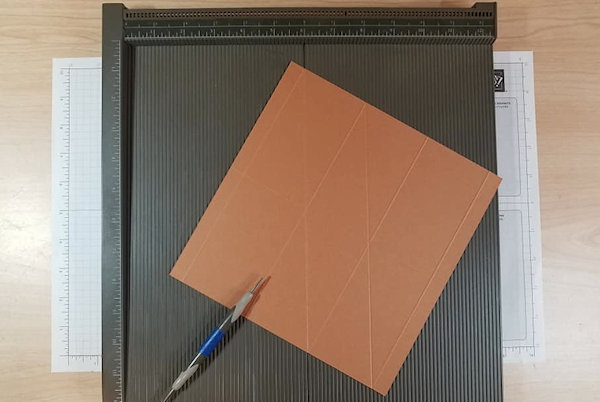
Step 3
Flip over and score diagonally from the top of the 1/2" scoreline to the bottom 3rd scoreline. Turn around and do the same.
-
Step 4
Trim away parts of the 1/2" scorelines as shown in picture. Add adhesive to flaps.
-
Step 5
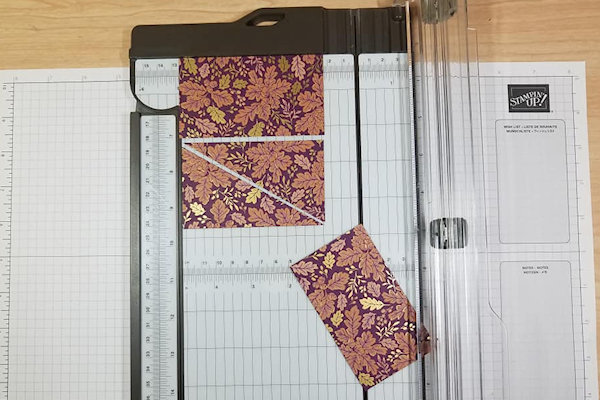
Cut one 4" x 2 1/4" and two 3 7/8" x 2 1/4" pieces of patterned paper.
Take the 2 smaller pieces and cut into triangles, being sure to put them in the paper trimmer as shown in the picture. -
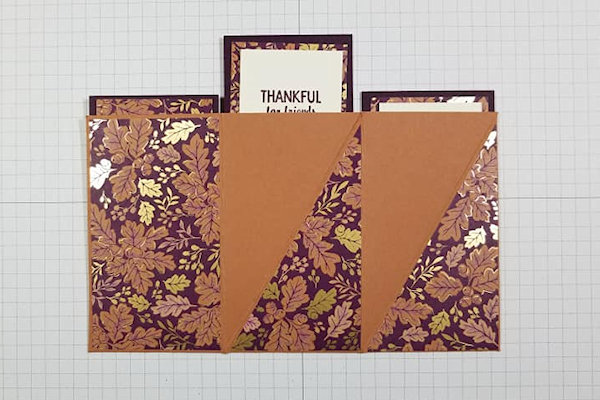
Step 6
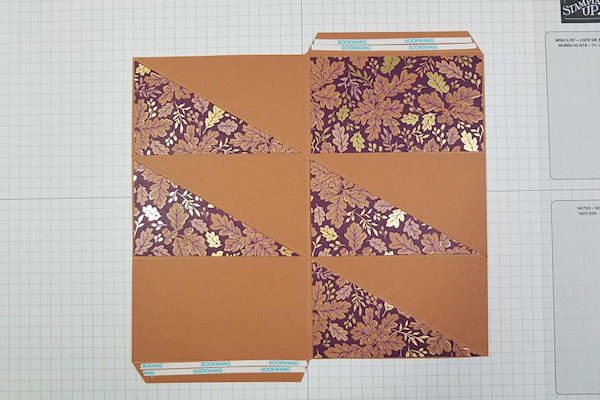
Glue patterned paper down as shown.
-
Step 7
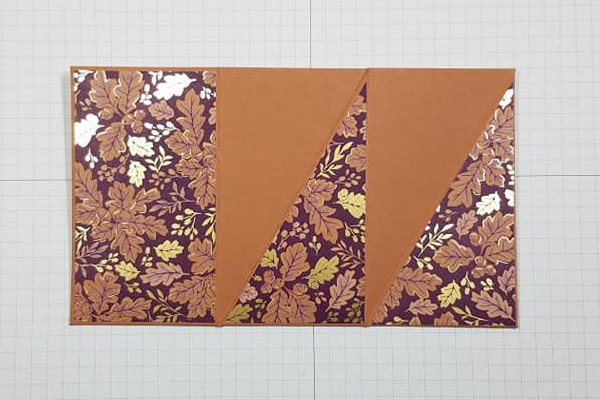
Crease all folds both ways, back and forth, making the card very flexible. Peel off the adhesive liner and attach the card together.
-
Step 8
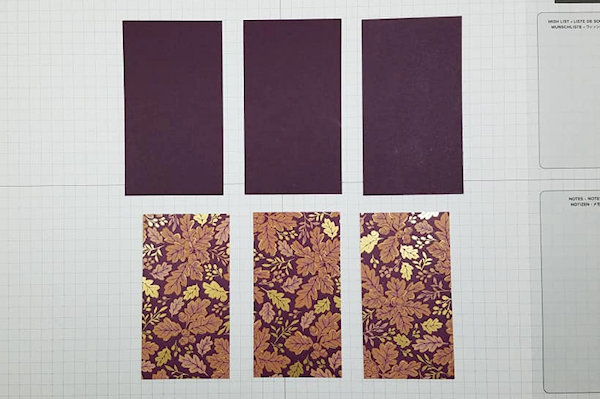
From coordinating cardstock cut three 4" x 2 1/4" pieces. From the patterned paper cut three pieces, 3 3/4" x 2".
-
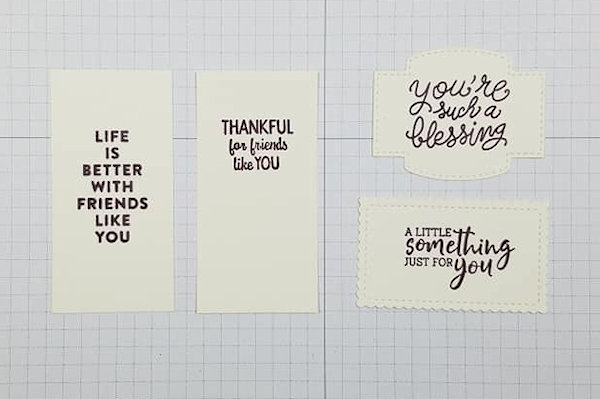
Step 9
From off white cardstock cut (2) 3 1/2" x 1 3/4" pieces. Use dies to cut out a shape for the sentiment for the front of your card and also to attach to the front of your gift card. Stamp sentiments of your choosing.
-
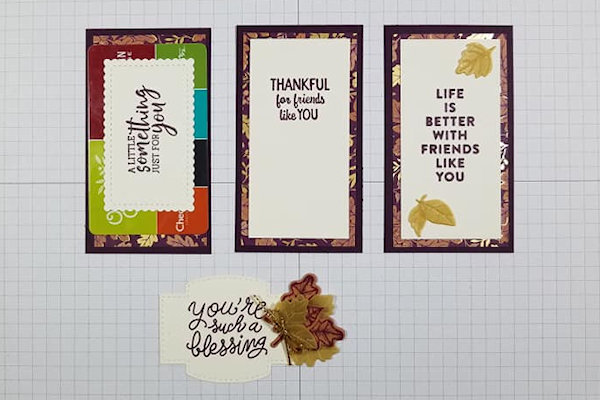
Step 10
Attach all layers of small cards together. Embellish as desired.
-
Step 11
Slip a card into each of the three slots.
-
Step 12
Fold and twist the card till it lays flat. Cut a piece of ribbon and tie around it in a bow. Add Dimensionals to the back bottom of the piece with the sentiment it and attach to the front of card.
Your card is finished, ready for gift giving!


Video!
Your Turn
You've seen the tutorial, now you try it! We've got a section of the gallery set aside for Triple Pocket Twist Card. Try this technique, then upload your artwork to the gallery. Show us your creations!
***Please note - Internet Explorer/Edge is not a supported browser, and will not allow you to see the videos. Please use Chrome, Firefox or Safari to view our tutorial videos.

Questions and Comments
We'd love to get your feedback or questions. Leave your comment below.
Page 1 of 1 pages