Trifold Pocket Card
by Beate Johns
Create a pocket card out of one piece of patterned paper.
Supplies
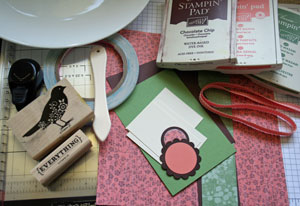
- One 8" x 8 1/2" piece of patterned paper or cardstock for the pocket card
- One 3 3/4" x 5 1/2" piece of cardstock for insert
- One 1 3/4" x 8 1/2" piece of cardstock for band
- Additional cardstock and patterned paper to decorate
- Paper Cutter with scoring tool
- Plate or other rounded object
- Pencil
- Stamps
- Ink
- Scissors
- Scor-Tape™ or other real strong adhesive
- Ribbon and other embellishments
Step-by-Step
-
Step 1
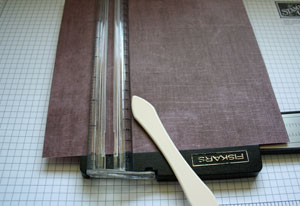
Line the 8 1/2" side of the patterned paper with the bottom of the paper cutter. Score at 2 1/4" and 6 1/4".
-
Step 2
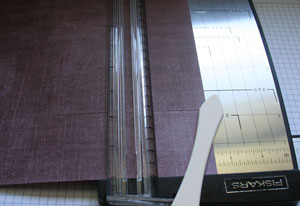
Turn patterned paper 90 degrees and score at 2 1/2".
-
Step 3
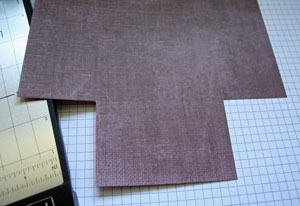
Cut the outer 2 1/4" x 2 1/2" scored panels off.
-
Step 4
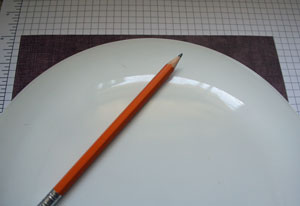
Trace an arch on the top of the trifold with the help of a bowl or plate.
-
Step 5
Cut traced arch with scissors.
Hint:
Save time when making multiples and construct a template by following step 1-5 with a piece of old card stock or a manila file folder.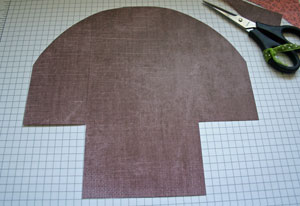
-
Step 6
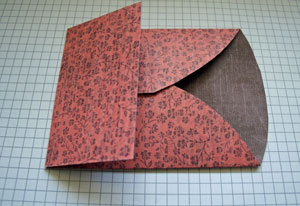
Pre-fold all scored lines.
-
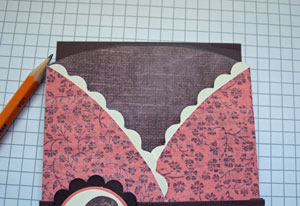
Step 7
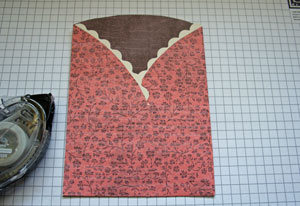
Add a border underneath the curved sides with coordinating card stock if wanted. To learn how to make scallops with the corner rounder, check here.
Fold sides in and tape bottom flap.
-
Step 8
Decorate the 1 3/4" x 8 1/2" strip of cardstock.
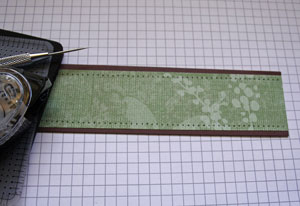
-
Step 9
Score strip at 4 1/8" and 8 1/4".
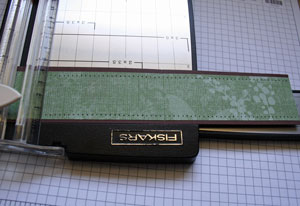
-
Step 10
Add Scor-Tape™ (or other strong adhesive) to the 1/4" wide glue tab.
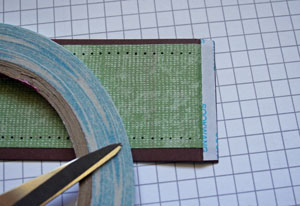
-
Step 11
Tape the belly band together and decorate pocket front.
-
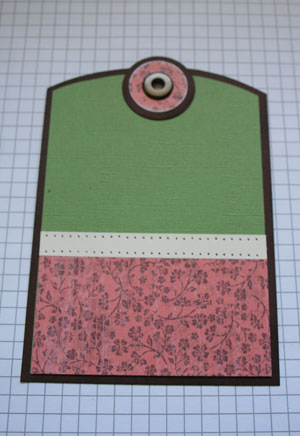
Step 12
Trace the pocket arch onto the 3 3/4" x 5 1/4" piece of cardstock.
-
Step 13
Cut the arch and decorate.
-
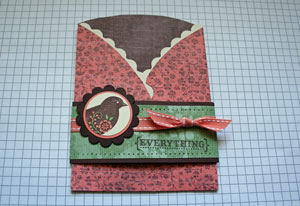
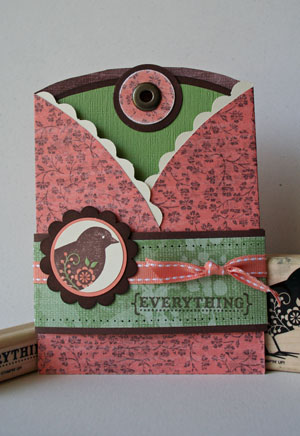
Step 14
Finished Card.
Variations
-
Be proud of your curves
Fold bottom flap up first and tape side panels on top of it. Leave the belly band off to show off your curved sides.
Gift Card Holder
Try scoring a Carousel Note at 1 3/4" on the left and right, 2" on the bottom to create a small pocket, perfect for gift cards.
Your Turn
You've seen the tutorial, now you try it! We've got a section of the gallery set aside for Trifold Pocket Card. Try this technique, then upload your artwork to the gallery. Show us your creations!
***Please note - Internet Explorer/Edge is not a supported browser, and will not allow you to see the videos. Please use Chrome, Firefox or Safari to view our tutorial videos.
 *
*
Questions and Comments
We'd love to get your feedback or questions. Leave your comment below.
Carousel Notes are big scalloped cardstock circles Stampin' Up! sells in their Occasional Mini catalog (available until end of May 2008)
Karan,
Check our tutorial on faux stitching. The first two steps show the tool and how to use it to achieve the paper pierced look.
Greetings,Willy
Just found out about your wonderful site. I am from Australia. The pocket card is absolutely awesome! You make everything look so easy! Love the scalloped edge as well. Will be making this real soon!! Thanks
Page 1 of 3 pages 1 2 3 >