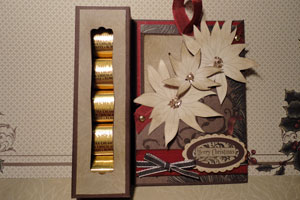
Treat Box Card
by Melanie Schulenberg
Create a card with a built in treat box.
Supplies
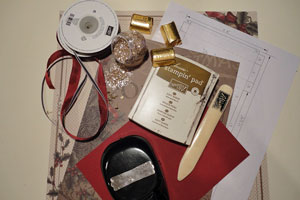
- Cardstock
- Scoring tool
- Patterned paper
- Adhesive
- Decorative punch, 1" or smaller
Step-by-Step
-
Step 1
Print out the treat box card template. Cut template out and use the instructions provided on the template to score your cardstock.
Treat Box Card Template
If you have trouble reading or printing the template use these measurements:
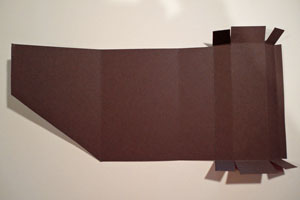
Start with a 6 1/2" x 11 3/4" piece of cardstock. Score your 6 1/2" side at 3/4" and 5 3/4". Score your 11 3/4" side at 3 1/2", 7", 8 1/2", 9 1/4", 10 3/4" and 11 1/2".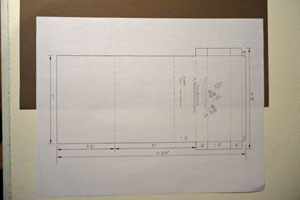
-
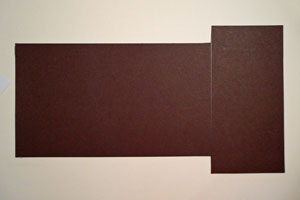
Step 2
Trim 3/4" from each of the longest sides up to the first base flaps of the box.
-
Step 3
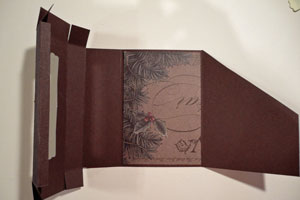
Crease the cardstock at the score lines. Create the end tabs by cutting the 3/4" extensions on each side of the box up to the score line, and totally removing the smallest end tab.
-
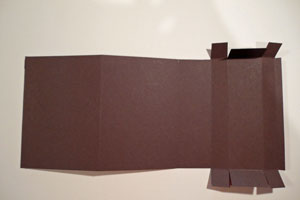
Step 4
Remove a diagonal piece of cardstock from the opposite end of the box. This will create your front flap.The diagonal line should go from approximately the center of the flap down to the score line.
-
Step 5
Cover the inside of the card with decorative paper.
-
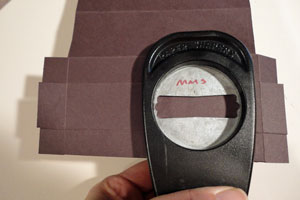
Step 6
Use a decorative punch to make a window in the top of the box. Use a punch that is 1” or smaller to keep your box stable.
-
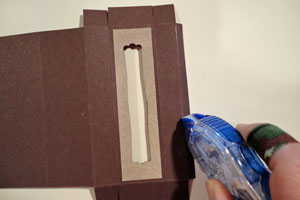
Step 7
Apply adhesive to the 1/4" fold of the box end. Fold over following score lines to form the box.
-
Step 8
Cover the front flap of card and embellish remainder of Treat Box Card as desired. Fill box with treats and secure top and bottom flaps with adhesive.
Video!
Your Turn
You've seen the tutorial, now you try it! We've got a section of the gallery set aside for Treat Box Card. Try this technique, then upload your artwork to the gallery. Show us your creations!
***Please note - Internet Explorer/Edge is not a supported browser, and will not allow you to see the videos. Please use Chrome, Firefox or Safari to view our tutorial videos.

Questions and Comments
We'd love to get your feedback or questions. Leave your comment below.
Thanks so much.
Linda
To clarify. You must start out with a 8 1/2" x 12" sheet of cardstock. You can't print the template on an 8 1/2" by 11" sheet, it will come out to small.
You'll hear me say in the video to score at: "3 1/2", 3 1/2" and 1 1/2".
The template shows 3 1/2" then 5". There is an additional 1 1/2" score going BACKWARDS from the 5" mark.
The score coming off the 5" line (backwards) isn't really needed. I only added it as a guide so you'll know where to attach the fold over of your box.
You can simply score the 3 1/2" then 5" and move on to the box dimensions...it allworks out the same. Simply fold your box over so it forms the square shape.
Thanks for you all of you comments.
Robin - The punch is the MODERN LABEL punch (Stampin' Up!). It's one of my favorites!
Eveline.
Hugs, Vina
You can find more info on the punch here:
http://www.stampinup.com/ECWeb/ProductDetails.aspx?productID=119849&dbwsdemoid=2030757
Hope this helps.
I was wondering if you could give me dimensions so this would fit a hershey kiss. I would be using the 6 1/2 X 12 most likely.
Page 1 of 1 pages