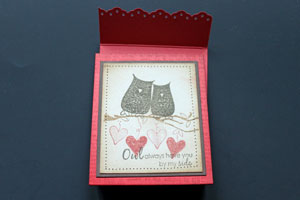
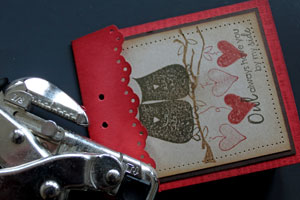
Treat Bag Cover
by Beate Johns
Decorate your cello bags with a cardstock cover.
Supplies
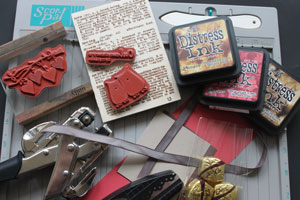
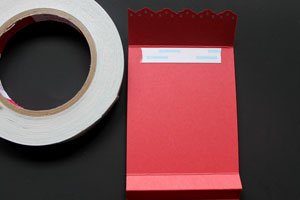
- One 3 3/8" x 10 1/2" piece of cardstock for treat bag cover
- Scor-Pal™, or other scoring tool
- Scor-Tape™, or other strong adhesive (optional)
- Border Punch (optional)
- Stamps, Unity's Believe in Fairytales used here
- Ink
- Ribbon
- Crop-a-dile™, or other hole punch
- 3" x 5" Cello Bag
- Candy to fill your cello bag
Step-by-Step
-
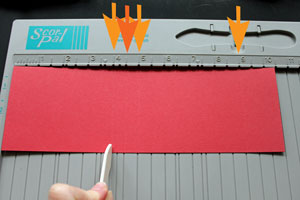
Step 1
Score the cardstock at 4", 4 1/2", 5" and 9".
-
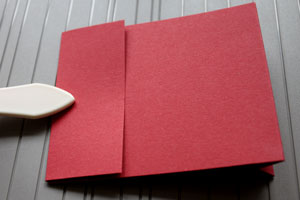
Step 2
Fold cardstock in half at the 4 1/2" score line.

-
Now fold the 4" and 5" score line in the opposite direction to create the bottom of the treat bag cover.

-
Step 3
Fold the top flap down.
-
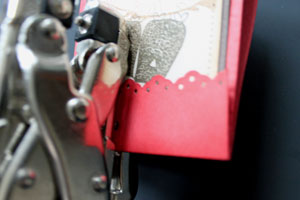
Step 4 (Optional)
Decorate the edge of the flap with a border punch.

-
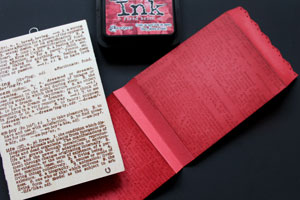
Step 5
Stamp the cardstock.
-
Step 6
Decorate the front of your treat bag cover.
-
Step 7
Add a strip of Scor-Tape™ on the score line under the flap.
-
Place the candy filled cello bag on the cardstock.
Line the bottom of the cello bag up with the edge of the first score line, centering over the cardstock.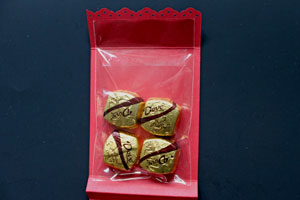
-
Step 8
Fold the part of the cello bag that extends over the score line of the flap down.
Now fold up the cover front.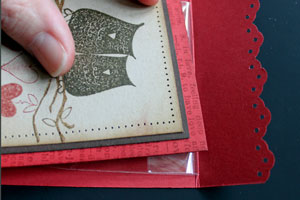
-
Step 9
Fold your flap down and punch a hole close to the center of the flap.
-
Punch a second hole close to the first one.
-
Step 19
Thread a piece of ribbon through the holes.

-
Tie a bow in the front. Your treat bag is done.

Video!
Variations
-
No stamping
Use patterned paper instead of stamping your cardstock.
Peek-a-Boo
Add a window to the panel furthest away from the front flap.
Your Turn
You've seen the tutorial, now you try it! We've got a section of the gallery set aside for Treat Bag Cover. Try this technique, then upload your artwork to the gallery. Show us your creations!
***Please note - Internet Explorer/Edge is not a supported browser, and will not allow you to see the videos. Please use Chrome, Firefox or Safari to view our tutorial videos.
 *
*
Questions and Comments
We'd love to get your feedback or questions. Leave your comment below.
FYI -- I think there's a typo in Step 19
Mirevan from Chamb�ry (france)
Thank you once again for another great how to video!!!
I really look forward to the newsletter.Thanks so much.
Page 1 of 2 pages 1 2 >