Traced Doodling
by Mel McCarthy
Using any kind of pencil, pen or marker to trace images and create a doodled or hand-drawn sketch look.
Supplies
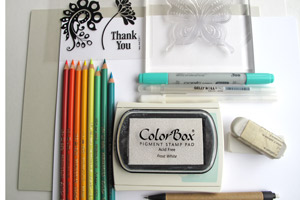
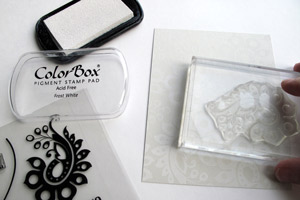
- Neutral cardstock
- Light colored ink, Colorbox Frost White pigment ink, Soft Sky ink by Stampin' Up! used here
- Stamps, BasicGrey Ambrosia Butterfly Bitsy stamp, Hero Arts & BasicGrey Sweet Threads stamp used here
- Mechanical pencil
- Eraser
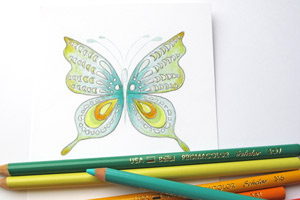
- Coloring mediums, Copic markers, Prismacolor scholar pencils, Sakura white Soufflé pen, Sakura glitter pen used here
- Stamps
Step-by-Step
-
Step 1
Stamp the image in a light ink and let it dry.
Hint:
There is no need to get the stamping perfect; it will just serve as a guide for doodling. Choose a shade of ink that compliments the look you want in the finished design. For instance for a red butterfly, you could choose a very light pink.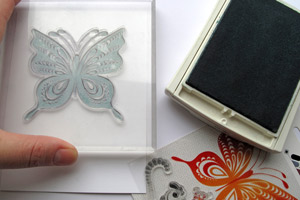
-
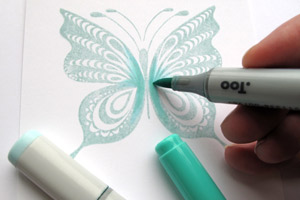
Step 2
Add a little depth to the stamped image with a matching marker.
-
Step 3
Color in some outlines and shapes with a pencil or pen.
You don't need to follow the design exactly if you don't want to. Add any sort of shape that strikes your fancy.
-
Step 4
Deepen the colour using pencil crayons. They won't smudge the pencil lines.
Tips on using coloured Pencils:
Wax-based pencils like Prismacolor pencils are easy to build up blended colour with because they are smooth. However, you can use any type of pencil crayon to blend shades if you apply a soft and even pressure on the pencil, then layer different colours by working in small circles.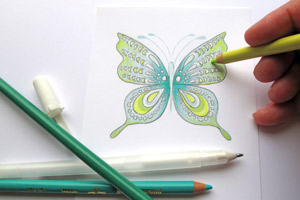
-
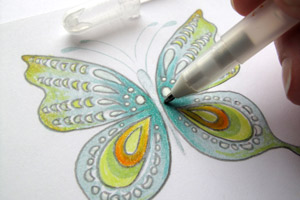
Step 5
Continue to add more pencil crayon in a contrasting color for a watercolor style.
-
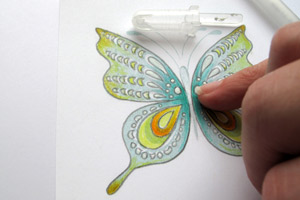
Step 6
Add details with white gel pen and a little glitter pen.
-
Smudge glitter pen with your finger tip to make it more sheer and subtle.
-
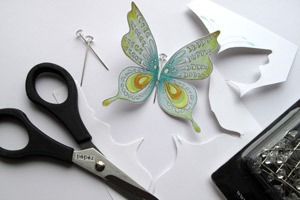
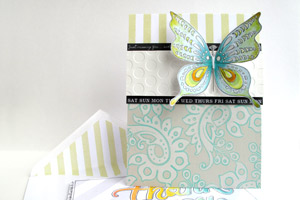
Step 7
Cut the doodled focal image out and embellish it.
-
Step 8
To make a traced doodle background, stamp in light or white ink. Let ink dry.
-
Step 9
Trace shapes in colored pencil.
Hint:
For smooth even lines, draw with your hand resting on a solid surface like your work desk. This keeps your hand steady & helps prevent shaky lines. Move the paper around to make it easier to reach the different areas of the design as you doodle.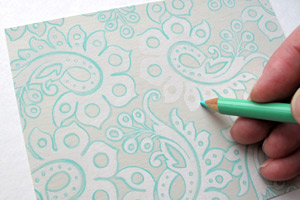
-
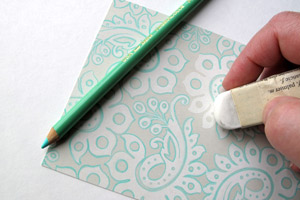
Step 10
Doodling is a very forgiving technique, since the 'flaws' make it look more hand done and you can use an eraser when you need to - even with pencil crayons. TIP: for easier to erase lines, use a relatively light pressure when you draw.
-
Step 11
Put it all together on a card.
Your Turn
You've seen the tutorial, now you try it! We've got a section of the gallery set aside for Traced Doodling. Try this technique, then upload your artwork to the gallery. Show us your creations!
***Please note - Internet Explorer/Edge is not a supported browser, and will not allow you to see the videos. Please use Chrome, Firefox or Safari to view our tutorial videos.

Questions and Comments
We'd love to get your feedback or questions. Leave your comment below.
thanks for this wonderful free tutorial. I'll try this technique-hope I'll be sucessfull.
HAve a great time
crissy
Thank you
Page 1 of 2 pages 1 2 >