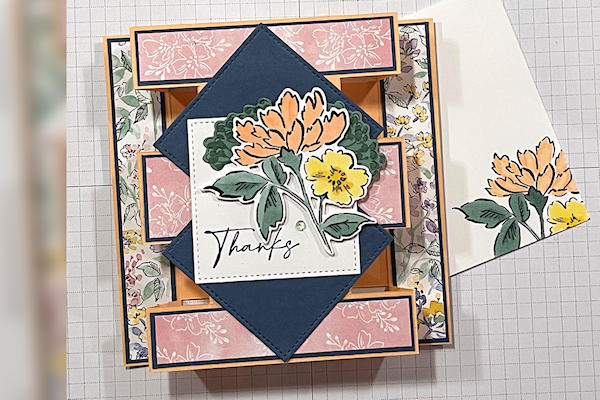
Tower Fold
by Mary Deatherage
Try this dramatic card design with stacked side folds.
Supplies
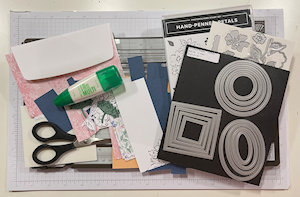
- Cardstock (Stampin' Up!® Pale Papaya, Misty Moonlight, Basic White used here)
- Patterned paper (SU Hand-Penned DSP used here)
- Paper trimmer
- Score tool
- Bone folder
- Adhesive (Liquid glue and Stampin’ Dimensionals used here)
- Other supplies as needed to complete the project (SU! products used here: Stampin’ Blends in Soft Succulent, Pale Papaya and Daffodil Delight;Tuxedo Black Memento Ink; Misty Moonlight and Soft Succulent Ink, Genial Gems, Hand-Penned Bundle)
Step-by-Step
-
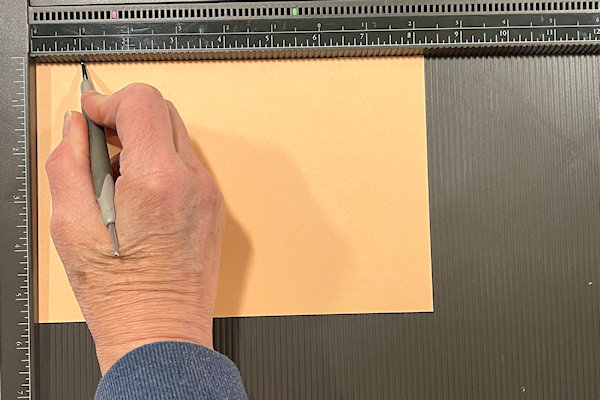
Step 1
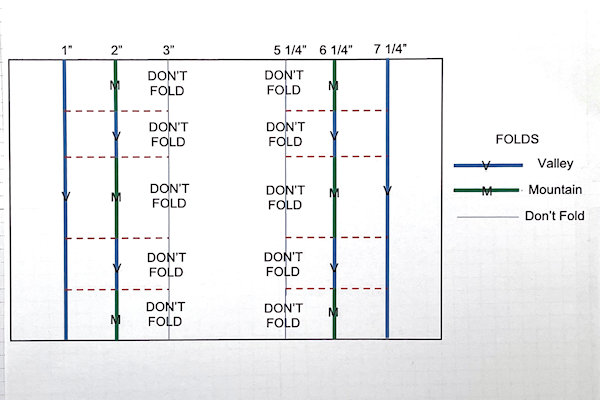
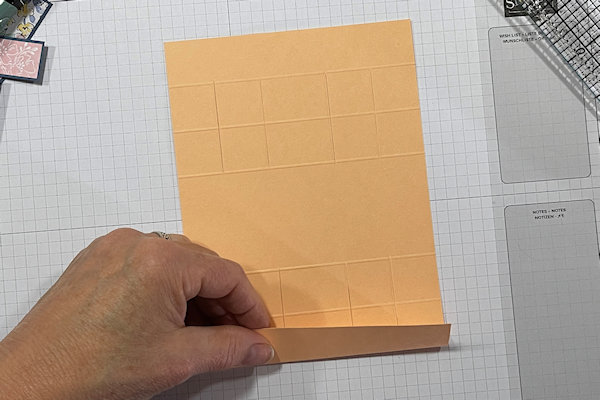
Score a 5 1/2” x 8 1/4” piece of base cardstock at 1”, 2”, 3”, 5 1/4”, 6 1/4” and 7 1/4” on the long side.
-
-
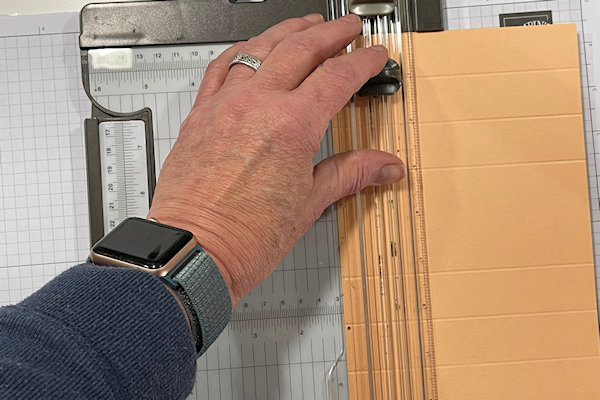
Step 2
Use a paper trimmer to cut at 1” and 2” from each long side between the 1” and 3” and again between the 5 1/4” and 7 1/4” score lines.
-
-
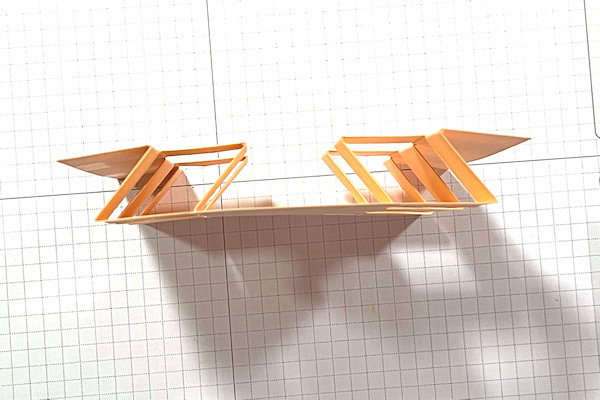
Step 3
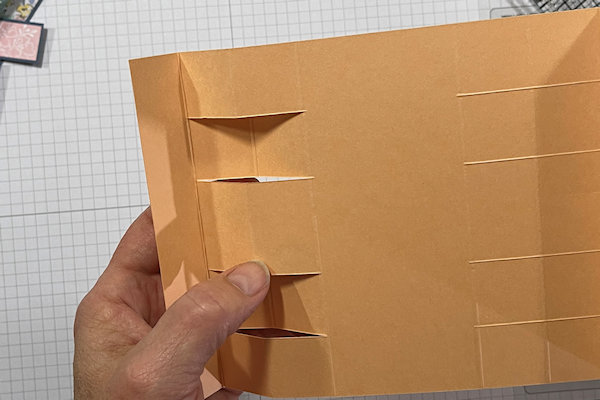
Fold the card base as shown on this template. “M” are mountain folds, “V” are valley folds.
-
-
Step 4
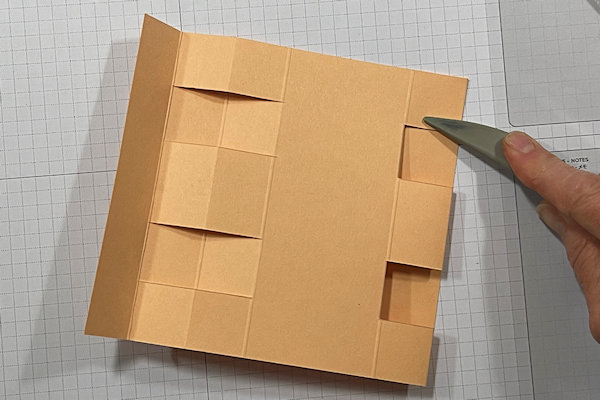
Work all the folds until the card comes together to form the tower.
-
-
Step 5
Burnish the folds well with the bone folder.
-
-
Step 6
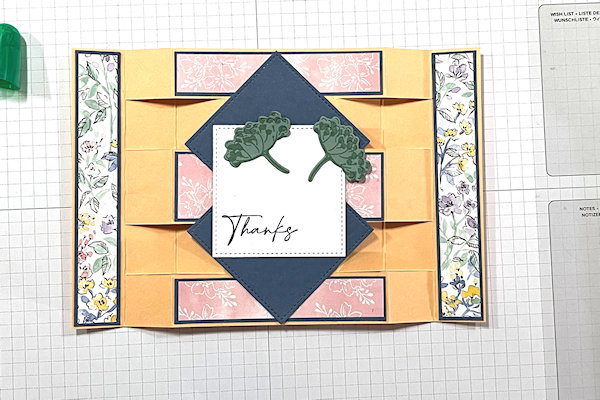
That completes the Tower Fold – now you can decorate it however you like!
-
Step 7
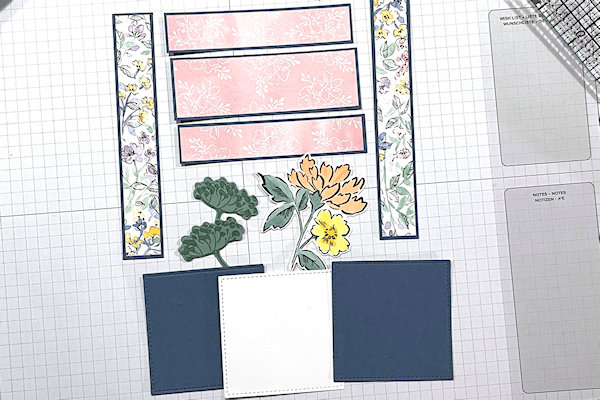
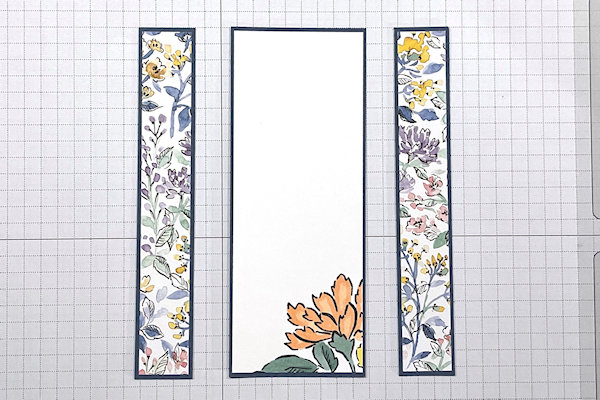
Layering panels as shown in the sample:
Cardstock mats for vertical side-panels card front and back: four at 7/8” x 5 3/8”
Cardstock mats for horizontal panels top and bottom on front: two at 7/8” x 4 1/8”
Cardstock mat for horizontal middle panel on front: 1 3/8” x 4 1/8”
Cardstock mat for back panel: 2 1/8” x 5 3/8”
Cardstock for back panel: 2” x 5 1/4”
2 5/8” square die cuts (sample uses largest square SU! Stitched Shapes Die”)
Patterned paper for vertical side-panels card front and back: four at 3/4” x 5 1/4”
For horizontal panels top and bottom on front: two at 3/4” x 4”
For horizontal middle panel on front: 1 1/4” x 4”
For Envelope flap: 2 1/2” x 6” -
-
Step 8
Embellish the card as desired.
-
Step 9
Complete the project.


Video!
Your Turn
You've seen the tutorial, now you try it! We've got a section of the gallery set aside for Tower Fold. Try this technique, then upload your artwork to the gallery. Show us your creations!
***Please note - Internet Explorer/Edge is not a supported browser, and will not allow you to see the videos. Please use Chrome, Firefox or Safari to view our tutorial videos.

Questions and Comments
We'd love to get your feedback or questions. Leave your comment below.
Love this card!
Thanks for such a thorough (though not too long) tutorial.
Jean ~
Page 1 of 1 pages