Tie Dye Background
by Kim Jolley
Recreate the magic of tie dye on paper.

Supplies
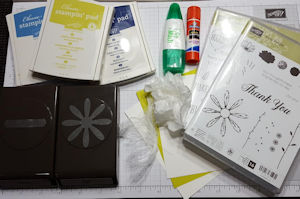
- Dye inks (Stampin’ Up!® Lemon Lime Twist, Night of Navy, and Marina Mist ink pads used here)
- Baby wipes
- One 8-12 cup size coffee filter
- Glue stick
- Multi-purpose glue
- Cardstock
- Other supplies as needed to complete the projects (SU supplies used here: Lemon Lime Twist and Whisper White cardstock; Stamp sets: Happy Birthday Gorgeous (sentiment) and Daisy Delight; scrap of cheesecloth; Classic Label punch and Daisy Punch)
Step-by-Step
-
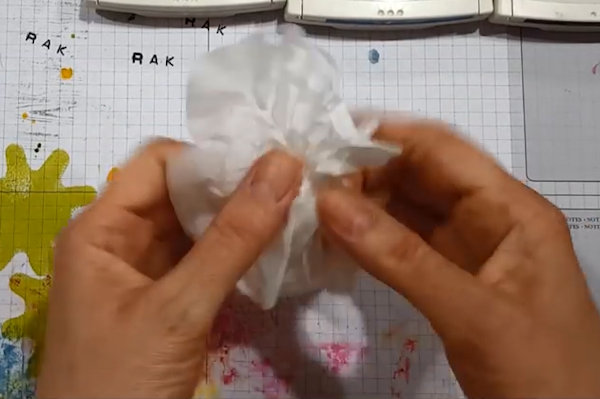
Step 1
Using an ordinary coffee filter (8-12 cup size used here), crumple it up in a ball. Then open it up, making sure there are lots of lovely crinkles and wrinkles in it.
-
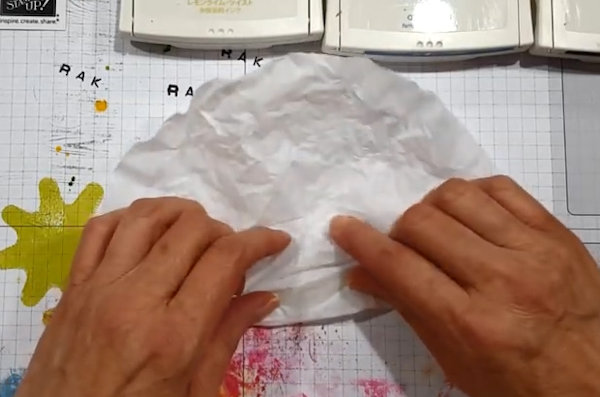
Step 2
Scrunch (don’t roll) it in to a lengthwise shape.
NOTE:
By scrunching instead of rolling, you will have more surface area to apply the ink. -
Pull and smooth the bundled paper to create creases.
-
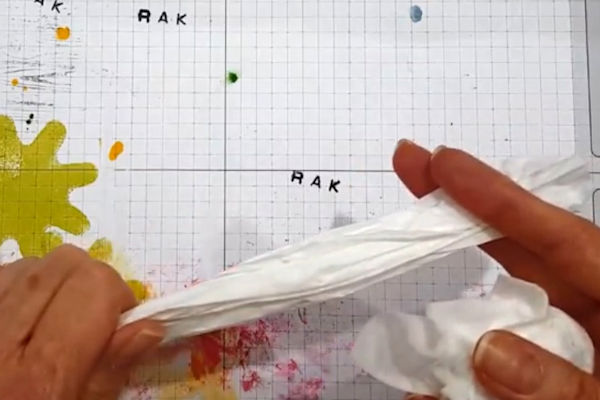
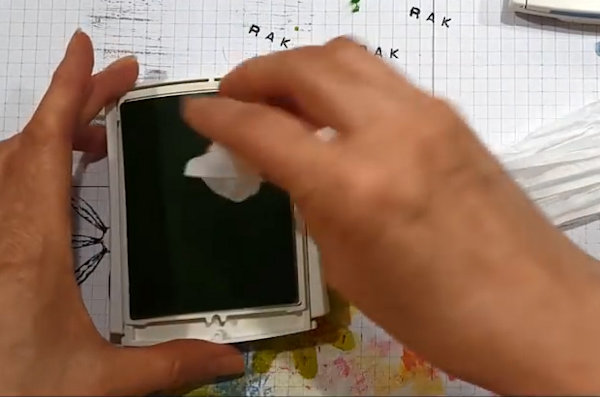
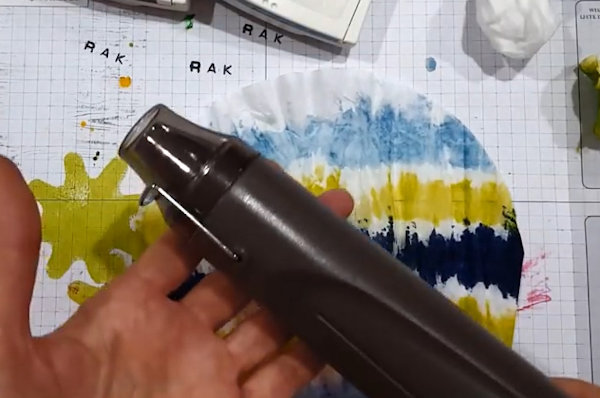
Step 3
Ball up a baby wipe and dab it on a dye ink pad.
-
Use the baby wipe like you would a sponge or stamp to apply inks in bands of color to the surface of the coffee filter.
-
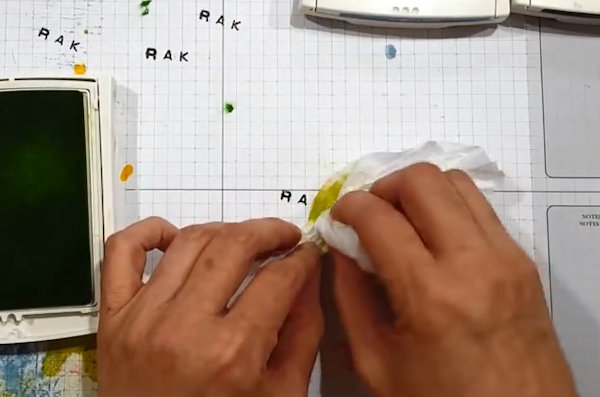
Step 4
TIPS:
Start with your lightest color. If you overlap colors with the damp baby wipe, you won’t muddy or mess up the color on the ink pad itself as you dab back and forth.
Turn or roll the coffee filter as you dab the ink, so that ink is applied all the way around. -
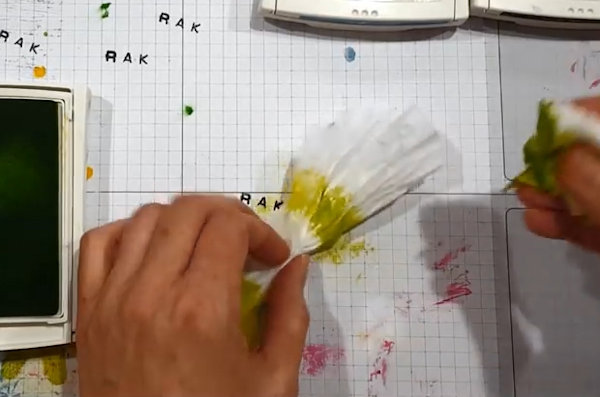
Step 5
Continue to apply ink to the coffee filter in stripes, unrolling it a bit during this process to make sure you have the stripe looking the way you want it. It is quite easy to fill in missing or blank areas.
NOTE:
If your baby wipe seems to dry out, use a new one. The wetness or dampness of the baby wipe is helping the ink bleed a bit like real tie-die, so it can’t be completely dry. -
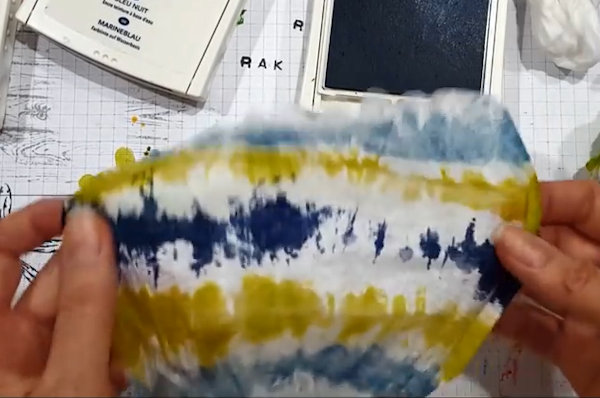
Step 6
Unroll the coffee filter and apply ink to any area that you feel needs more ink. Tie dye has many looks and designs, so this is up to you.
-
Step 7
Set the paper aside to dry, or use a heat tool to dry it. It only takes a few seconds to dry using a heat tool.
-
-
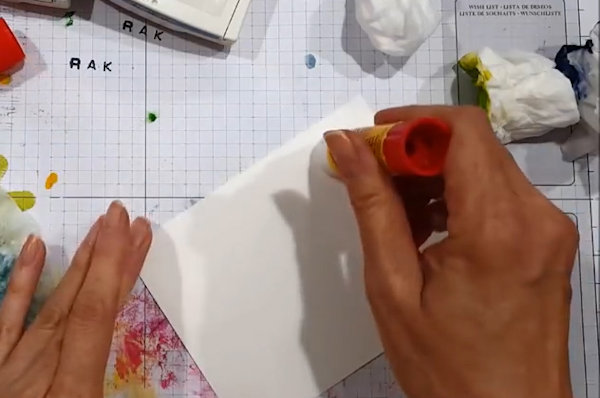
Step 8
Adhere the coffee filter to a sturdy base of watercolor paper or cardstock. Rub a glue stick on the piece of paper you will be adhering the coffee filter to.
NOTE:
A glue stick seems to work best for this, rather than a wetter glue, as you do not want glue bleeding through the coffee filter.
-
Lay the coffee filter face down and adhere the cardstock to it. Don’t try to smooth all of the wrinkles from the coffee filter - they are part of the look.
-
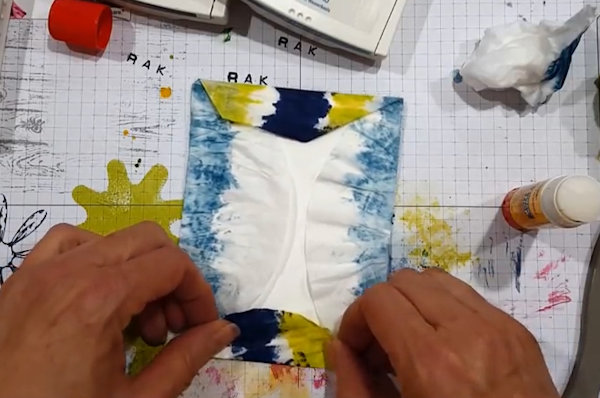
Step 9
Fold the rounded edges of the coffee filter to the back side of your cardstock.
Using the glue stick, glue the rest of the coffee filter down, mitering the corners as you go. -
Step 10
Use the finished panel to complete a card or other project.


Video!
Your Turn
You've seen the tutorial, now you try it! We've got a section of the gallery set aside for Tie Dye Background. Try this technique, then upload your artwork to the gallery. Show us your creations!
***Please note - Internet Explorer/Edge is not a supported browser, and will not allow you to see the videos. Please use Chrome, Firefox or Safari to view our tutorial videos.

Questions and Comments
We'd love to get your feedback or questions. Leave your comment below.
What do you use the cheesecloth for? It's in your materials list.
Carole from Chicago
Thank you. Making card for the grandson I just escorted through a month's worth of activities between end of pre-school and camp. His tie-dye shirt my fav for spotting him in crowded venues.
Gretchen Collins: I used Walmart brand babywipes. As far as the glue stick, I used an off-brand I bought in the school supply section...not sure what brand, I ran out of that one and threw it away.
Thanks for the inspiration!
Barb B. CZT
Page 1 of 2 pages 1 2 >