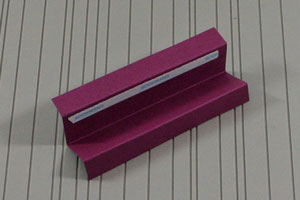
Tag Box
by Valerie Stangle
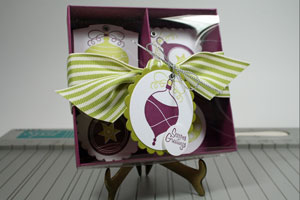
This divided box was inspired by one in the SU! catalog and is perfect for tags or other small goodlies.
Supplies
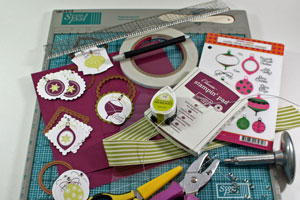
- Scor-Pal™, or other scoring tool
- Scor-Tape™, or other strong adhesive
- Scor-Mat™, or paper trimmer
- Ruler and Exacto Knife, or paper trimmer
- One 8" x 8" piece of cardstock for box base
- One 3" x 3 15//16" piece of cardstock for box divider
- Two 17/8" x 5 7/8" pieces of cardstock for box divider
- One 4 1/16" x 11" piece of Acetate for box cover
- Ink and stamps (Our Craft Lounge Jolly Ornaments used here)
- Additional cardstock and embellishments for tags and to embellish your box
Step-by-Step
-
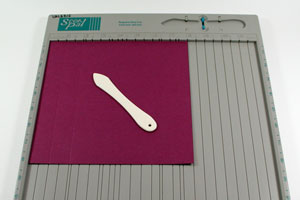
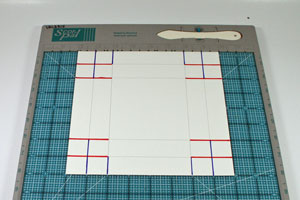
Step 1
Align the 8" x 8" square to the top fence of your Scor-Pal, left side, and score at 1", 2", 6" and 7".
-
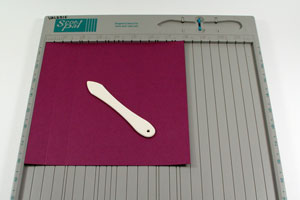
Step 2
Rotate 1/4 turn and repeat, scoring at 1”, 2”, 6” and 7”.
-
Step 3
For illustration purposes, I've used plain cardstock with pencil lines indicating the score lines.
Using a craft knife, metal edged ruler, and your Scor-Mat, cut as shown on the orange lines.
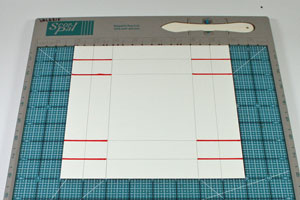
-
Now, cut as shown on the blue lines.
-
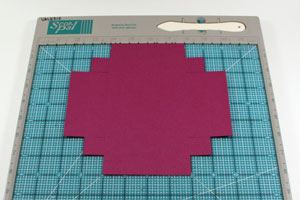
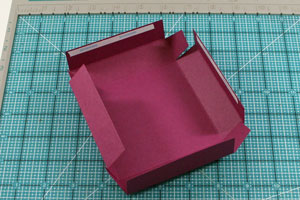
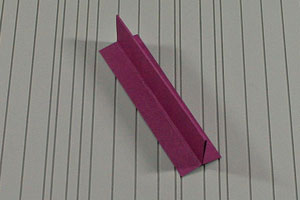
Step 4
After cutting, this is what you will end up with.
-
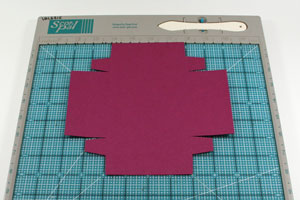
Step 5
Notch 4 small tabs, then take a sliver off each side of the 4" flap; 8 cuts total, from the edge of the paper to the first score line.
This will ensure the box folds together nicely without binding in the corners.
-
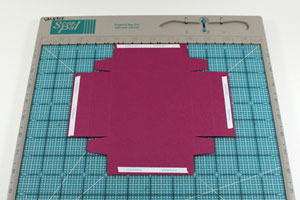
Step 6
Attach a small piece of Scor-Tape to each tab.

-
Step 7
Turn cardstock over and attach 4 strips of Scor-Tape to outside edge of flaps.
-
Step 8
Pre-fold all scores.
-
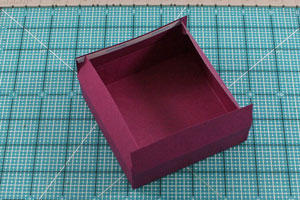
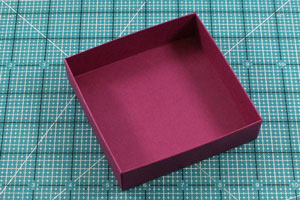
Step 9
Adhere tabs to inside to create box form.
-
Adhere flaps to inside to create box, burnish sides with your Scor-Tool to create crisp sides.
-
Step 10
Align the 3" x 3 15/16" piece of cardstock to the top fence, left side, and score at 1/2", 1 1/2", and 2 1/2".
-
Step 11
Pre-fold all scores and attach a piece of Scor-Tape, as shown.
-
Adhere together.
-
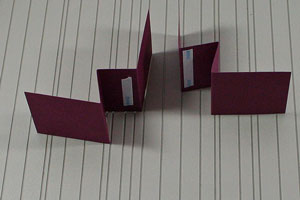
Step 12
Align one of the 1 7/8" x 5 7/8" pieces of cardstock at top fence, on the 1/16th (midway between the 0" and 1/8") at the left side, and score at 2", 3", and 4".
Repeat with second piece of cardstock.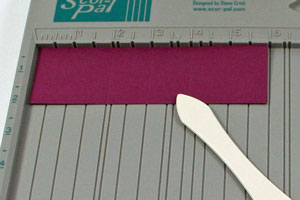
-
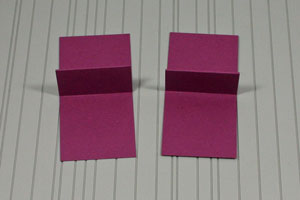
Step 13
Pre-fold both pieces and attach a piece of Scor-Tape, as shown.
-
Adhere together.
-
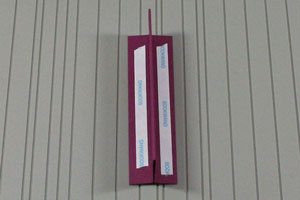
Step 14
On the longest of the 3 inserts, place 2 pieces of Scor-Tape as shown.
-
Remove Scor-Tape liner and attach the 2 smaller inserts to larger insert.
Tip:
Attach to one end and then the other, finally to the middle, this ensures all edges line up; burnish with the Scor-Tool.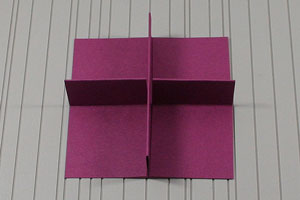
-
Step 15
Align the transparency sheet to the top fence, left side, and score at 2-1/2", 3-1/2", 7-1/2", and 8-1/2".
Tip:
Even after scoring, transparency sheets can be hard to fold. I line up a metal edged ruler to the scored lines and fold over the ruler, and then burnish with the Scor-Tool to get a hard edge.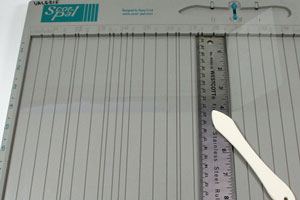
-
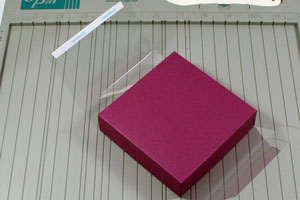
Step 16
Attach a piece of Scor-Tape™ to one edge and wrap scored transparency around the box.
-
Step 17
Slide clear cover off, insert stamped tags, replace clear cover and tie a ribbon around the box.
Video!
Your Turn
You've seen the tutorial, now you try it! We've got a section of the gallery set aside for Tag Box. Try this technique, then upload your artwork to the gallery. Show us your creations!
***Please note - Internet Explorer/Edge is not a supported browser, and will not allow you to see the videos. Please use Chrome, Firefox or Safari to view our tutorial videos.

 *
*
Questions and Comments
We'd love to get your feedback or questions. Leave your comment below.
Thanks so much for sharing ....
God Bless
Great tutorial on the tag box. I am off to make one this very minute. Thank you for all the details. Happy Holiday.
Hugs to you!
I want to make give tags for my children teachers, that makes the perfect presentation.
Thank you for sharing.
Thanks for sharing this awesome project.
~ Pam
Page 1 of 2 pages 1 2 >