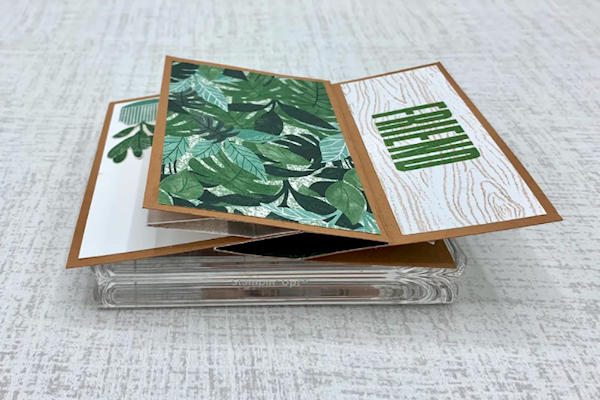
Stepped-Up Pinwheel Card
by Vy Tran
Add some pop-ups and a window panel to make this fun fold card even more special!

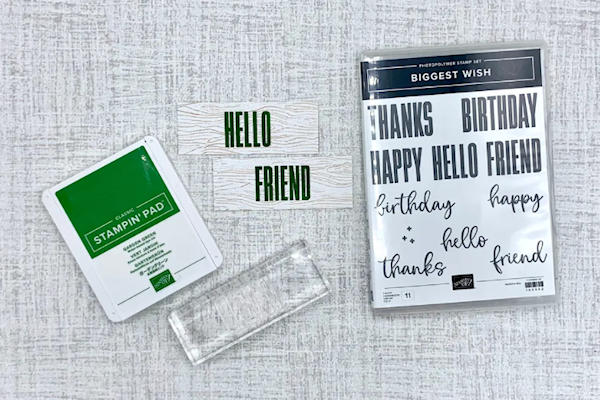
Supplies

- Patterned paper (Stampin’ Up!® Bloom Where You’re Planted used here)
- Cardstock (SU Cinnamon Cider and Basic White used here)
- Rectangle die (optional, SU 1-3/4” (W) x 3-1/8” (H) Stitched Rectangle die used here)
- Die-cutting machine (optional)
- Paper trimmer
- Bone folder
- Adhesives (tape runner and glue, SU Stampin’ Seal and Tombow Multipurpose Liquid Glue used here)
- Other supplies as needed to complete the project (SU supplies used here: Biggest Wish stamp set, Garden Green ink, Paper Lattice, Perfect Plants die, Window Flower Box die)
Step-by-Step
-
Step 1
Prepare cardstock and patterned paper.
Patterned Paper:
4-1/2” (W) x 4-1/4” (H), scored at 1”, 2”, 3”, and 4” along the long side
up to THREE of 2-1/2” (W) x 4” (H)
up to FOUR of 1-1/2” (W) x 4” (H)
TWO of 3” (W) x 1/2” (H), scored at 1/2”, 1-1/4”, and 2-1/2’ along the long side
Cardstock:
FOUR of 2-3/4” (W) x 4-1/4” (H)
2-1/2” (W) x 4” (H)
Stamp any desired images and sentiments onto the 2-1/2” (W) x 4” (H) and the 1-1/2” (W) x 4” (H) layers. -
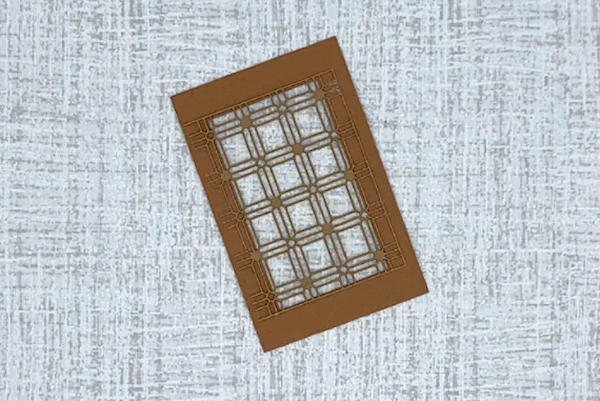
Step 2
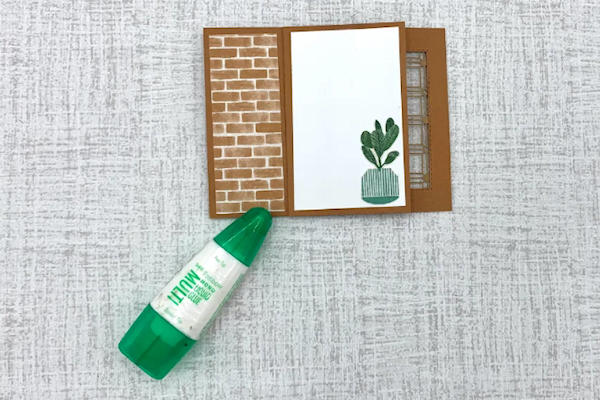
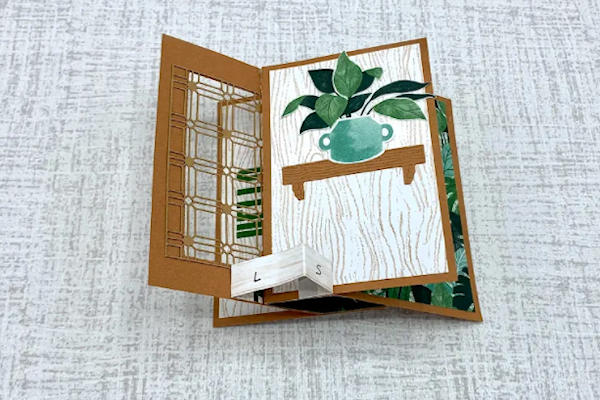
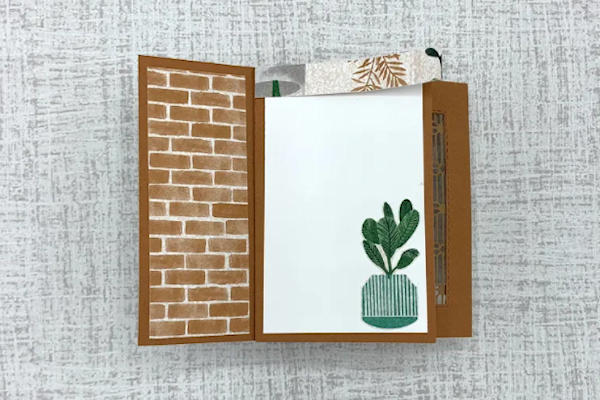
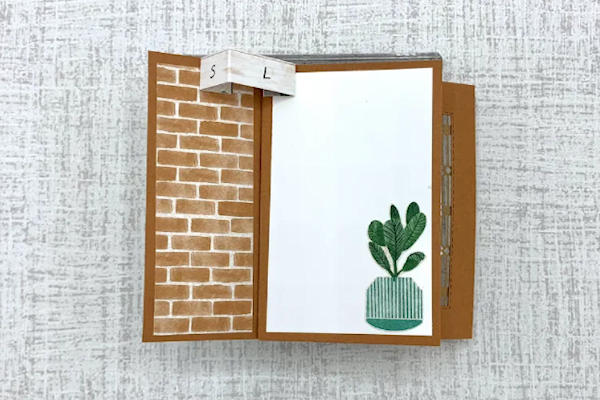
If desired, die cut a window into one of the 2-3/4” (W) x 4-1/4” (H) cardstock panels.
-
Adhere decorations to window panel (Stampin’ Up Paper Lattice cut in half used here).
-
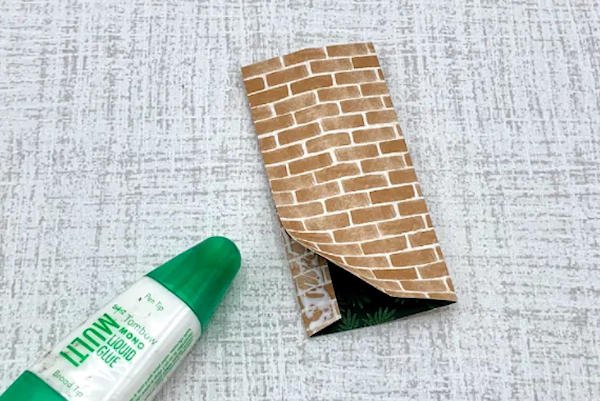
Step 3
Fold score lines on 4-1/2” (W) x 4-1/4” (H) patterned paper piece as mountain folds and reinforce with bone folder.
Cut small wedges along top and bottom edge of shortest panel to create a gluing tab. -
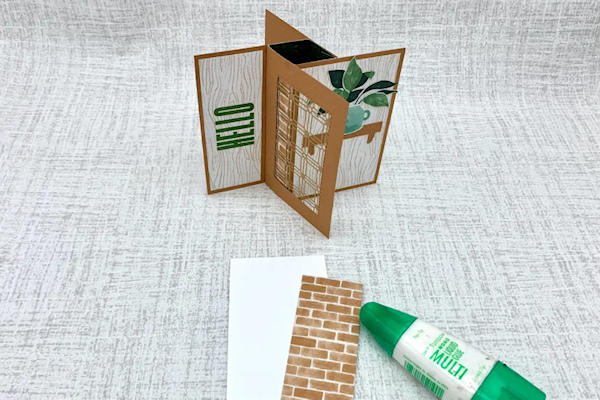
Step 4
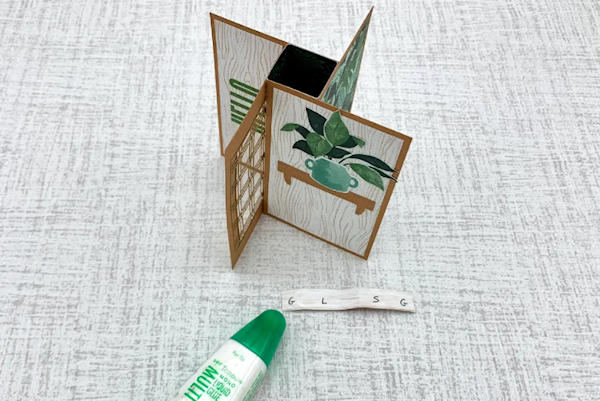
Adhere the gluing tab to the first panel, creating a box shape. This is the central tower for the card.
-
Step 5
Adhere one of the 2-3/4” (W) x 4-1/4” (H) cardstock pieces to each panel of the tower.
-
Step 6
Adhere the 2-1/2” (W) x 4” (H) and 1-1/2” (W) x 4” (H) panels onto each of the 4 cardstock pieces from Step 5. The 2-1/2” (W) x 4” (H) and 1-1/2” (W) cardstock piece is for your message panel. If you opted to cut a window in Step 2, you will only need two of the 2-1/2” (W) x 4” (H) and 1-1/2” (W) patterned paper pieces and three of the 1-1 /2” (W) x 4”(H) patterned paper pieces.
-
Add any die-cut or fussy-cut images you’d like to include.
NOTE:
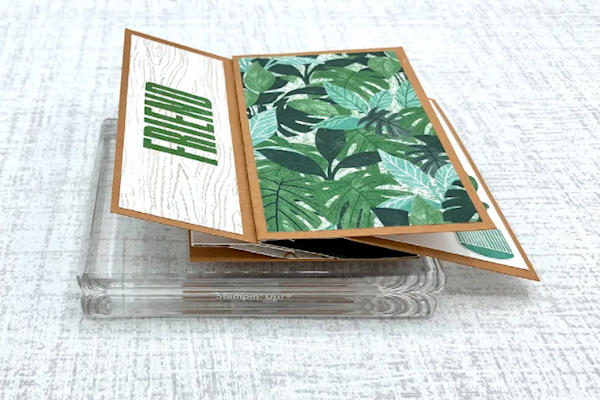
For a basic pinwheel card, you can stop here! Your project is complete. -
Step 7
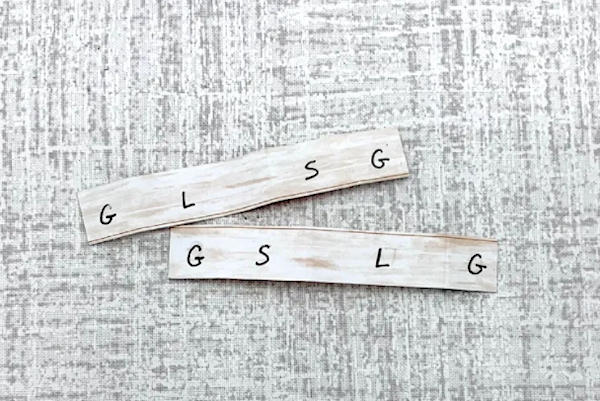
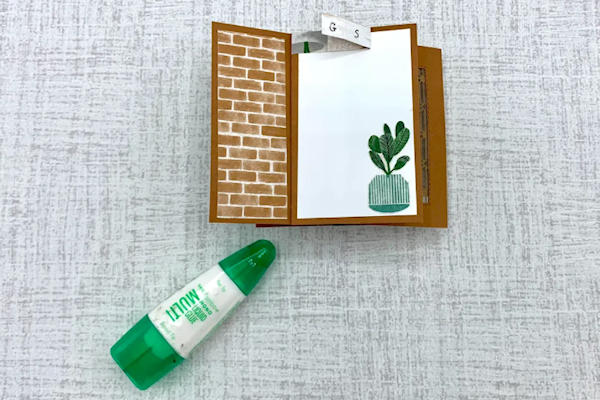
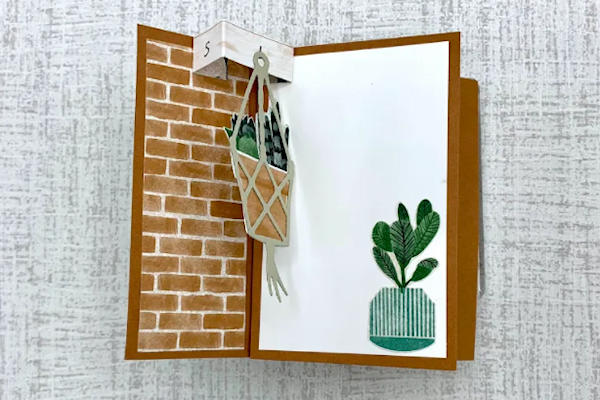
Fold each of the score lines on the 3” (W) x 1/2” (H) patterned paper pieces as mountain folds. These will be supports for the pop-ups. You will have a gluing panel (G) on each end, a short (S) panel, and a long (L) panel.
-
Step 8
Note that in order for the card to fold completely flat, the pop-up supports can only be installed on opposite sections of the pinwheel card—either the first and third, or the second and fourth.
-
To install the first pop-up support, orient it so that you have the long (L) panel to the LEFT of the short (S) panel. Put glue on the LEFT gluing (G) tab. Flip the piece upside down so that the glue is on the bottom, and then adhere it to the card, butting up right to the crease.
-
Step 9
Fold the pop-up support piece along the center crease so that the short (S) panel and RIGHT gluing (G) tab are now facing up. Put glue on the RIGHT gluing tab.
-
Flip the card panel on the right down onto the exposed adhesive.
-
Step 10
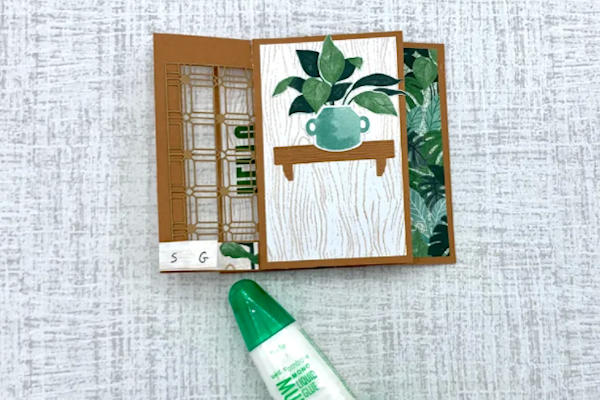
When you open that section of the card again, you should have both ends of the pop-up support installed in your card.
-
Apply glue to your desired die-cut or fussy-cut image and adhere it to the long (L) panel of the pop-up support.
-
Step 11
To install the second pop-up support, orient it so that you have the long (L) panel to the RIGHT of the short (S) panel. Put glue on the RIGHT gluing (G) tab.
-
Flip the piece upside down so that the glue is on the bottom, and then adhere it to the card, butting up right to the crease.
-
Step 12
Fold the pop-up support piece along the center crease so that the short (S) panel and LEFT gluing (G) tab are now facing up. Put glue on the RIGHT gluing tab.
-
Flip the card panel on the LEFT down onto the exposed adhesive.
-
Step 13
When you open that section of the card again, you should have both ends of the pop-up support installed in your card.
-
Apply glue to your desired die-cut or fussy-cut image and adhere it to the long (L) panel of the pop-up support.
-
Step 14
Complete the project.
The card will fold flat to fit into an A2 envelope.


Video!
Your Turn
You've seen the tutorial, now you try it! We've got a section of the gallery set aside for Stepped-Up Pinwheel Card. Try this technique, then upload your artwork to the gallery. Show us your creations!
***Please note - Internet Explorer/Edge is not a supported browser, and will not allow you to see the videos. Please use Chrome, Firefox or Safari to view our tutorial videos.

Questions and Comments
We'd love to get your feedback or questions. Leave your comment below.
Page 1 of 1 pages