Star Box
by Diana Crick
Try this box for holiday decor or favors.
Supplies
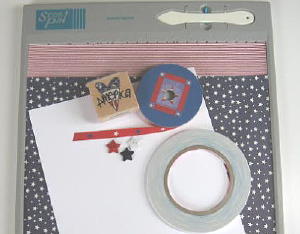
- Paper trimmer with scoring blade or Scor-Pal®
- Cardstock 8 1/2" x 11" long - white
- Patterned paper two different patterns
- Sticky Strip™ or similar adhesive
- Embellishments for the tag
Step-by-Step
-
Step 1
Determine the height of the box and add one inch. The box shown is 7 1/2" high.
Cardstock 8 1/2" x 10 1/2". Red striped paper is 4" x 10 1/2", blue and white is 3" x 10 1/2", and border is 3/8" x 10 1/2".
Apply Sticky Strip™ along bottom and two sides of the striped paper and along top and two sides of the star paper. Adhere to cardstock as shown. Apply adhesive to border strip and adhere, covering where the two patterned papers meet.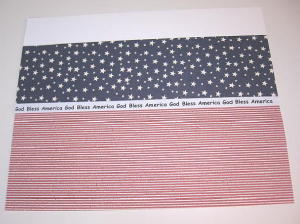
-
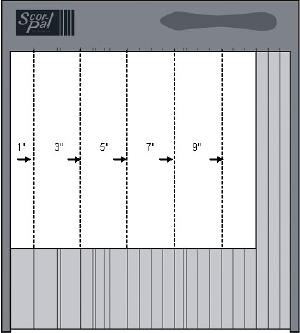
Step 2
With patterned side facing down, score at 1", 3", 5", 7" and 9". Flip the page over from top to bottom NOT side to side. The left side of the paper will remain in the same orientation.
-
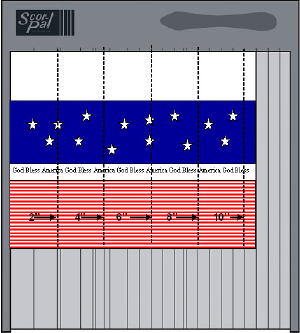
Step 3
With the patterned side facing up, score at 2", 4", 6" and 8" and 10".
-
Step 4
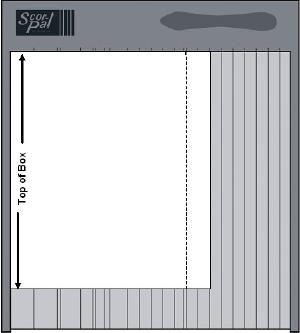
Turn the page so the top of the box is along the left and top fence. Score at 7 1/2".
-
Step 5
The intersecting score lines have created ten 1" little squares and a smaller tab at the 10" score.
Cut each of the ten little squares into points as shown. Cut the 1/2" tab off.
Accordion fold, creasing along each fold. Apply Stick Strip along the length of the side tab on the right side. Do not expose the adhesive yet.
-

-
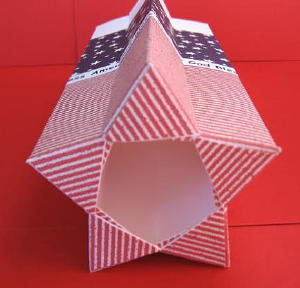
Step 6
Fold the tabs in, right over left, along bottom. Remove liner from Sticky Strip and adhere the side tab to the inside, retaining star shape. Adhere tabs together.
-
Step 7
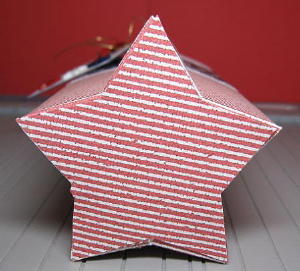
Trace the outline of the box onto the wrong side of patterned paper. With a pencil mark one of the points of the bottom of the box and a pencil mark on the corresponding point of the paper to line up the star after it is cut out. Cut inside the pencil lines and glue into place.
-
Step 8
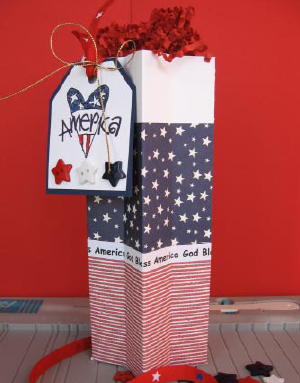
Make a coordinating tag and embellish.
Your Turn
You've seen the tutorial, now you try it! We've got a section of the gallery set aside for Star Box. Try this technique, then upload your artwork to the gallery. Show us your creations!
***Please note - Internet Explorer/Edge is not a supported browser, and will not allow you to see the videos. Please use Chrome, Firefox or Safari to view our tutorial videos.

 *
*
Questions and Comments
We'd love to get your feedback or questions. Leave your comment below.
Page 1 of 1 pages