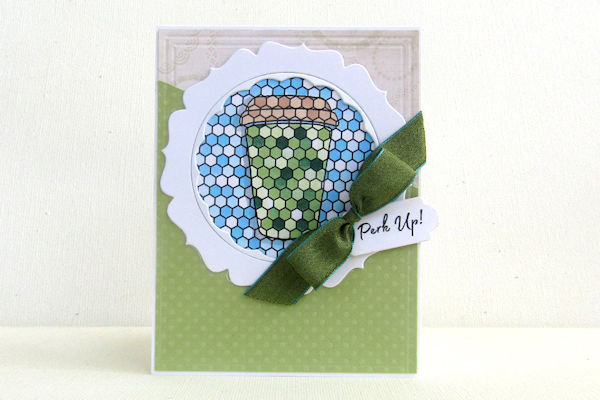
Stained Glass Stamping
by Dina Kowal
Recreate the look of stained glass with stamps and markers.
Supplies
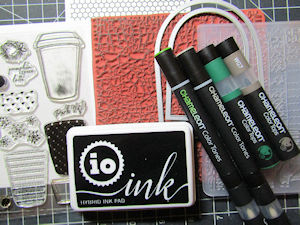
- Cardstock
- Open outline stamp (Impression Obsession CL774 Coffee To Go clear set used here)
- Coloring medium (Copic markers, Chameleon Color Tones Pens and Toppers used here)
- Large crackle, tile, or mosaic stamp, or a similar printable background (used here: Impression Obsession CC069 Cover-a-Card Craquelure; printable Honeycomb Texture background from Pixabay.com)
- Ink compatible with the coloring medium (Impression Obsession Black Hybrid Ink used here)
- Heavy acetate
- Embossing folder (Tim Holtz/Sizzix Cracked folder used here)
- Shaped dies or trimmer (Sizzix Rounded tags dies used here)
- Other supplies as needed to complete the project (used here: MISTI, adhesive foam sheet, adhesive, ribbon, black colored pencil, sentiment stamp from A Jillian Vance Design)
Step-by-Step
-
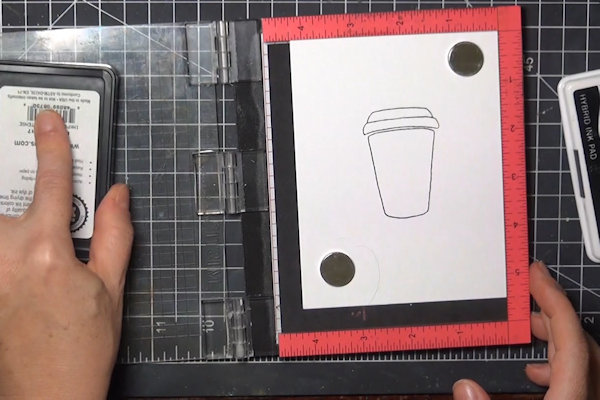
Step 1
Stamp an outline image onto cardstock that’s compatible with your coloring medium of choice. Be sure to use an image that doesn’t have a lot of added details.
-
Step 2
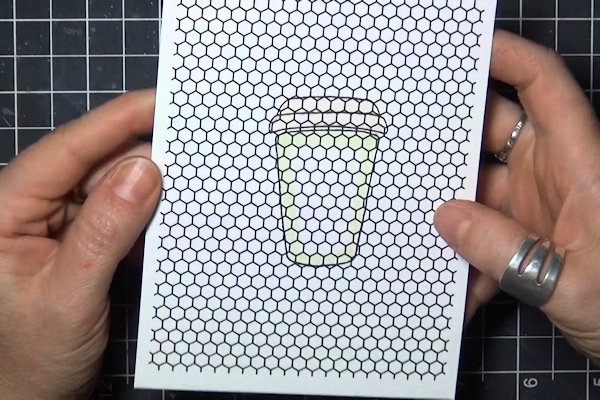
Choose a variety of colors for each general area of the image, including the background. About 3 markers for each color area is good. For the sample, the cup will be green, the lid tan, and the background grey.
Use the lightest color in each set to color in each area of the image, or at least mark the outline. This will help to guide your coloring and define lines later. -
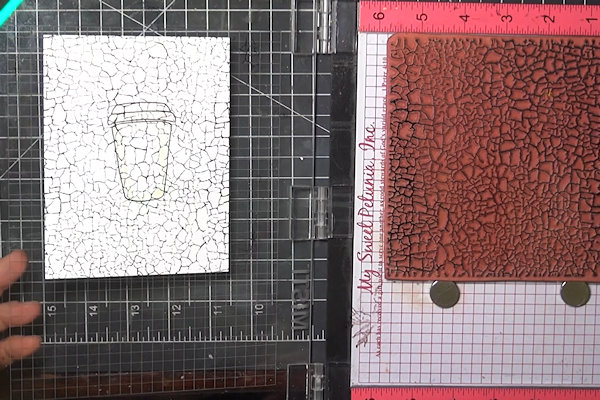
Step 3
Stamp over the image using a large crackle, tile, or mosaic stamp with clean, defined sections.
-
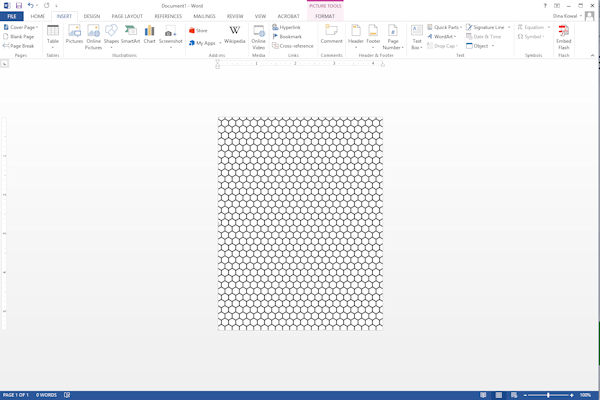
Step 4 (Optional)
Alternatively, you can print onto your cardstock using a downloadable background pattern like this one. Working in a word processing program, set the size of the document to the size of your stamped panel. Reduce margins to 0", and size the image to fill the panel.
TIP:
When searching for a background image online, look for honeycomb, crackle, or mosaic backgrounds, and set the color search to black and white. -
Insert the stamped panel into the printer so that the background image will print over the image. Print.
-
Step 5
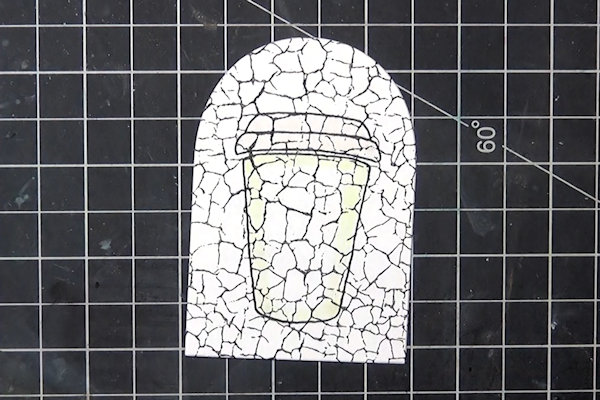
Trim or die cut the panel down to size before coloring.
-
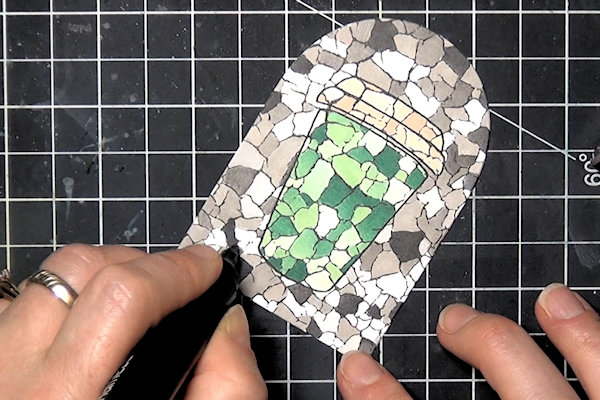
Step 6
The lines of the background combined with the outlines of the image create many new small areas. Using the colors you selected above, color in the first section of the image. Try not to color contiguous sections in the same shade – move around the area and skip a few sections each time.
TIP:
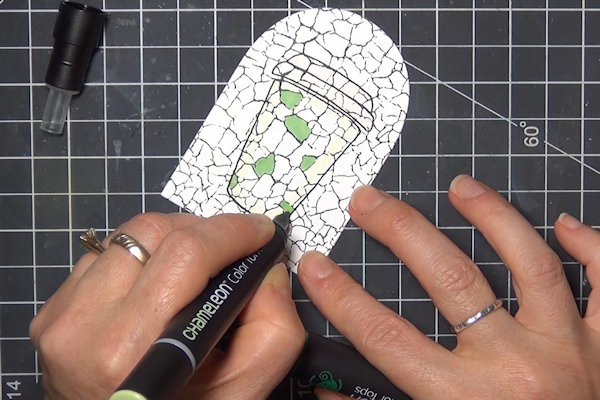
Stamp a second image to refer to when you’re unsure of the outline in the pattern of the background stamp. With more intricate images, sometimes the details can get lost.
-
Continue filling each space with varying tones and shades within the color area.
-
Step 7
Move on to the other areas of the image, filling in each small area as before.
-
Remember to fill in the background as well.
-
Step 8 (Optional)
Add a light shadow around the focal image to help it to stand out if needed.
-
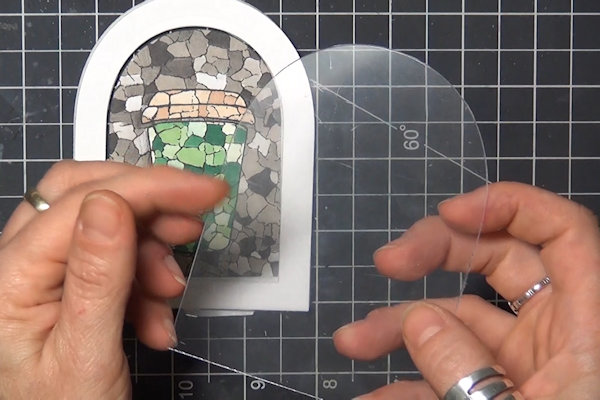
Step 9 (Optional)
If your stained glass panel will be framed, add an overlay of acetate for extra effect. Cut the acetate to the size of the outside of the frame.
-
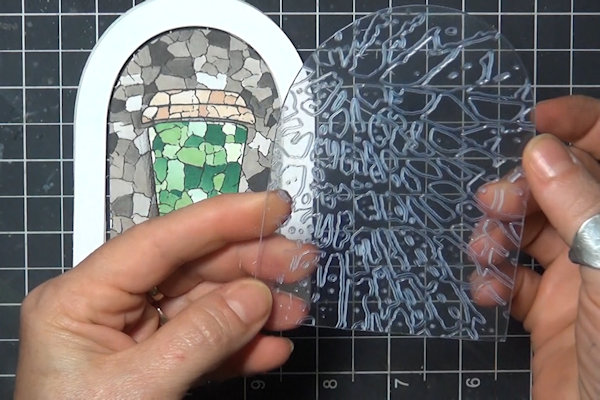
The acetate can be embossed in an embossing folder for added interest.
-
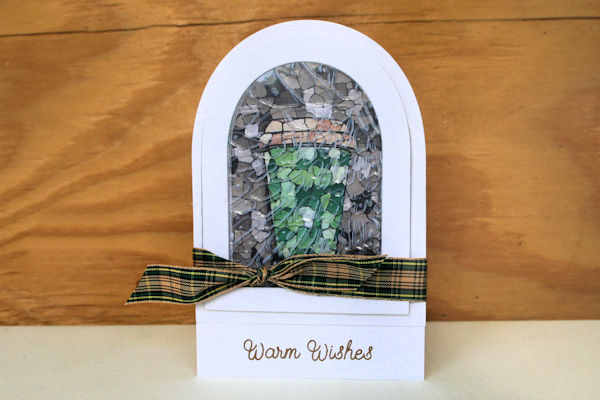
Step 10
Use the panel to embellish a card or other project.
In the sample, the colored panel was layered on the bottom, then a frame cut from an adhesive foam sheet, the acetate, and then a cardstock frame. -
Step 11
Complete the project.
-


Video!
Your Turn
You've seen the tutorial, now you try it! We've got a section of the gallery set aside for Stained Glass Stamping. Try this technique, then upload your artwork to the gallery. Show us your creations!
***Please note - Internet Explorer/Edge is not a supported browser, and will not allow you to see the videos. Please use Chrome, Firefox or Safari to view our tutorial videos.

 *
*
Questions and Comments
We'd love to get your feedback or questions. Leave your comment below.
Thanks!
Judi
Page 1 of 1 pages