Stained Glass

by Beate Johns

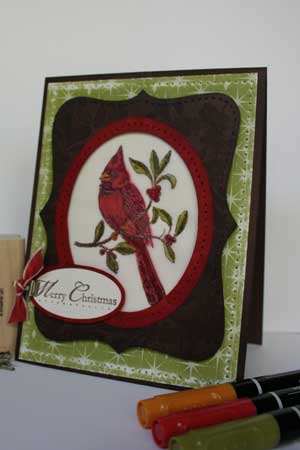
Bring the beauty of stained glass to your papercrafts, without the special tools.

Supplies
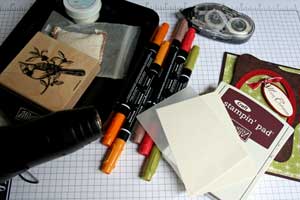
  • Outline Image Stamp

  • Vellum Paper

  • Dark Pigment Ink

  • Clear Embossing Powder

  • Embossing Buddy

  • Heat Gun

  • Marker

  • Neutral Colored Cardstock

  • Adhesive

Step-by-Step

  1. Step 1

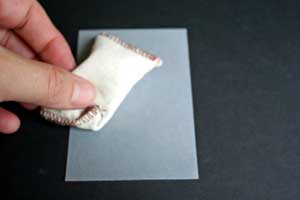
    Rub Embossing Buddy over vellum. This will help keep embossing powder where it belongs - on the stamped image.
  2. Step 2

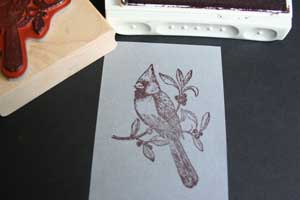
    Stamp image in dark pigment ink on the vellum.
  3. Step 3

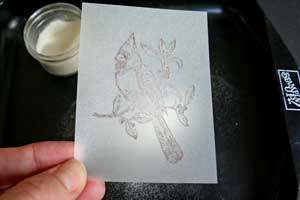
    Pour clear embossing powder over the image and tap off the excess powder.

    Alternative:
    Ink stamp with Versamark™ and apply dark embossing powder over it.
  4. Step 4

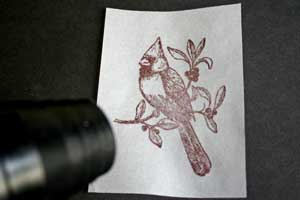
    Heat powder until it melts.

    Hint:
    If you are using vellum paper, the paper will curl a bit.
  5. Step 5

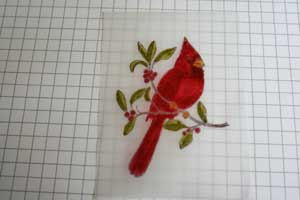
    Flip vellum over and color the back of the image with markers.
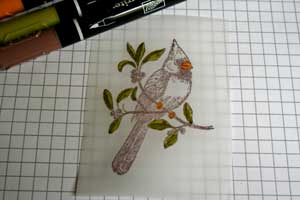
  6. Color the entire image and let dry.

  7. Step 6

    Adhere the vellum piece to neutral cardstock, making sure the embossed side faces up.

    Place adhesive where it won't be seen later. It can be hidden behind ribbon or a cardstock window.
    Alternative:
    Instead of adhesive, use brads or just ribbon to secure the vellum to the neutral colored cardstock.
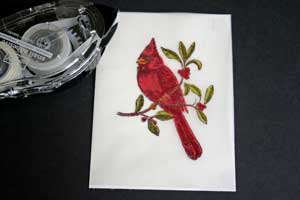
  8. Step 7

    Finish your card.

Video!

Your Turn

You've seen the tutorial, now you try it! We've got a section of the gallery set aside for Stained Glass. Try this technique, then upload your artwork to the gallery. Show us your creations!

***Please note - Internet Explorer/Edge is not a supported browser, and will not allow you to see the videos. Please use Chrome, Firefox or Safari to view our tutorial videos.

Questions and Comments

We'd love to get your feedback or questions. Leave your comment below.

Awesome tutorial Beate! I can't wait to give this technique a try tonight!
Chrissy  |  Wed Oct 15, 2008 at 7:24 AM
This is such a beautiful technique. Thanks for teaching us how. I have a tip: use the Glue Arts Vellum Adhesive sheets and you won't have to 'hide' your adhesive because you won't even know it is there. wink And, you can trim it to any size you want. It is my preferred adhesive I use on vellum and transparencies
ElizabethB  |  Wed Oct 15, 2008 at 7:37 AM
Great tortial, thanks so much for all your ideas. I have a question, is the vellum, cardstock vellum or regular vellum paper?

Thanks so much,

Deb
Deb Broadway  |  Wed Oct 15, 2008 at 7:42 AM
OH MY GOSH !!! I can hardly wait to try this out !!! Genius !!!
Corinne (aka Roxy)  |  Wed Oct 15, 2008 at 7:43 AM
This is a wonderful card. Thanks for presenting it.
Maxine Naumann  |  Wed Oct 15, 2008 at 8:16 AM
I would like to know how or what you used to get the perfect Ovals and the fun background shape?
Thanks!
KMO  |  Wed Oct 15, 2008 at 8:54 AM
BEAUTIFUL! I cannot wait to give this a whirl!
Carolyn King  |  Wed Oct 15, 2008 at 9:16 AM
Deb,
I used Vellum paper for this card.

KMO,
I used the Big Shot Top Note Diez for the shape and cut the ovals with my Coluzzle.
You can find all supplies listed in my gallery upload in the stained glass gallery.
beate  |  Wed Oct 15, 2008 at 10:19 AM
Oh...this could be dangerous!! I see sleepless nights in my future, while I play with this technique. Could be addictive!!
AStampinRookie  |  Wed Oct 15, 2008 at 11:12 AM
h Beate this is just gorgeous. Can't wait to try my hand at this!!
Jacki Ranieri  |  Wed Oct 15, 2008 at 2:22 PM
can't wait to give this one a go....looks great...
danelover  |  Wed Oct 15, 2008 at 2:36 PM
You can actually use classic ink to emboss on vellum as it stays wet long enough to hold the embossing powder. I did this technique for a votive surround with Holy Triptych last year and it turned out gorgeous! Thanks for the wonderful tutorial Beate!
tanya27  |  Wed Oct 15, 2008 at 3:57 PM
Great card - and easy to follow tutorial. Thanks, again.
Candy  |  Wed Oct 15, 2008 at 4:07 PM
Wow! Thanks for bringing back memories of one of the first Stampin' Up! parties I ever went to and watched (who became my upline) demo this technique! Haven't thought of this in years!!! Thank you for bringing it to the foreground of my mind.
Melissa  |  Wed Oct 15, 2008 at 4:23 PM
This is really a piece of work. You are so good. It his absolutly stonning. Keep up the good work.
AndrĂ©e-Anne Charpentier  |  Wed Oct 15, 2008 at 6:36 PM
Last week you used a Fiskars punch for your featured demo. I have looked everywhere for that punch with no luck. Could you give me the name or number of that punch? I would really appreciate it. Thank you!
Meredith Schreiner  |  Thu Oct 16, 2008 at 11:01 AM
Beautiful card and technique Beate, thanks for sharing! Jennifer smile
Jennifer Meyer  |  Thu Oct 16, 2008 at 12:22 PM
This card is beautiful, tfs.
tonda baldwin  |  Thu Oct 16, 2008 at 4:43 PM
wow i can't wait to try this on a christmas set i have so many christmas stamp's i just can't wait till i get started after i'm done with halloween one's smile)
Roberta  |  Fri Oct 17, 2008 at 8:50 AM
This is beautiful and what an informative instructional. I think I might like to try this.
Thanks.
ZacksNana  |  Sat Oct 18, 2008 at 9:07 AM

Page 1 of 2 pages  1 2 >

You need to be logged in to comment

GET OUR NEWSLETTER


Splitcoaststampers's privacy policy