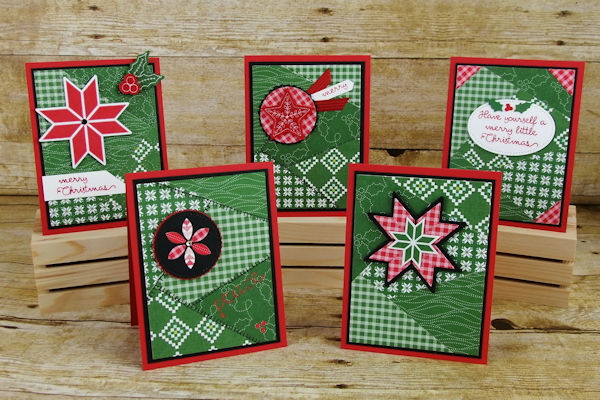
Stack and Cut Quilt Cards
by Betty Traciak
Make a set of backgrounds at once by cutting stacked papers together.
Supplies
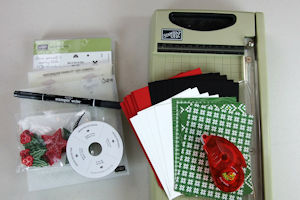
- Cardstock (Stampin’ Up!® Garden Green, Real Red, Basic Black and Whisper White Cardstock used here
- Scrapbook paper (SU Quilted Christmas Designer Series Paper used here)
- Snail or sheet adhesive
- Heavy duty paper trimmer or rotary cutter, mat and ruler
- Other supplies as needed to complete the project (Stampin’ Up! products used here: Christmas Quilt stamp set, Real Red, Basic Black Stamp’ n Write Marker, Versamark ink, Stitched Felt Embellishments, Rhinestone Basic Jewels, Black Rhinestone Jewels, Black Vintage Crochet Trim, Quilt Top Textured Impressions Folder, Quilt Builder Framelits, Stitched Shapes Framelits, Layering Circles Framelits, Classic Label punch
Step-by-Step
-
Step 1
To make 5 cards, cut five of each of the following:
Scrapbook paper: 3-3/4” X 5”
Cardstock layer for gluing base: 3-3/4” X 5”
Accent layer: 3-7/8” X 5-1/8”
Card base: 4-1/4” X 11”
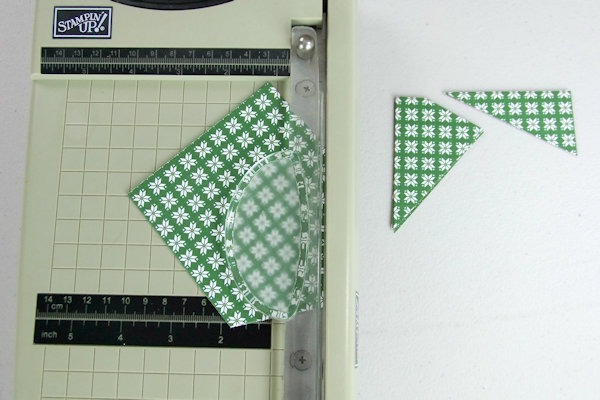
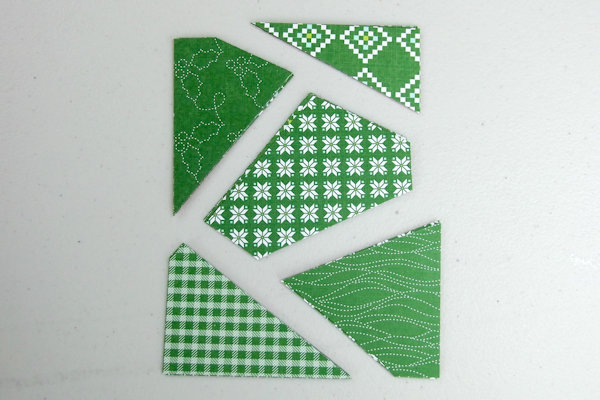
Stack the five pieces of scrapbook paper. Hold them firmly together and insert a corner in the trimmer. Cut through all five layers. Keep the layers of the cut pieces in order and set aside. -
Step 2
Rotate the stacked scrapbook paper. Reinsert the stack into the trimmer and make another cut. Keeping the layers in order, place the cut pieces next to the previously cut pieces to recreate the original rectangle.
-
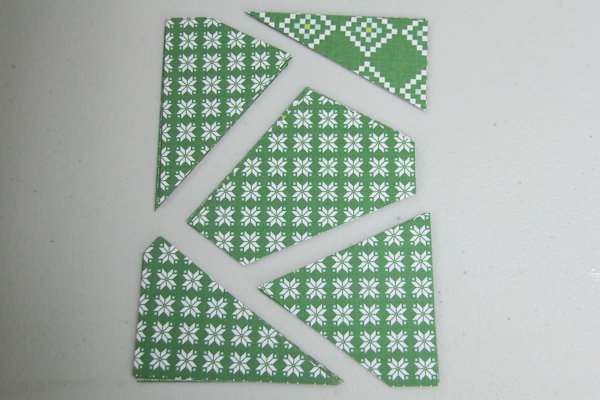
Step 3
Continue working, rotating and cutting until you have five sections.
-
Step 4
Pick up one stack and shuffle the top layer to the bottom of the pile.
-
Step 5
Pick up the second stack and shuffle two layers to the bottom. Then for the third stack shuffle three layers and for the forth shuffle four layers. Keep the fifth stack as it is.
-
Step 6
Add adhesive to one of the 3-3/4” X 5” piece of cardstock. Using the top layer from each stack, reassemble the pieces.
-
Step 7
For the second card use the second layer from each stack, and so on to create the five quilted pieces.
-
Step 8
Trim a tiny bit from each side to even up the edges.
-
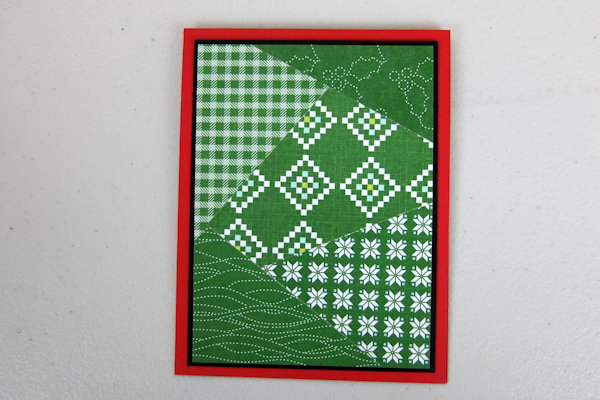
Step 9
Layer each quilted piece on the accent layer and then on the card base. Have fun decorating!
-
Step 10
Complete the project.


Video!
Your Turn
You've seen the tutorial, now you try it! We've got a section of the gallery set aside for Stack and Cut Quilt Cards. Try this technique, then upload your artwork to the gallery. Show us your creations!
***Please note - Internet Explorer/Edge is not a supported browser, and will not allow you to see the videos. Please use Chrome, Firefox or Safari to view our tutorial videos.

Questions and Comments
We'd love to get your feedback or questions. Leave your comment below.
Idea to my stack! Thank you for a super video and idea.
if Stampin Up still make this paper trimmer you are using
in the tutorial.
Unfortunately, the Stampin' Up trimmer that I used is not longer available. I have had mine for a while quite a few years and it is still going strong. I know other companies do make cutters that are similar.
Page 1 of 1 pages