Spotlighting Technique
by Beate Johns
This technique is great to spotlight part of your image. It's a fun way to use detailed stamps and only color part of of the image.
Supplies
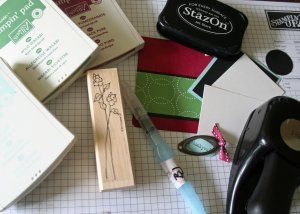
- Two paper punches or cutting system that gives you nested shapes
- Outline image stamp
- Coloring mediums (here Aqua painter and waterbased ink)
- Cardstock (here Shimmery White)
- Black Stazon™
Step-by-Step
-
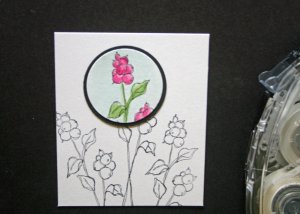
Step 1
Stamp the main image in Black Stazon™ ink.
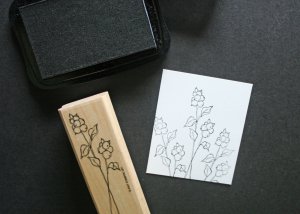
-
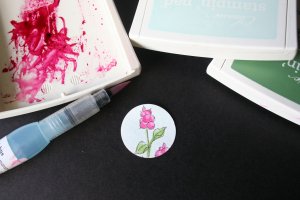
Step 2
Stamp the part of the image that will be highlighted again, this time on a smaller piece of cardstock.
-
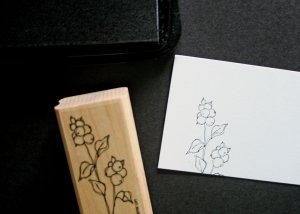
Step 3
Punch out the part of the image that will be highlighted.
(Or use a cutting system to cut it out.)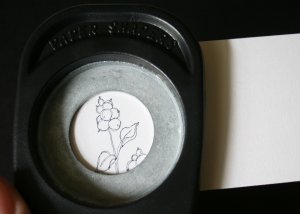
-
Step 4
Color in the punched image.
-
Step 5
Adhere image to a slightly bigger, colored cardstock punch out.
This will draw attention to the image.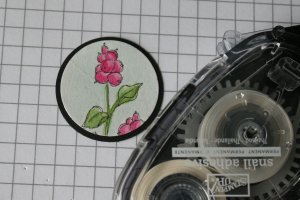
-
Step 6
Line up the layered punch out over the main image and tape down.
-
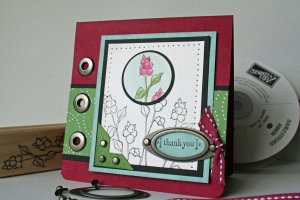
Step 7
Finish your card.
Video!
Your Turn
You've seen the tutorial, now you try it! We've got a section of the gallery set aside for Spotlighting Technique. Try this technique, then upload your artwork to the gallery. Show us your creations!
***Please note - Internet Explorer/Edge is not a supported browser, and will not allow you to see the videos. Please use Chrome, Firefox or Safari to view our tutorial videos.
Questions and Comments
We'd love to get your feedback or questions. Leave your comment below.
I just wanted to let you know how beautiful your card is.
This was one of the first techniques that I learned and have totally forgottten about it.
So thanx for the reminder, now I will go and work on some more cards with this technique.
Inky Huggz,
i am fairly new 2 stamping so i haven;t seen this technique before i love it. I will defo be having a play at doing it
I have a 1 1/2 punch for the first one then the 1 3/4 punch circle is to large and it doesn't look good. Help!!!!!
For the sample in the video tutorial I used Circle Nestabilities.
Thanks for your easy to understand tut.
Sharon
Page 1 of 1 pages