Sponging
by Beate Johns
Add warmth and dimension to your image with a sponge and ink. Sponging is a great way to distress and/ or age your cardstock.
Supplies
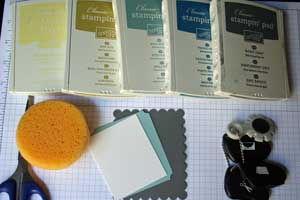
- Cardstock
- Sponge
- Scissor
- Ink pads, both dye as well as pigment ink will work
- Stamps
- Cutter Kit or other distressing tool (optional
- Embellishments
Step-by-Step
-
Step 1
Cut a sponge into smaller pieces.
Variation:
Try sponge daubers or cosmetic sponges, also. Each sponge will give you a different look. I prefer the sponge shown for a soft look.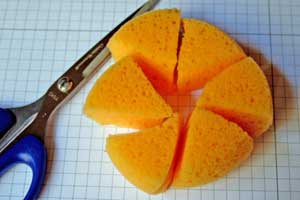
-
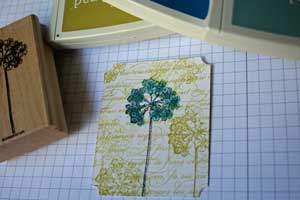
Step 2
Stamp an image.
-
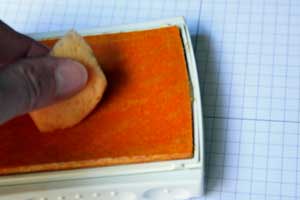
Step 3
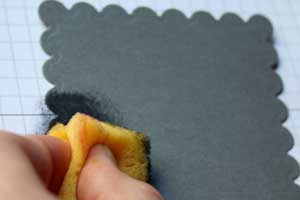
Ink one a sponge wedge with the lightest color ink by tapping it on the ink pad.
-
Hold the cardstock in one hand, the sponge in the other. Apply the ink by moving the sponge over the edge of the cardstock in an up and down motion.
Repeat several times before reloading the sponge with more ink.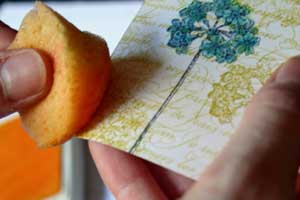
-
Step 4
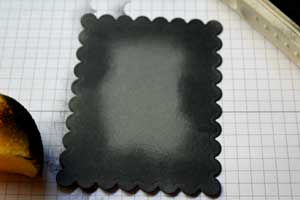
Sponge all the edges of your cardstock. If neccessary, go around the cardstock again for a richer look.
Hint:
Don't apply too much ink at once. You can always go over it again. Once you have too much ink on it, it can't be taken off. You can only go darker, not lighter!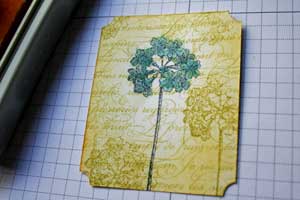
-
Step 5
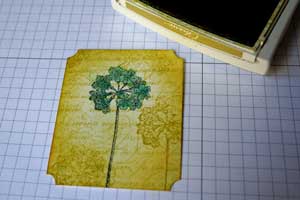
For an even richer look, go over the edges again with a slightly darker color.
-
Step 6 (Optional)
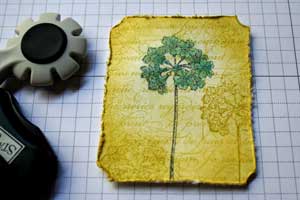
Distressed edges look really good with sponged cardstock.
Take an edge distressor (or cutter kit tool) and slide it over the cardstock edges, applying a little pressure.
-
-
Step 7
When sponging cardstock that will be a lower layer of a card, just ink the sponge and rub over the cardstock edge.
-
The sponging will make the cardstock color richer. No need to try to make it look gradual. Only the outer part of the cardstock will show.
-
Step 8
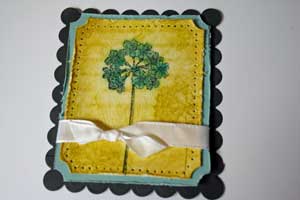
Tape your layers together.
-
Finish your card.
You can find this card in the gallery HERE with all supplies listed.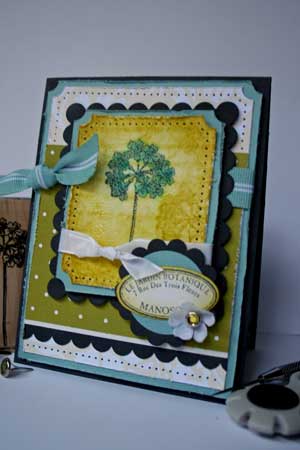
Video!
Variations
- Chalkboard
- Collage
- Embossing Resist
- Faux Leather
- Faux Mother of Pearls
- Faux Postage
- Faux Tearing
- Gesso Resist
- Grid Technique
- Paper Tole
- Poppin' Pastels
- Retiform
- Tapestry
Different texture
Different sponges will give you different results. The denser the sponge, the higher the ink transfer.
Techniques that involve sponging
Questions and Comments
We'd love to get your feedback or questions. Leave your comment below.
The scallop rectangle is cut with Rectangle Nestabilities Dies.
The scallop border on the bottom is punched with Scallop Edge border punch from Stampin' Up!
The scallop circle is punched with the Scallop Circle punch from Stampin' Up!
The round sponges can be bought from Stampin' Up! You get three for $3.50.
The dots are made with a paper piercer. Check our tutorial on Faux Stitching here. The first two steps show you how to paper pierce.
your ideas. Your blog is fantastic also. Keep those ideas coming. Dena
Page 1 of 2 pages 1 2 >