Spirelli
by Susie Nelson
Create beautiful string art with die cuts and embroidery floss.
Supplies
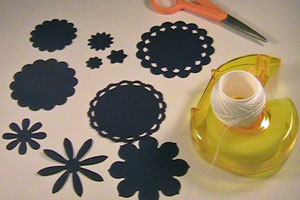
- Cardstock scallops either cut with punches or dies
- Crochet thread or embroidery floss
- Tape
- Scissors
Step-by-Step
-
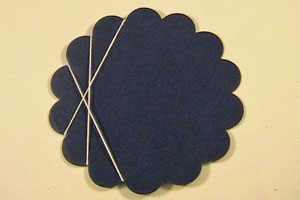
Step 1
Tape one end of the thread to the back side of the scallop.
Hint:
DO NOT cut the thread until the spirelli is complete.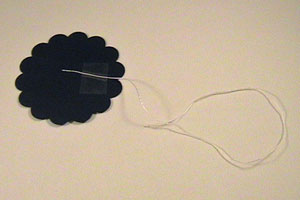
-
Step 2
Run thread from a scallop valley to another scallop valley. Skip at least 3 scallops for the “wrap.” Make sure it’s taut.
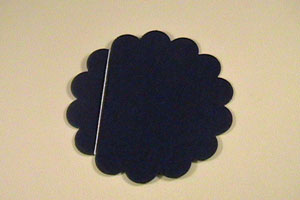
-
The back of the scallop will look like this.
-
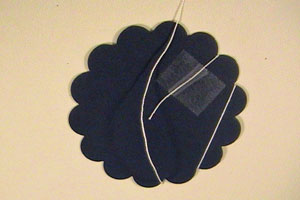
Step 3
Continue “wrapping” in one direction only, always skipping the same amount of scallops. (If you work counter clockwise, always continue in the the counter clockwise way.)
-
The back of the scallop will look like this.

-
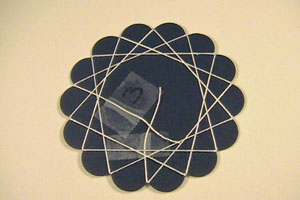
Step 4
Continue “wrapping” always moving in the same direction. You will be doubling up on each scallop valley with the thread until all valleys have 2 threads each.
Partway through the wrap, the scalloped circle will look like this.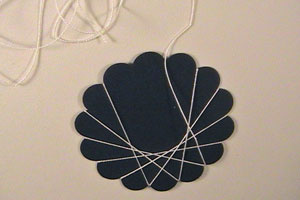
-
Step 5
Tape the thread on the back when the wrapping is finished.
Cut the thread.
-
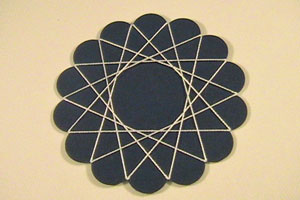
Step 6
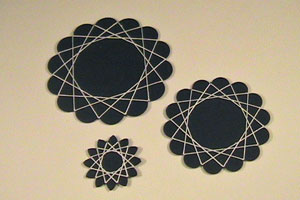
This is how the spirelli will look when completed. You should have two threads in each valley of the scallop.
-
Step 7
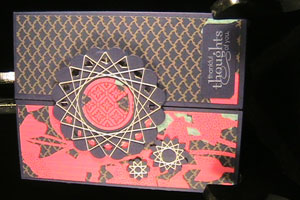
Finish your card.
Video!
Variations
-
Different scallop shapes give you a different look.
Your Turn
You've seen the tutorial, now you try it! We've got a section of the gallery set aside for Spirelli. Try this technique, then upload your artwork to the gallery. Show us your creations!
***Please note - Internet Explorer/Edge is not a supported browser, and will not allow you to see the videos. Please use Chrome, Firefox or Safari to view our tutorial videos.

Questions and Comments
We'd love to get your feedback or questions. Leave your comment below.
Thanks for the tutorial!
Thanks for the memories of that fun project and the great idea!! Happy Thanksgiving!
Awesome
Marlene
Thanks Susie for the tutorial and Beate for the video !
Here is my new card :
http://www.splitcoaststampers.com/gallery/photo/2096746?&cat=500&ppuser=205884
and an old one :
http://www.splitcoaststampers.com/gallery/photo/1155648?&cat=500&ppuser=205884
greetings from Belgium,
niki
Page 1 of 2 pages 1 2 >