Spinning Princess Pop-Up
by Cathy Andronicou
This pop-up card stands and twirls like a music box ballerina.
Supplies
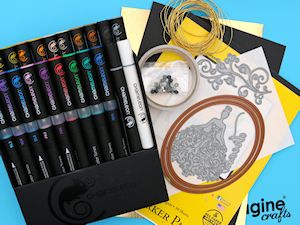
- Cardstock suitable for markers (Bee Paper used here)
- Cardstock for base and frame (black cardstock and Gold Miri Card used here)
- Shape die for base and frame (Spellbinders Grand Nesting Ovals used here)
- Die for spinner element (Tattered Lace Bella Die used here)
- Markers or other coloring medium to color die cut (used here: Chameleon Color Tone Pens, Purple Grape PR4, Crimson Red RD4, Bisque NU1, Bark BR5)
- Beads (2)
- Wire
- Hole punch
- Craft knife and ruler
- Paper trimmer
- Scoring tool
- Adhesive (Red Liner tape and Stick It used here)
- Other supplies as needed to complete the project (Penny Black Flourish and Envision Dies used here)
Step-by-Step
-
Step 1
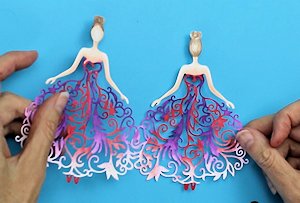
Die cut 2 identical images for the spinner element. Color the first die cut image, then repeat the coloring on the reverse side of the other die cut.
-
TIP:
Create a template from scrap dark cardstock that will hold the die cut in place for coloring. In the sample, the image was cut from black cardstock and discarded. The image to be colored was replaced into the opening. It fits like a puzzle piece, keeping the die cut in place. This is especially helpful for coloring intricate dies.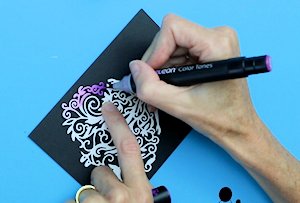
-
Step 2 (Optional)
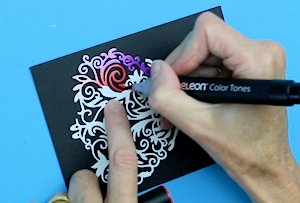
Sample is colored using Chameleon Pens. For the dress, the Purple Grape Pen was placed on the mixing chamber on the brush nib end and infused for 15 seconds. Starting at the bottom of dress, coloring was done in sections working up towards the top. The process was repeated using Crimson Red.
-
The Bisque pen (brush nib) was infused for 5 seconds to color the arms, neck and face. To add dimension, shading was added to the bottom of the arms, under the chin and around the edges of the face. The Bark pen (bullet nib) was infused for 5 seconds to color the hair using the lightest shade, adding darker strokes to give variation in hair color.

-
Step 3
Cut a strip of cardstock for the base, measuring 10" x 3 3/4".
Score at 1", 2 1/2", 3 1/2", 6 1/2", 7 1/2" and 9". Fold along each of the score lines.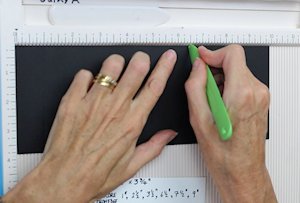
-
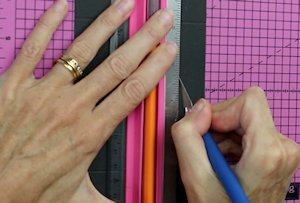
Step 4
At the center of the middle panel (5"), measure and mark in 1" from each edge. Cut a 1 3/4" slit between the points using a craft knife.
-
Add double sided tape to both ends of the base.
-
Step 5
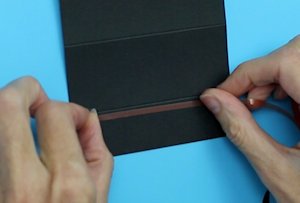
Cut a piece of sturdy cardstock to 1 3/4" x 1 5/8" and punch a hole 3/8" down (the hole needs to be large enough to allow the bead to spin freely).
-
Slide the punched piece through the slit in the base with the hole up, and fold up the ends of the black strip to adhere the card into place and form the card base.

-
Step 6
Die cut two identical frames and one solid shape. (Sample is cut using Spellbinders Grand Ovals 6 1/4" x 4 3/4" and 5 5/8" x 4 1/4").
TIP:
Align 2 nesting shape dies and secure them with tape to cut the frames. The solid shape will be cut by the inner die.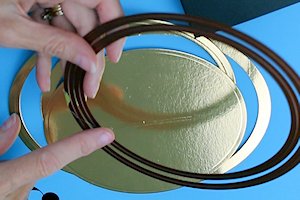
-
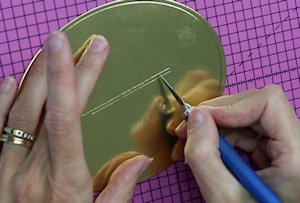
Step 7
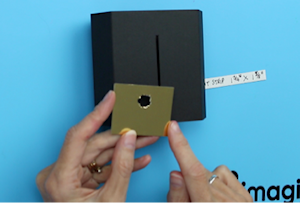
Cut a slit in the center of the solid shape that measures 1 3/4" wide.
-
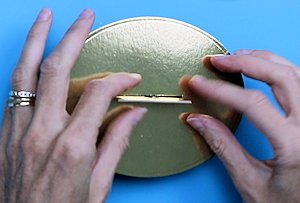
Step 8
Place the oval on top of the black base, sliding the punched strip of cardstock up through the slit.
-
Step 9
Add die cut flourishes or other embellishments to be sandwiched between the frame pieces, if desired.
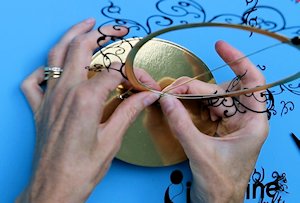
Take a piece of wire 7" long and add a bead to each end, turning the wire ends with pliers to secure. With the beads to the outside of the frame, center the wire vertically on the oval frame then glue the second oval over the top, leaving the bottom of the frame open and both ends of the wire free.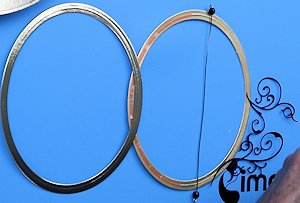
-
Attach the oval frame to the strip of gold card in the base, making sure the bead sits in the punched-out section of the strip.
-
Step 10
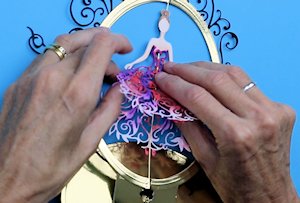
Attach the die cut images to either side of the wire, making sure both sides line up. Die cut a sentiment and attach to the base of the card to finish.
-
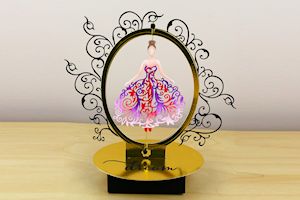
Step 11
Finish the project. Card folds flat and can be mailed in a large envelope.
Video!
Your Turn
You've seen the tutorial, now you try it! We've got a section of the gallery set aside for Spinning Princess Pop-Up. Try this technique, then upload your artwork to the gallery. Show us your creations!
***Please note - Internet Explorer/Edge is not a supported browser, and will not allow you to see the videos. Please use Chrome, Firefox or Safari to view our tutorial videos.

Questions and Comments
We'd love to get your feedback or questions. Leave your comment below.
The princess was cut from the black cardstock, and discarded. The white princess that is to be colored is placed in the opening that's left. The template holds the cut in place, which makes it easier to color all the intricate details.
Pat
Page 1 of 1 pages