Sour Cream Container

by Beate Johns

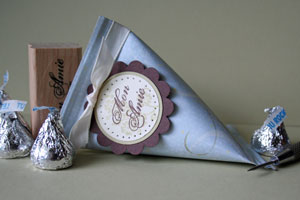
Create a unique container perfect for giving away candy or other small treats.

Supplies
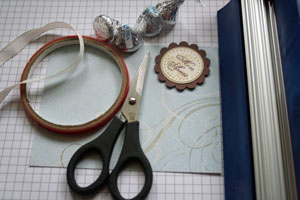
  • 4 1/4" x 5 1/2" piece of lightweight cardstock or patterned paper
  • Sticky Strip™
  • Paper Crimper
  • Embellishments
  • Candy

Step-by-Step

  1. Step 1

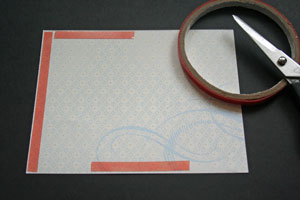
    Apply Sticky Strip™ to one of the short sides of the reverse side of the 4 1/4" x 5 1/2" piece of patterned paper.

    Apply another strip from the end of the long side until half way in.

    Apply the last piece in the middle of the other short side of the paper.
  2. Step 2

    Remove the plastic liner from the Sticky Strip™, but make sure to leave the backing on the Sticky Strip™ that is in the middle of one of the long sides.

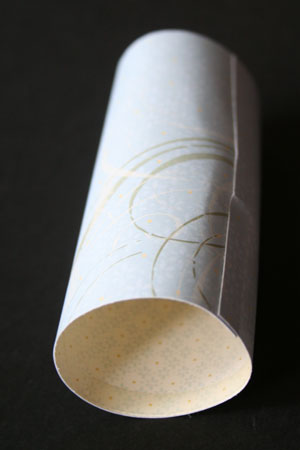
    Adhere the short ends of the paper together to form a cylinder.
  3. Step 3

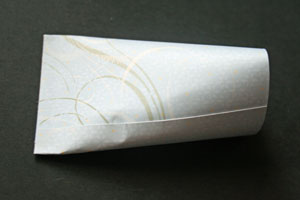
    Press the two sides with the Sticky Strip™ exposed together.
  4. Step 4

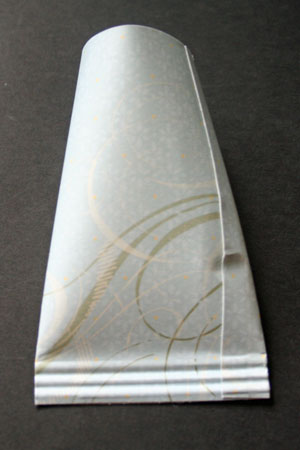
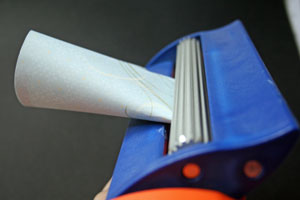
    To reinforce the adhesive, slide the taped end into your paper crimper and slowly add two or three crimped lines.
  5. Step 5

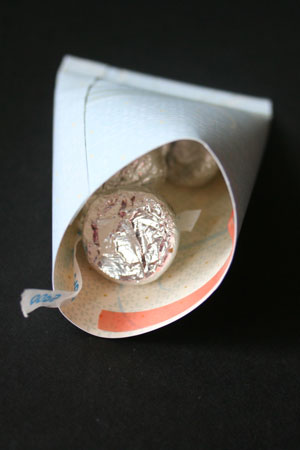
    Fill container with candy or other small treat.
  6. Step 6

    Remove the liner from the remaining Sticky Strip™, then push the sides together in the opposite direction from the other end.

    When looking at the container from the top, the two ends will form a +.
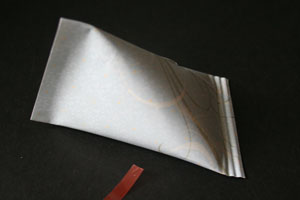
  7. Step 7

    Crimp this edge of the container.
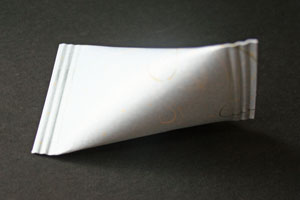
  8. Step 8

    Decorate the container.

Video!

Variations

  1. Crystal Clear
    Use Vellum or acetate to make a see through container. When using acetate, reinforce the short ends with brads or eyelets.
    (After 1 1/2 weeks my Sticky Strip™ taped box that is shown here opened up).

    Resize it
    -Try making the container in a different size. If you need a bigger version, try out a 5 1/2" x 8 1/2" sheet of paper.
    -Is it not quite small enough? Use a 4 1/4" x 2 3/4" piece of paper to make a tiny treat holder.
    -Make it longer! Try taping the long side together first to make your container long and skinny.
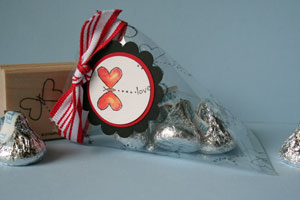
Your Turn

You've seen the tutorial, now you try it! We've got a section of the gallery set aside for Sour Cream Container. Try this technique, then upload your artwork to the gallery. Show us your creations!

***Please note - Internet Explorer/Edge is not a supported browser, and will not allow you to see the videos. Please use Chrome, Firefox or Safari to view our tutorial videos.

Questions and Comments

We'd love to get your feedback or questions. Leave your comment below.

Am starting to get back into the swing of things.... but think I will enjoy SCS more this time around.

Although I wish there was a general search feature and when printing off photos of a card, when hitting the print view, it would be great to include the recipe. Or maybe I just haven't messed with my printer settings enough, LOL.

Thanks
Micki Harper  |  Tue Jan 15, 2008 at 5:24 PM
Great reminder about this cool little project! I think it's time to revisit it!
amysings  |  Wed Jan 30, 2008 at 9:20 AM
Beate your tutorials rock! I so look forward to Wed. to see what you and the girls come up with. It's my favorite day!
maryjo2  |  Wed Jan 30, 2008 at 10:51 AM
This looks great! Love the use of the crimper. I never would have thought of that. Ahhhh.....what is the "sour cream" container part? My sour cream comes in a container. Have I missed something?
Sally
Ribbongrass  |  Wed Jan 30, 2008 at 11:37 AM
What a great way to gift out Valentines gifts!
Ginger  |  Wed Jan 30, 2008 at 11:38 AM
This is THE cutest! Off to see if I have any goodies to put inside! smile Thanks Beate
Tamara  |  Wed Jan 30, 2008 at 11:42 AM
Sally-it is the type of individual serving sour cream container you get when you buy fast food--like a baked potato from Wendy's. smile

And a great use of all that patterned paper lying around, I might add. Thanks!
Debora  |  Wed Jan 30, 2008 at 11:49 AM
Thank you so much! It is cold and dreary and I am housebound. What a charming project and so quick and easy to put together. Thank you for the spirit lifter!
Ann  |  Wed Jan 30, 2008 at 11:59 AM
These are adorable! I thought it was an actual plastic sour cream container. This so much better! Can't wait to try them out!
Kathy-p  |  Wed Jan 30, 2008 at 12:19 PM
Great tutorial and so adaptable,it gets the creative juices going. I will be able to use up all the odd pieces of paper that I have been hoarding.
barbara hickson  |  Wed Jan 30, 2008 at 12:39 PM
Thank you for the tutorial. I have made these and what I love is I can make them from my scraps. They are quick and easy to make. The recipients always admire them in awe. You can change the dimensions to make them the size you want. I made them small and only needed 2-3 kisses each. So for making for a crowd, it was always economical. I first learned them from SCS so thank you.
Lisa lara  |  Wed Jan 30, 2008 at 2:07 PM
I made zillions of these for my daughter's wedding, filled with hugs and kisses. So cute!
Karin  |  Wed Jan 30, 2008 at 2:52 PM
awesome project can't wait to try.
barbara  |  Wed Jan 30, 2008 at 3:08 PM
I've always wanted to try this...Thanks!
Catherine M  |  Wed Jan 30, 2008 at 3:37 PM
Thank you. My son is getting married this gives us another idea for favors. Did you use the forever together stamp set. This project has nice clean lines colors.
Suzanne Burkey  |  Wed Jan 30, 2008 at 3:39 PM
I feel so stupid, when I read the article in the Weekly Inking I thought we were altering sour cream containers and for the life of me couldn't figure out where that shaped could be purchased. I knew I had never seen sour cream in those kind of containers in local grocery stores, so I thought it was a regional thing. Thank goodness we are to MAKE the containers and that I read the full tutorial!
McFadden  |  Wed Jan 30, 2008 at 4:37 PM
Felicitations, c'est super beau.......
Nadeau  |  Wed Jan 30, 2008 at 6:57 PM
This looks great and so easy! Would one be able to do this project without the paper crimper? Thanks to anyone who can answer!
Oakville Mom  |  Wed Jan 30, 2008 at 9:02 PM
Thanks so very much for the information on the instructions of the sour cream container wrapper; it's a very cute idea and I appreaciate being able to have such wonderful and clear instructions on making this project. I love all your information that you share with us stampers. Thanks a million!
Brenda Gamble  |  Wed Jan 30, 2008 at 11:06 PM
I apologize if this has been asked ... Is it possible to make this without a paper crimper?? I don't have one and I want to make these!! smile Thanks!
Patti  |  Thu Jan 31, 2008 at 3:25 AM

Page 1 of 4 pages  1 2 3 >  Last »

You need to be logged in to comment

GET OUR NEWSLETTER


Splitcoaststampers's privacy policy