Soot Stamping
by Beate Johns
This is a technique to bring out the inner kid in you. Playing with fire, who doesn't like that? LOL...Use your candle to make an incredible background.

Step-by-Step
-
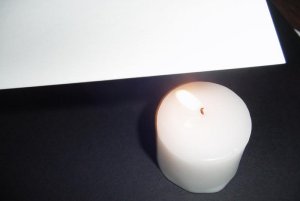
Step 1
Take your glossy piece of cardstock and hold it glossy side down over the candle. The flame has to touch the cardstock. Move cardstock around quickly.
WARNING: edges catch on fire easily.
-
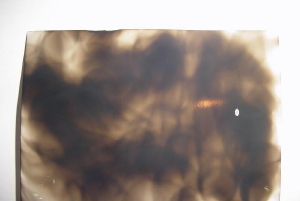
Continue to move the cardstock over the flame until your cardstock is covered.
-
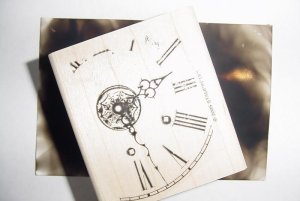
Step 2
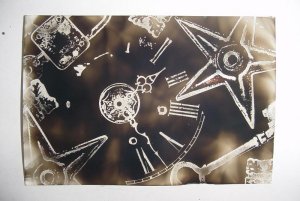
Take a stamp and press it on to your soot-covered cardstock.
-
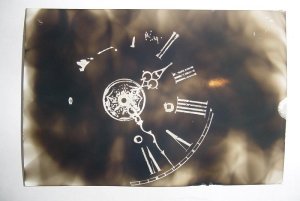
Lift stamp up to reveal your image. The stamp will take away the soot.
-
Step 3
Continue to stamp images if needed.
WARNING: Don't touch the front of your soot cardstock or it will show finger prints.
-
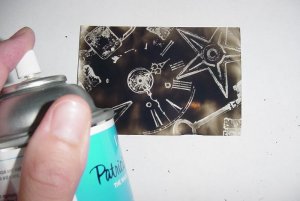
Step 4
Spray your image with acrylic sealer.
-
Step 5
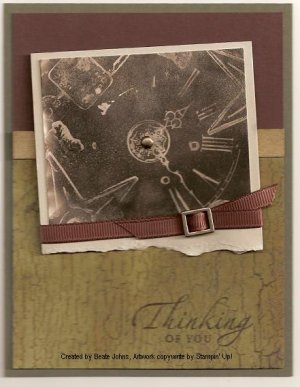
Finish your card.
Your Turn
You've seen the tutorial, now you try it! We've got a section of the gallery set aside for Soot Stamping. Try this technique, then upload your artwork to the gallery. Show us your creations!
***Please note - Internet Explorer/Edge is not a supported browser, and will not allow you to see the videos. Please use Chrome, Firefox or Safari to view our tutorial videos.
Questions and Comments
We'd love to get your feedback or questions. Leave your comment below.
I´m going to check out your gallery now!
I could not find this card in the gallery so I could find the stamp set you used. This technique is so well suited for vintage layouts. Love it! Thanks.
Hugs and smiles
Do you like it?
http://www.stamperspad.com/home/2008/10/direct-to-paper-inking-and-halloween-soot-stamping.html
We have a a tutorial for Colored Soot Stamping right here in the resource section.
Hugs and smiles
You can press your stamp directly on your soot. No Versamark needed.
Page 1 of 1 pages