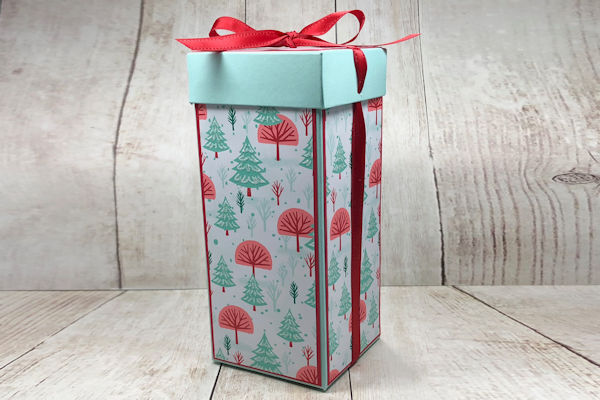
Scoreboard Gift Box
by Mary Deatherage
Make a custom gift box using scored cardstock.
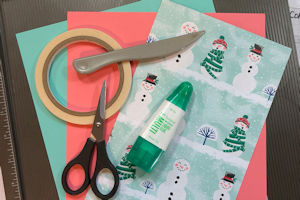
Supplies
- Cardstock in base color - 12” x H” (size required is dependent on desired finished height: height of gift + 2 3/4”)
- Coordinating cardstock for box top (6” square) and bottom (2 3/4” square)
- Cardstock and patterned paper for layering on sides
- Scoring tool
- Bone folder
- Double sided adhesive
- Liquid glue
- Small hole punch (Stampin’ Up!® Detailed Trio Punch used here)
- Ribbon, about 30” to wrap around box and tie bow on top
- Scissors
- Other supplies as needed to complete the project
Step-by-Step
-
Step 1
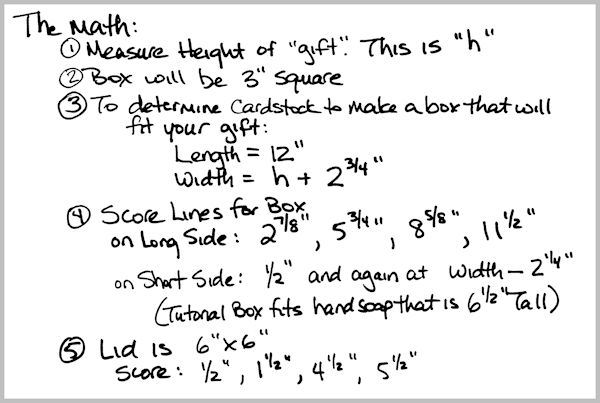
Determine the finished size of box desired. For all box sizes, the length of cardstock needed is 12”. To get the width, take the height of the item you want to put in the box and add 2 3/4”.
The base for the tutorial box sample has a height of 9 1/2” and will hold a 6 1/2” tall bottle of hand soap. -
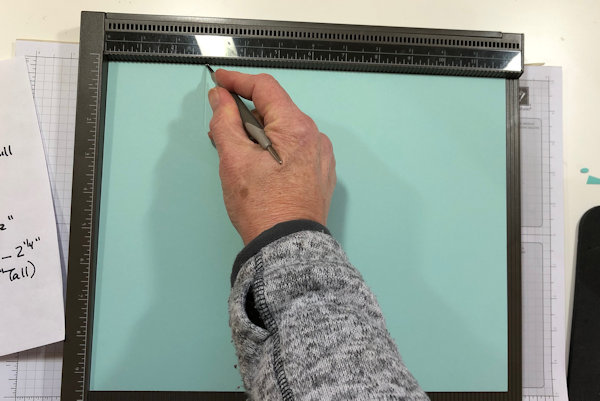
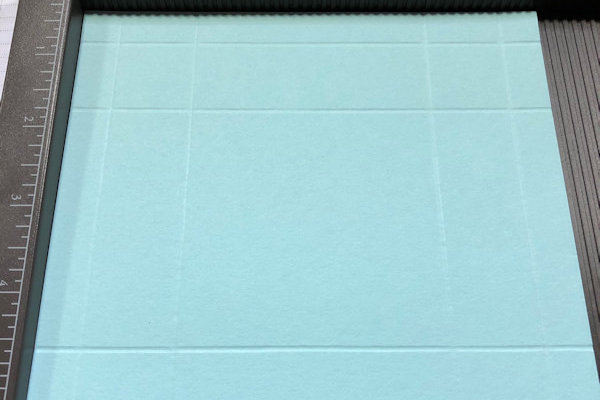
Step 2
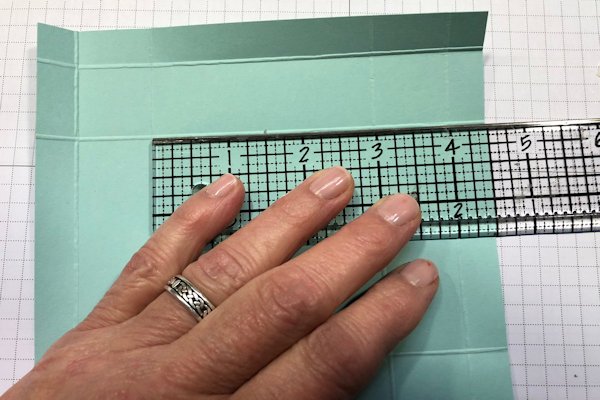
Place the cardstock in the corner of your score board with the 12” side across the top. Score the cardstock at 2 7/8”, 5 3/4”, 8 5/8” and 11 1/2”.
-
Step 3
Rotate the cardstock 90 degrees, placing the short side across the top. Score the cardstock at 1/2” from the left, and at 2 1/4" from the right. For this box, that is at 7 1/4”.
-
Step 4
Place the 6” x 6” piece of cardstock on the scoreboard and score at 1/2”, 1 1/2”, 4 1/2” and 5 1/2”.
Rotate the cardstock 90 degrees and score again at 1/2”, 1 1/2”, 4 1/2” and 5 1/2”.
Fold and burnish with a bone folder each of the score lines on both pieces of cardstock. -
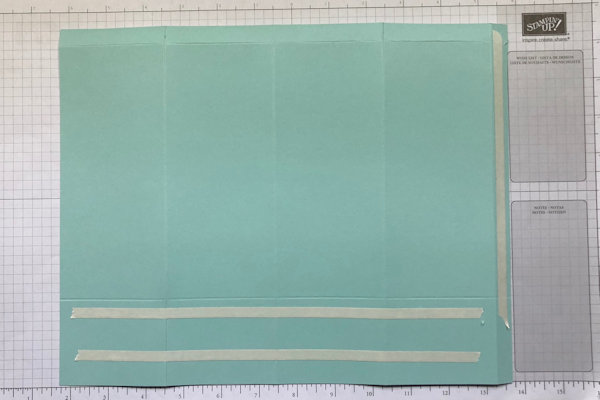
Step 5
On the larger piece of cardstock, put double-sided adhesive on the 1/2” fold running along the short side of the cardstock. Place the adhesive as close to the fold as possible.
Across the long side – on the short panels – place two strips of adhesive. -
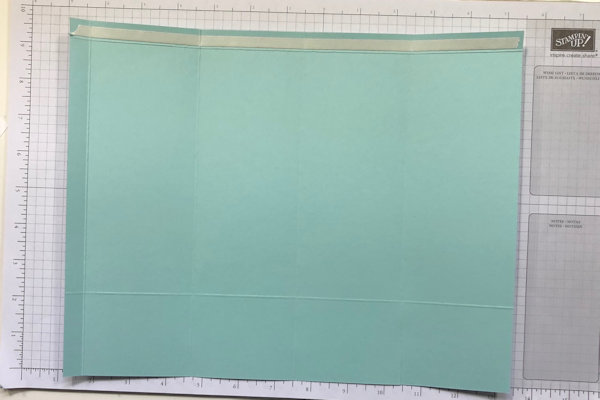
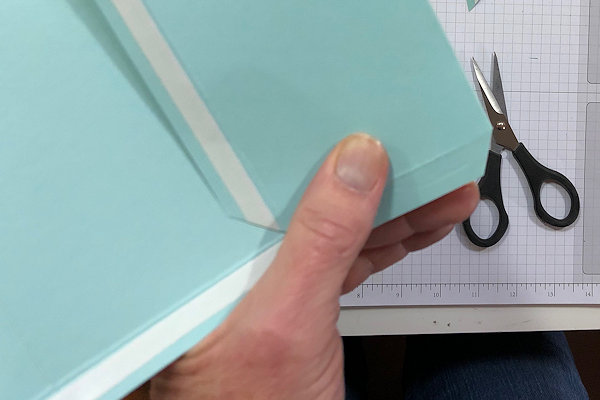
Flip the cardstock over and place tape on the 1/2” fold on the long side of the cardstock.
-
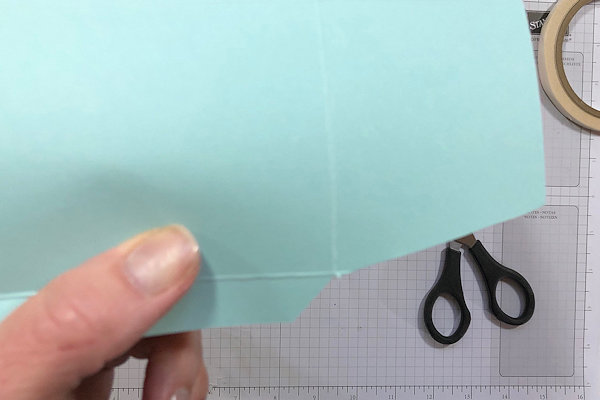
Step 6
With paper scissors, begin creating tabs. Cut across the corner where the two 1/2” score lines come together.
-
Cut a tab in the opposite end, at slight angles out from the intersection of scored lines.
-
Step 7
Fold at the first long score line and cut a notch in the bottom (you will be cutting through two layers at once).
Fold at the remaining two long score lines and repeat this cut.
On the last square – make a cut to create the other side of the tab.
Repeat the same notching process on the other long side – with the 1/2” fold. -
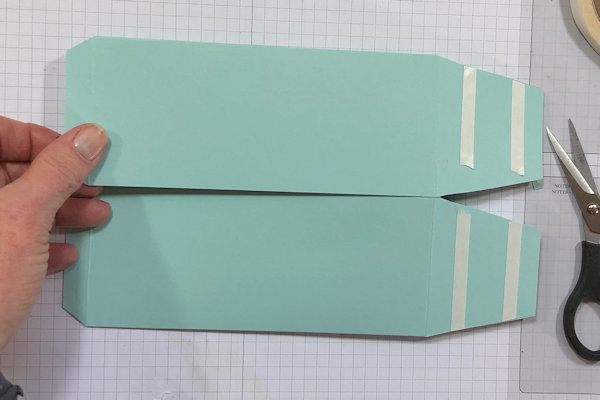
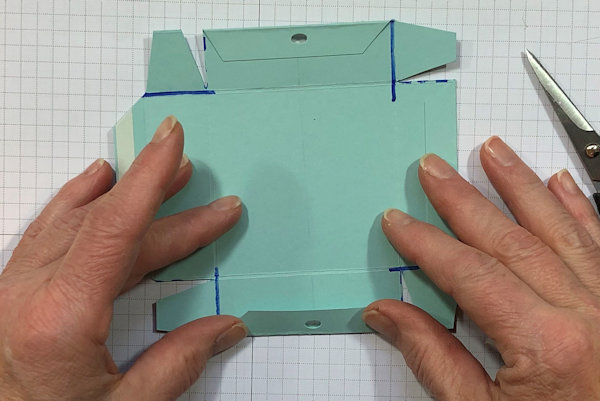
Step 8
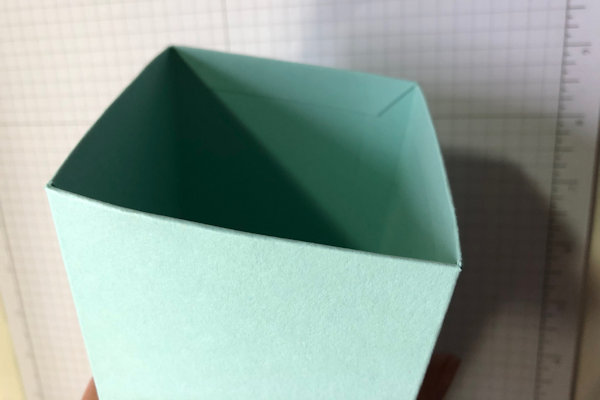
Once the tab cuts are completed, the box should look like this.
-
Step 9
Turn the cardstock so that the adhesive on the long-side 1/2” fold is visible. Fold the panel with the short-side 1/2” fold in at the first score line. Remove the adhesive liner on the 1/2” fold.
-
Fold the cardstock in to bring the opposite short-side over the exposed adhesive. Line that edge up with the score line carefully, then lightly burnish to ensure a good adhesion.
-
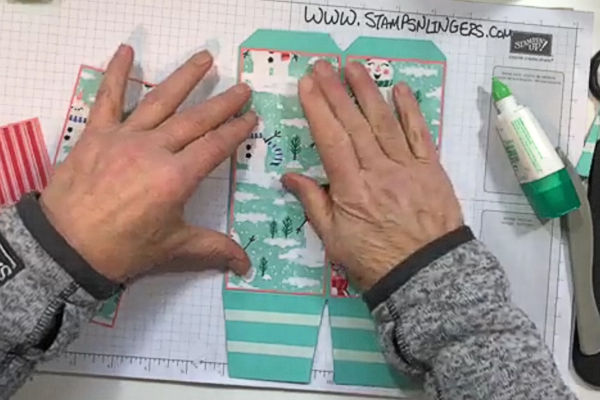
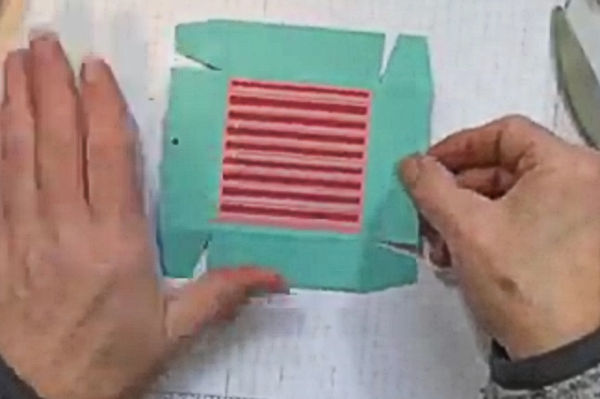
Step 10
Prepare the layering panels and adhere them to the box sides.
For the sample, the layering panels are 2 3/4" x 6 5/8" and 2 5/8" x 6-1/2" (four of each). -
Step 11
Open the box and fold in the bottom flaps one at a time. Remove the cover from the adhesive strips on each panel as you fold them in. Be sure to “square” up the box as you fold it.
-
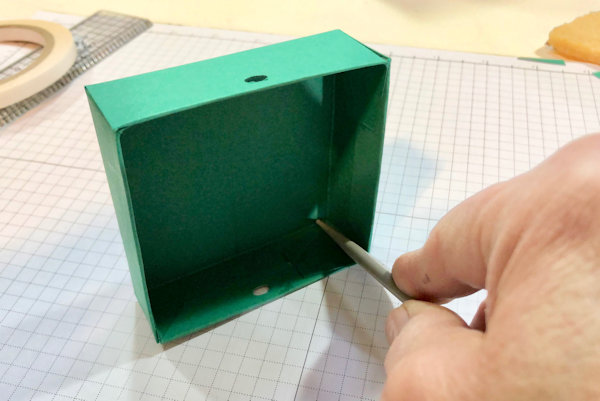
Step 12
Generously cover the bottom of the box with liquid glue, and place the 2 3/4” square of same-color cardstock on the bottom of the box. Place the box down on the table and reach inside to press down on the bottom and ensure a good adhesion.
-
Step 13
Removed the cover from the adhesive on the top 1/2” strips and fold them inside the box. Burnish each strip.
-
Step 14
To make the box lid, fold and burnish all the score lines on the 6” x 6” cardstock square.
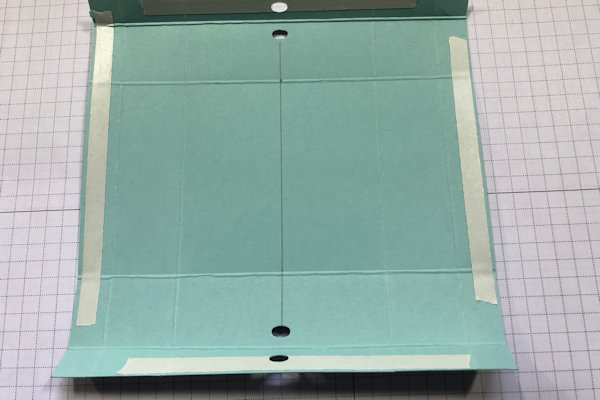
Mark the center (1 1/2”) of the inner score line on two opposite sides of the box. -
Use a pencil to draw a line between the 2 marks.
Lay adhesive tape on the small flaps all the way around. -
Step 15
Fold the flaps in on the two sides that the pencil line “points” to. Punch a ribbon hole through both layers. Repeat on the opposite side. Erase the pencil line.
-
Step 16
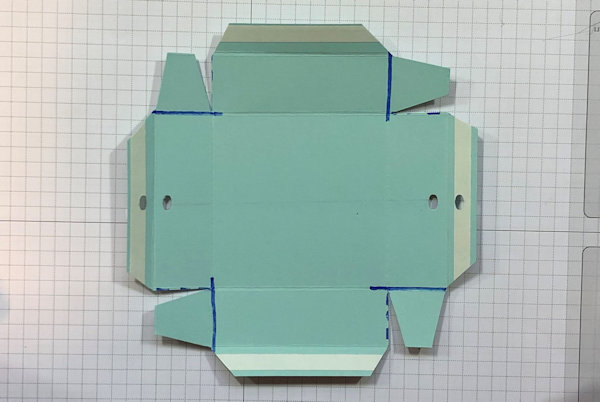
Create corner tabs by cutting at each corner as shown.
On the first and second score line in on the bottom right-corner, use scissors to cut from the edge of the cardstock up to the intersection of the second score-line. Rotate 90 degrees clockwise and repeat. Do that until all four corners are cut. Remove the small tab at the corner – snip on a diagonal from the edge of the cardstock into the cut you already made. Rotate and repeat on all four corners. Notch each corner tab. Snip the small tab at the end of each corner. Notch the remaining corner of each long tab (the ones with the adhesive on them). -
Step 17
Remove the covers from the adhesive and fold each flap in. Burnish lightly.
-
Step 18
Prepare the layering panels and adhere them to the box top.
For the sample, the layering panels are 2 3/4" x 2 3/4"" and 2 5/8" x 2 5/8" (one of each). -
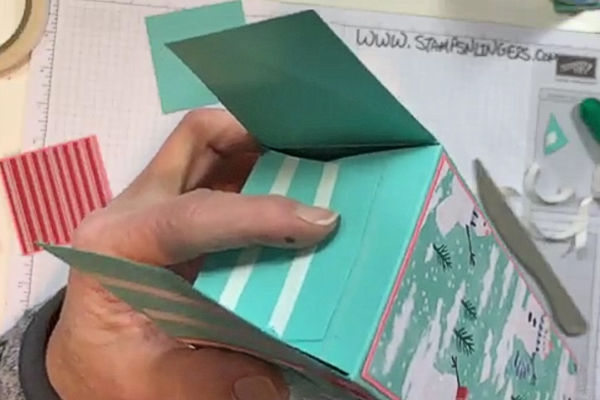
Step 19
Place a small piece of tape adhesive on each of the tabs. Remove the cover and add liquid glue, making sure to get some glue near the score lines.
Fold the sides up – tucking the tabs on the inside. Once all four corners are up, burnish the insides to insure a good adhesion. -
Step 20
Thread the ribbon from the inside out through the hole in the edge of the lid. Using the other end, thread from the inside out through the opposite hole.
-
Step 21
Place gift in box.
Place the lid on the box and loop the ribbon down around the bottom of the box. Tie a decorative bow and add a tag as desired to complete the project.


Video!
Your Turn
You've seen the tutorial, now you try it! We've got a section of the gallery set aside for Scoreboard Gift Box. Try this technique, then upload your artwork to the gallery. Show us your creations!
***Please note - Internet Explorer/Edge is not a supported browser, and will not allow you to see the videos. Please use Chrome, Firefox or Safari to view our tutorial videos.

Questions and Comments
We'd love to get your feedback or questions. Leave your comment below.
Page 1 of 1 pages