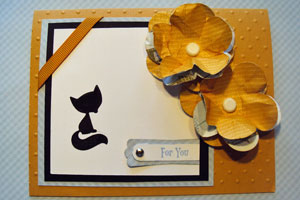
Scherenschnitte (Scissor Cut) Stamping

by Melanie Schulenberg

Recreate the famous Scherenschnitte silhouette technique using rubberstamping supplies.

Supplies

  • Stamps, Stampin' Up!'s Forest Friends used here

  • Versamark™, or other embossing ink

  • Clear Embossing Powder

  • Heat Embossing Tool

  • Black and light colored cardstock

  • Scissors

  • Adhesive

  • Border Punch

  • Die Cut Templates

Step-by-Step

  1. Step 1

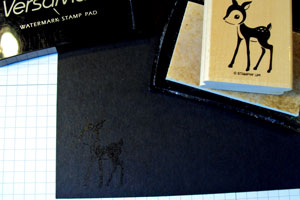
    Stamp your desired image with Versamark™ ink on to a scrap sheet of black cardstock.
  2. Step 2

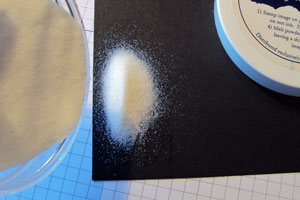
    Sprinkle clear embossing powder over image.
  3. Step 3

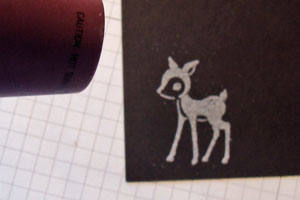
    Tap off excess embossing powder and heat set with your embossing tool.
  4. Step 4

    Remove extra cardstock so you have only your embossed image. Cut out your image.

    Hint:
    For detailed areas (like the legs of this fawn), trim the inner most cardstock first before removing the outer area. This will allow extra support for holding your image while trimming.
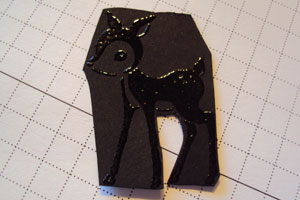
  5. Step 5

    Apply glue to the ‘glossy’ side of your heat-embossed image (the embossed side will be faced down on your card front).
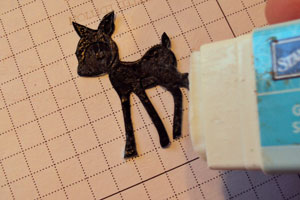
  6. Step 6

    Adhere image to a neutral colored card front.
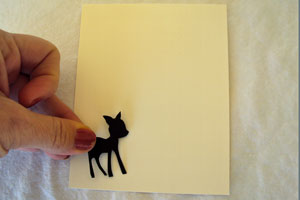
  7. Step 7

    Finish your card front by adding more stamped, punched or die cut images if neccessary.
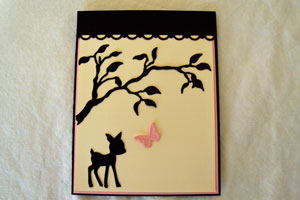
Video!

Variations

  1. Scherenschnitte stamping on neutral cardstock
    Stamp your image in black ink on neutral cardstock. Color in your image with black marker.
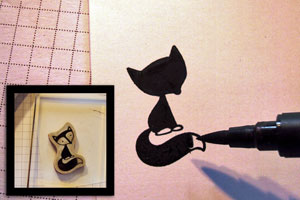
  2. Finish your project.

Your Turn

You've seen the tutorial, now you try it! We've got a section of the gallery set aside for Scherenschnitte (Scissor Cut) Stamping. Try this technique, then upload your artwork to the gallery. Show us your creations!

***Please note - Internet Explorer/Edge is not a supported browser, and will not allow you to see the videos. Please use Chrome, Firefox or Safari to view our tutorial videos.

Questions and Comments

We'd love to get your feedback or questions. Leave your comment below.

Great tutorial, Melanie! (Loved your accent on the video!)
BevMom  |  Tue Feb 16, 2010 at 11:25 PM
I'm not sure why the embossing is done and then used as the back of the image. Is it done to make the image stronger or easier to cut?
Marilyn Buell  |  Tue Feb 16, 2010 at 11:33 PM
Very beautiful card, will try it soon.
Mary  |  Tue Feb 16, 2010 at 11:35 PM
I think this is very striking. It is so unusual, i really like it. I have been in need of a reason to buy those forest friends, now I have one.
THanks a bunch.
Lacey  |  Tue Feb 16, 2010 at 11:54 PM
Marilyn - I think the clear embossing is done on the black cardstock so that you can cut out your image.
ANTHEA HILL  |  Tue Feb 16, 2010 at 11:56 PM
I'm all for simplicity...so...if you're going to flip the image over, why bother with the embossing? Why not just use an ink you can see?
dini  |  Wed Feb 17, 2010 at 12:07 AM
Great tutorial. Love the idea but i don't understand why you would emboss it and then turn it over.
Brooke Bassett  |  Wed Feb 17, 2010 at 12:17 AM
I've always admired Scherenschnitte, but it is so detailed to cut out-- I thought. This is a good idea for the technique of Scherenschnitte. I'm guessing the embossing adds stability to your image, plus a3D/pop-up effect that the black Scherenschnitte silhouette would need.
Donna  |  Wed Feb 17, 2010 at 12:43 AM
WOW I LOVE THIS!!

So simple and dramatic! I'm going to try this today!!

Plus, I'm going to make up a nonsense word when I try to pronounce it! smile

Thanks so much!
Lydia Fiedler  |  Wed Feb 17, 2010 at 5:10 AM
AWESOME JOB. Thank you so much for the idea. I use to Scherenschnitte all the time. It has been years but loved it, what a way to bring it back. I live the idea of using the big shot to help with the fine details. The embossing is probably not necessary but I LOVE the idea of to give the card stock stability and I will be doing it. I have torn so many little pieces in the past. Thank you so much sharing
Nikki Oaks  |  Wed Feb 17, 2010 at 6:20 AM
This is an awesome tutorial. i am sure to try thid one soon. Thanks so much! pam b
Pam B  |  Wed Feb 17, 2010 at 7:30 AM
Great idea, Melanie! I really loved the little "spring birds" chirping in the video! We're up to our eyeballs in snow here in east central Ohio! This has inspired me to "think spring" and go stamp! Thanks!
Bee Lehner  |  Wed Feb 17, 2010 at 7:51 AM
Wouldn't it work the same if you used craft ink and let it dry? I really love this technique - thank you for sharing it!
Alesha Walls  |  Wed Feb 17, 2010 at 7:54 AM
I guess this method is meant to bring back a vintage craft. In this age of technology, I like the idea of using a die cut to achieve the same result. Just still, don't understand why the embossing. Can't see why it would make the cutting more stable.

In any case, I like the color combination used on the card.

Patti
Patti  |  Wed Feb 17, 2010 at 7:56 AM
If you use the craft in it the cutout won't glue to the paper as well.. When you emboss it it will be easier to cut around (because you can easily see the image) and it will glue down without problems
Katie  |  Wed Feb 17, 2010 at 8:21 AM
^ *craft ink i meant (not craft in) :D oops!
Katie  |  Wed Feb 17, 2010 at 8:22 AM
Beautiful card! TFS!

Where can I purchase the grey butterfly embosslits die? I checked SU and Ebay and could not find it. Who makes it and what is the code?

xoxo,
Lori
Lori  |  Wed Feb 17, 2010 at 9:41 AM
Thank you so much for the wonderful tutorial and awesome new technique!
Elena  |  Wed Feb 17, 2010 at 9:51 AM
Nice work. Question....Where ever did you get that bigger container of embossing powder? LOVE it! It looked like a SU! label. Am I wrong? That is so nice and easy to dump the powder back into!!!
TIA!
Ruth Schow  |  Wed Feb 17, 2010 at 10:04 AM
Lori,
The butterfly embosslits die is new to SU in the Occasions Mini. The catalog number is 118138 and here's link from the SU customer website: http://www.stampinup.com/ECWeb/ProductDetails.aspx?productID=118138
It's pretty cool! smile

Sarah
Sarah  |  Wed Feb 17, 2010 at 11:01 AM

Page 1 of 3 pages  1 2 3 >

You need to be logged in to comment

GET OUR NEWSLETTER


Splitcoaststampers's privacy policy