Scallop Envelope Box

by Jane Matsumoto

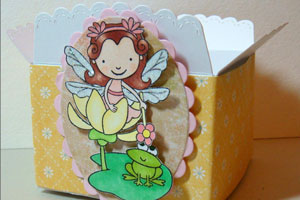
Create a darling box with four scallop edge envelopes.

Supplies

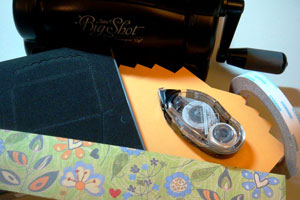
  • Four 5" x 5 1/2" pieces of cardstock or patterned paper
  • One 2 3/16" x 12" strip of patterned paper
  • Scallop Envelope Bigz Die (Stampin’ Up®)
  • Big Shot™, or other die cut machine
  • Adhesive
  • Stamps
  • Ink
  • Additional cardstock or patterned paper

Step-by-Step

  1. Step 1

    Cut your four 5" x 5 1/2" pieces of cardstock with the Bigz Scallop Envelope Die and Big Shot.
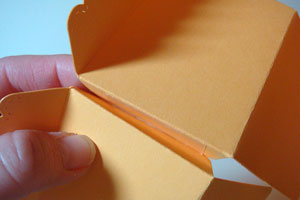
  2. Step 2

    Crease all scored lines.

  3. Step 3

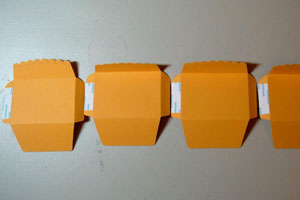
    Add Scor-Tape™ along one of the side tabs of each die cut.

  4. Step 4

    Adhere one die cut to the next.

  5. Lay the project flat.

    Hint:
    You can adhere the inside tabs to the panels, but this may make creasing the box after the next step more difficult.
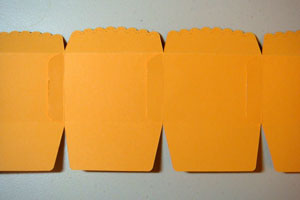
  6. Step 5

    Adhere the patterned paper to the die cut strip.

    Start on one end, approximately 1 1/4” from the edge (creasing as you go). You will have 1 1/4” of the patterned paper sticking out past the other end.

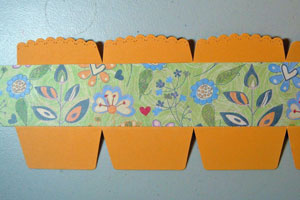
  7. Put the last two tabs together and then adhere the rest of the patterned paper.

    Variation:
    After putting the box together, start adhering patterned paper on one end and wrap all the way around (creasing as you go). Finish on the same panel you started with, but expect a small gap. The 12” of patterned paper will not cover the entire front.
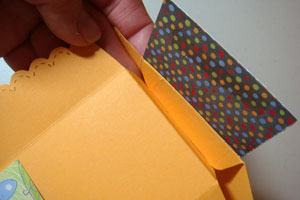
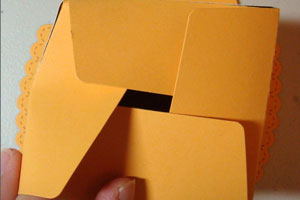
  8. Step 6

    Tuck the bottom flaps (not scalloped) over each other and tuck the bottom edge of the last flap into the box.

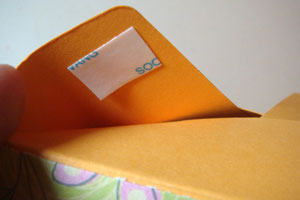
  9. Lift each flap and adhere using either double-sided tape or glue dots.

  10. Step 7

    Decorate the front as desired.

Video!

Your Turn

You've seen the tutorial, now you try it! We've got a section of the gallery set aside for Scallop Envelope Box. Try this technique, then upload your artwork to the gallery. Show us your creations!

***Please note - Internet Explorer/Edge is not a supported browser, and will not allow you to see the videos. Please use Chrome, Firefox or Safari to view our tutorial videos.

Questions and Comments

We'd love to get your feedback or questions. Leave your comment below.

Wow! This is so great. I can't wait to try it. What an awesome use for the Scallop Envelope Bigz Die! Thanks for the tutorial Jane. smile
Brenda  |  Wed Mar 17, 2010 at 6:01 AM
How creative and adorable. I love that stamp too. Whose is it?
Jil  |  Wed Mar 17, 2010 at 6:15 AM
From one Jane to another, what a wonderful video! You did a great job.
Jane Harrah  |  Wed Mar 17, 2010 at 6:41 AM
Jane, Thank you for the tutorial, it was very easy to understand. I made the box immediately because I wanted to know the finished size, 3 1/4 x 3 1/4. What a great idea for a single Easter egg. Peggy
Peggy  |  Wed Mar 17, 2010 at 6:50 AM
I found a way to not have the two inside tabs from sticking out and did not have a problem with the paper crease. You cut off one of the side tabs always on the same side. Next glue the remaining tab to the next envelope on the side without a tab. I have photos here. http://tarheelstamper.blogspot.com/2010/01/stampin-up-scallop-envelope-bigz-die.html
Tammy Howell  |  Wed Mar 17, 2010 at 6:50 AM
can this die be used in the cuttlebug?? great tutorial and such a cute idea.
lori  |  Wed Mar 17, 2010 at 6:55 AM
Great tutorial Jane!! LOVE it!!!
Jana  |  Wed Mar 17, 2010 at 8:57 AM
Awesome job on your tutorial Jane!! That is such a pretty box. I love how you coloured Lily and her froggy friend!
Hugs,
Melissa
Melissa Rodger  |  Wed Mar 17, 2010 at 9:08 AM
Thanks for the tutorial! It's always fun to get new ideas with the die cuts-especially one as cute and useful as this one!
Andrea Brewster  |  Wed Mar 17, 2010 at 9:16 AM
To avoid cuts in scored lines when cutting multiples with the Big Shot, use a Standard Premium Crease Pad. It is worth it!
ellen crowfoot  |  Wed Mar 17, 2010 at 9:33 AM
Lori: I saw your question on whether this die could be used in the Cuttlebug -- yes, it can. You put a B plate down, then the scallop envelope die (cutting blades/foam side up) card stock, and another B plate. In lieu of the second (top) B plate, and in order to cut multiple pieces of card stock in one pass, you can use the crease pad as Ellen pointed out or, if you have the tan embossing mat for use with Spellbinders dies, you can use that. If using the crease pad or tan embossing mat with your Cuttlebug, you may need to add a bit of scrap card stock or chipboard as a shim. I hope that helps!
Carol  |  Wed Mar 17, 2010 at 9:54 AM
AWESOME tutorial for such a cute project!!!
Irina  |  Wed Mar 17, 2010 at 10:41 AM
Wonderful tutorial!

Like Jil in comment #2, the stamp is TOO CUTE. Could you pls share the stamp info?
Connie  |  Wed Mar 17, 2010 at 10:54 AM
Great tutorial. I love making boxes. Thank you for the tutorial.
Nanny Barbara  |  Wed Mar 17, 2010 at 11:16 AM
What a great box Jane and congrats on your first video, it turned out great! Can't wait to try this adorable box.
Carolina Buchting  |  Wed Mar 17, 2010 at 11:41 AM
Awesome! This is so cute! TFS!
dawnsview  |  Wed Mar 17, 2010 at 12:40 PM
Great tutorial. This is a great way to extend the creativity and usefulness of the die. This tutorial reminds us to think outside the box. It gives me ideas and I will be using it to make this and maybe I'll come up with something new as well. So interesting!
luvglitztoo  |  Wed Mar 17, 2010 at 1:34 PM
For those asking about the stamp it looks like one of the characters from the British company Lili of the Valley.
they have some lovely images!
Kathleen x
KATHLEEN MC  |  Wed Mar 17, 2010 at 3:23 PM
Any chance of getting a PDF or jpeg of template as dies are harder to come by in Australia, please.
Love the box and great tutorial.
Cheers Vicki
Vicki  |  Wed Mar 17, 2010 at 3:48 PM
Hi everyone! For those interested in learning more about the stamp that I used, it's LILY from Pink Cat Studios.
http://www.pinkcatstudio.com/

This image is part of the Enchanted Lily set.
Jane Matsumoto  |  Wed Mar 17, 2010 at 4:19 PM

Page 1 of 2 pages  1 2 >

You need to be logged in to comment

GET OUR NEWSLETTER


Splitcoaststampers's privacy policy