Santa’s Drawers
by Brenda Quintana
Create a darling box with multiple drawers.
Supplies
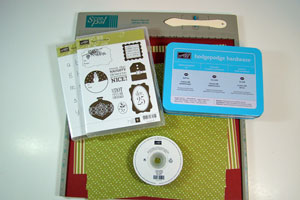
- Scor-Pal™, or other scoring tool
- One 12" x 12" piece of cardstock, for drawer base
- One 8" x 8" piece of cardstock, for drawer shelf
- Two 9 3/8" x 9 3/8" pieces of cardstock, for square drawers
- One 11-3/8" x 9-3/8" piece of cardstock, for rectangular drawer
- Embellishments
- Additional cardstock, stamps and ink to decorate
Step-by-Step
-
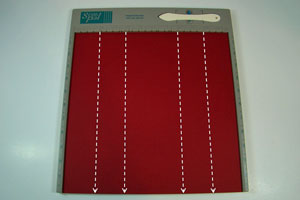
Step 1
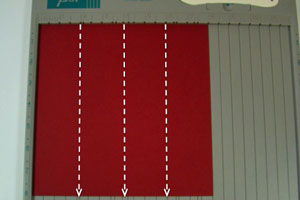
Score your 12" x 12" piece of cardstock at 2", 4", 8" and 10".
-
Step 2
Turn the Card Stock 1/4 turn and score at 2", 4", 8" and 10".
At the 6" mark, score two inches down from the top edge of the cardstock. On the opposite end of the cardstock, score two inches up along the 6" score line (see photo).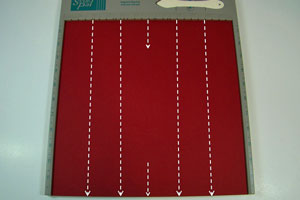
-
Step 3
Cut away the corner squares and the two adjacent squares on all four corners of the drawer base. You will be cutting away three squares from each corner.
Next, cut along the score lines where indicated by the bold white lines - making four cuts total.
Cut a 1/8" slot along the two score lines that you made at the six-inch score mark indicated by the bold yellow lines - making two cuts total.
Optional:
Cut away about a 1/8" strip of card stock from the areas indicated by the blue bold lines (4 places). This step will help your base fold together more easily. Set aside.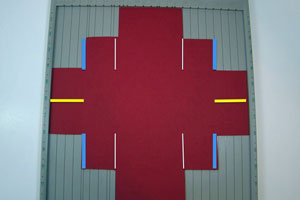
-
Step 4
Score your 8" x 8" piece of cardstock at 2", 4" and 6".
-
Step 5
Turn the cardstock 1/4 turn and score at 2" and 6".

-
Step 6
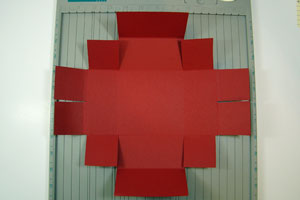
Cut away the four corner squares of the drawer shelf.
At the 4" score mark, cut a 1/8" slot two inches in, on both sides of the card stock indicated by the bold yellow lines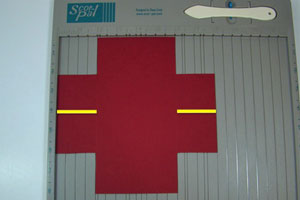
-
Step 7
Making sure the front side of the drawer shelf piece is facing up, fold along the score lines as shown. Set aside.
-
Step 8
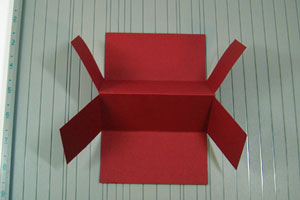
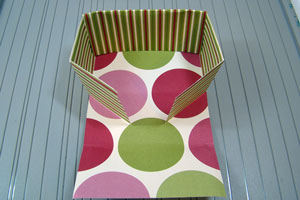
Take the drawer base piece and put it on the table in front of you, with the front side facing down. Fold inward along all the score lines.
-
Step 9
IMPORTANT:
All parts of this project (drawer base, drawer shelf and drawers) can be assembled without adhesive. I recommend not using adhesive the first time you put them together. Once you know how to assemble the project, you may go back and add a little adhesive so that every piece lies flat. For the sake of clarity, I will use the positions of the compass to refer to pieces that will be folded and tucked in. Make sure that you have the drawer base positioned the same way as it was in Step 8.
Start assembling the drawer base by folding down the North side of the drawer base, while tucking in the NE and NW tabs.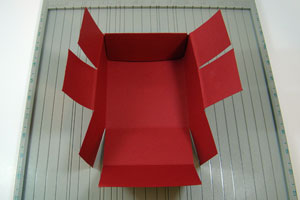
-
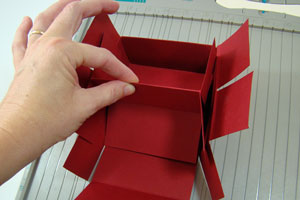
Step 10
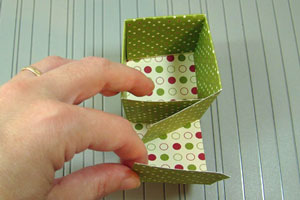
Pick up the drawer shelf in the middle and place it inside the drawer base as shown.
-
Step 11
Make sure to position the drawer shelf all the way into the top of the drawer base.

-
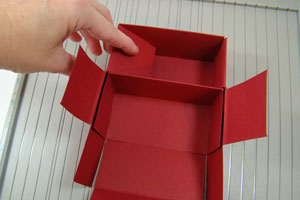
Step 12
Fold down the two East and two West pieces on either side of the shelf.
-
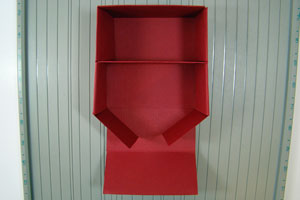
Step 13
Fold in the South side of the drawer base, while tucking in the SE and SW tabs.
-
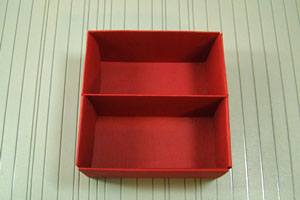
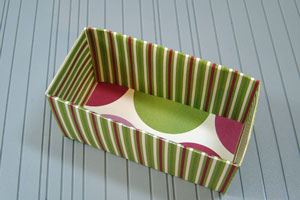
Step 14
The drawer base with shelf insert is now complete.
-
Step 15
Score your 9 3/8" cardstock squares at 1 7/8" and 3 3/4" on all sides of the card stock.
Hint for Scor-Pal™ users:
Shift card stock to the 1/4" mark (see blue arrow) and score at the 2-1/8" and 4" (repeat for all four sides).
-
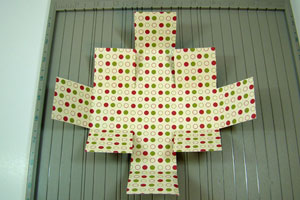
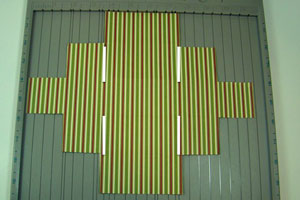
Step 16
Cut away the corner squares and the two adjacent squares on all four corners of the drawer base. You will be cutting away three squares from each corner. Cut along the score lines, where indicated by the bold white lines

-
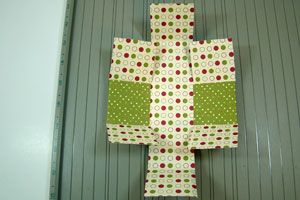
Step 17
Flip the cardstock over so that the front of the drawer is facing down. Fold in along all the score lines.
-
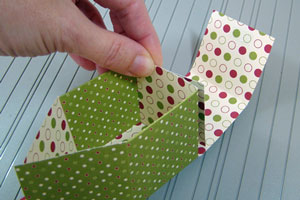
Step 18
Fold in the East and West squares.
-
Step 19
Fold down the North side of the drawer while tucking in the NE and NW squares.
-
Step 20
Fold in the South side of the drawer while tucking in the SE and SW squares.
-
Step 21
The finished square drawer should look like this.
Repeat steps 15-20 to make a second square drawer.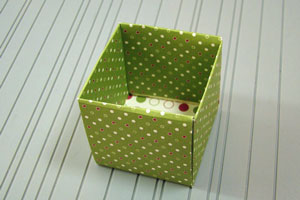
-
Step 22
Score the 11 3/8" x 9 3/8" piece of cardstock at 1 7/8" and 3 3/4" on all sides of the cardstock.
Hint for Scor-Pal™ users:
Shift cardstock to the 1/4" mark (see blue arrow) and score at 2-1/8" and 4" (repeat for all four sides).
-
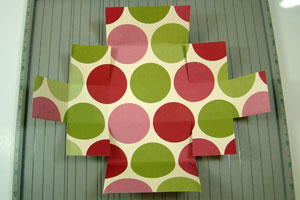
Step 23
Cut away the corner squares and the two adjacent squares on all four corners of the drawer base. You will be cutting away three squares from each corner. Cut along the score lines, where indicated by the bold white lines.
-
Step 24
Flip the cardstock over so that the front of the drawer is facing down. Fold in along all the score lines.
-
Step 25
Fold in the East and West squares.

-
Step 26
Fold down the North side of the drawer while tucking in the NE and NW squares. Next, fold in the South side of the drawer while tucking the SE and SW squares.
-
Step 27
The finished rectangular drawer should look like this.
-
Step 28
When you have all three drawers made, they should fit into the drawer base like this.
Each Single drawer measures approximately 2" x 2" x 2" and the rectangular drawer measures approximately 2" x 4" x 2".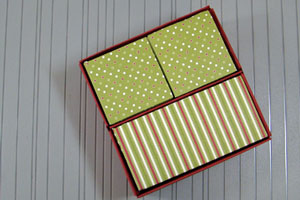
-
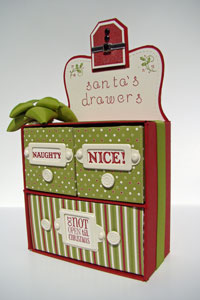
Step 29
Decorate your drawers as desired and fill with small presents or sweet treats.
Video!
Variations
Try making the drawers with 4 single drawers or 2 rectangular drawers.
Your Turn
You've seen the tutorial, now you try it! We've got a section of the gallery set aside for Santa’s Drawers. Try this technique, then upload your artwork to the gallery. Show us your creations!
***Please note - Internet Explorer/Edge is not a supported browser, and will not allow you to see the videos. Please use Chrome, Firefox or Safari to view our tutorial videos.

 *
*
Questions and Comments
We'd love to get your feedback or questions. Leave your comment below.
Can't wait to give it a try!
Thanks for sharing.
Marla
We are having a little gift exchange in my stamp club and I am going to make this as my gift. Under 5.00 and can be homemade. I will put something in the drawers too.
Wonderful
Diana
Kris
You can make little drawer pulls by threading a piece of ribbon through a button and the front of the drawer (leaving a little loop above the button that will be the "handle"). Cute and functional!
Page 1 of 3 pages 1 2 3 >