Salted Background
by Beth Warner
Raid your kitchen cupboard to create this unique background.
Supplies

- Glossy Cardstock
- Dye Ink pads and/or Re-Inkers
- Aqua Painter™ or wet watercolor brush
- Spray bottle filled with water
- Salt (coarse or kosher salt works best, but regular table salt will do just fine)
- Heat tool (optional)
Step-by-Step
-
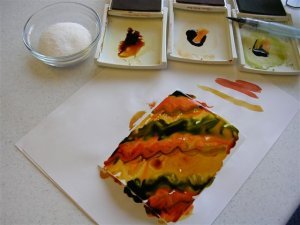
Step 1
Press the lid of your dye ink into the pad OR squirt a few drops of re-inker into the lids of your stamp pads.
Spritz the glossy cardstock with water using your spray bottle.
Using the Aqua Painter™, pick up some color and smear it on the cardstock. Repeat with other colors. You can do squiggles, lines, swirls, or spots of color.
-
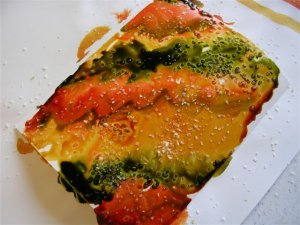
Step 2
Sprinkle the cardstock with salt, then spritz again with water. The colors will blend a little more now.
-
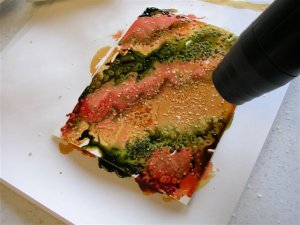
Step 3
Allow your background to set up, either by air drying or by using a heat tool.
Next, use your fingers or a paper towel to brush off the salt crystals. A slight haze of salty water will still remain on the cardstock, which you can now use as a fun background!
-
Step 4
Finish your card.

Video!
Your Turn
You've seen the tutorial, now you try it! We've got a section of the gallery set aside for Salted Background. Try this technique, then upload your artwork to the gallery. Show us your creations!
***Please note - Internet Explorer/Edge is not a supported browser, and will not allow you to see the videos. Please use Chrome, Firefox or Safari to view our tutorial videos.

Questions and Comments
We'd love to get your feedback or questions. Leave your comment below.
But then I clicked and saw your beautiful card...love this technique--I will try it!
~Bev
Page 1 of 1 pages