Rubber Cement Resist
by Beate Johns
Use rubber cement to create crazy resist patterns.
Supplies
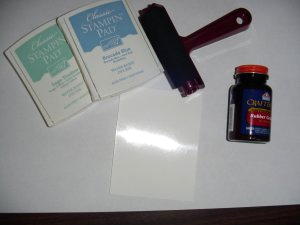
- White Glossy Cardstock
- Rubber Cement
- Brayer (I used a foam attachment)
- Dye ink
Step-by-Step
-
Step 1
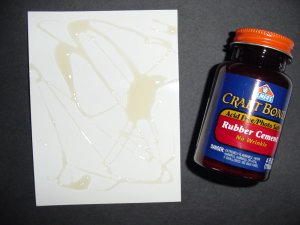
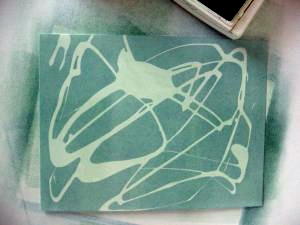
Drizzle Rubber Cement over your White Glossy Cardstock in any pattern you want.
Make sure the rubber cement is completely dry before moving on to the next step.
-
Step 2
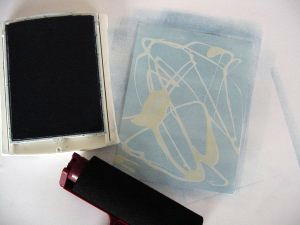
Brayer your darkest Dye Ink over your cardstock.
-
Step 3
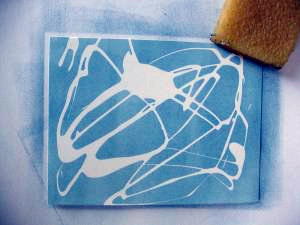
Remove rubber cement using either your fingers or an adhesive remover.
-
Step 4 (Optional)
Brayer your second color over the cardstock.
-
Step 4 (Optional)
Brayer your second color over the cardstock.
-
Step 5
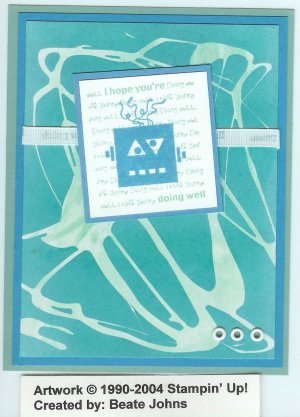
Finish your card.
Variations
Single Color Background
For a one-color backround, stop after Step 3. You're done!
Dual Color Background
For a two-color background, rub off all the rubber cement prior to Step 4. If you would like to have two colors and some spots still white, leave a portion of the rubber cement in place until your background is complete.
Brush It
Instead of drizzling the rubber cement randomly around your cardstock, try using a brush to create a more deliberate pattern.
Your Turn
You've seen the tutorial, now you try it! We've got a section of the gallery set aside for Rubber Cement Resist. Try this technique, then upload your artwork to the gallery. Show us your creations!
***Please note - Internet Explorer/Edge is not a supported browser, and will not allow you to see the videos. Please use Chrome, Firefox or Safari to view our tutorial videos.
Questions and Comments
We'd love to get your feedback or questions. Leave your comment below.