Rolled Ribbon Flower

by Beate Johns

Learn how to roll ribbon into a flower.

Supplies
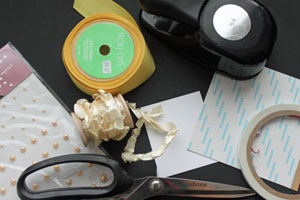
  • Ribbon
  • Scor-Tape™ sheet, or other strong adhesive sheet
  • Scissors
  • Cardstock
  • Circle Punch
  • Embellishments, Want2Scrap Pearls used here

Step-by-Step

  1. Step 1

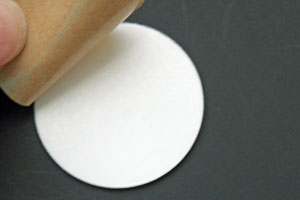
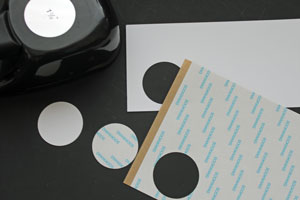
    Punch out a circle out of cardstock as well as the adhesive sheet.

    Hint:
    Your finished flower will be the size of your circles.
  2. Step 2

    Adhere the adhesive circle to the cardstock circle.
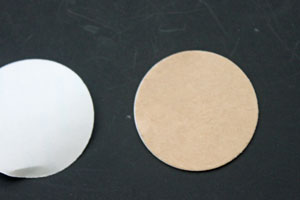
  3. Peel off adhesive circle liner.

  4. Step 3

    Tie a knot in one end of your ribbon.
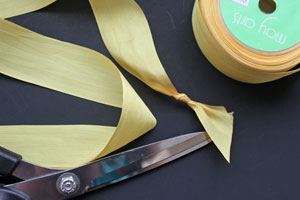
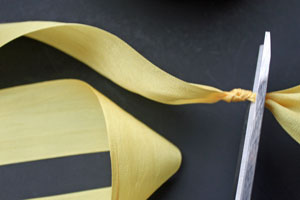
  5. Cut off the short end of the ribbon close to your knot.
  6. Step 4

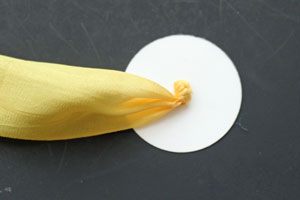
    Press the ribbon knot (with the short end down) into the center of your sticky cardstock circle. This will be your flower center.
  7. Step 5

    Start twisting your ribbon and roll it around your flower center.

    Hint:
    With wide ribbon, like shown in the tutorial, it's easiest if you fold the ribbon in half before starting to twist and roll it.
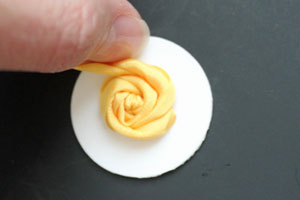
  8. Continue to twist and adhere your ribbon until your cardstock circle is covered.
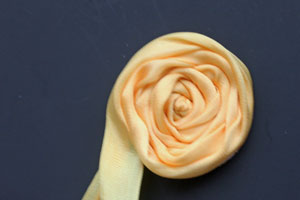
  9. Step 6

    Flip Flower around and add adhesive on the edge of your cardstock circle.
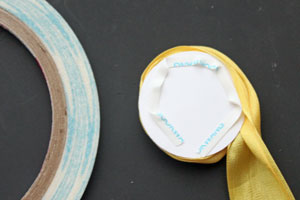
  10. Step 7

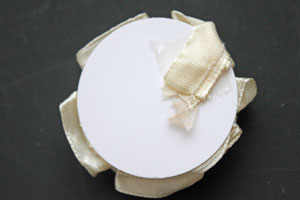
    Adhere the ribbon end and - if needed - the overhanging edges of the ribbon to the cardstock back.
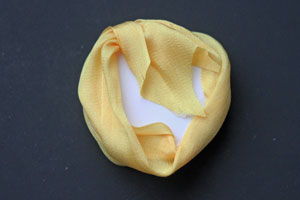
  11. Your rolled ribbon flower is ready to be embellished and used.
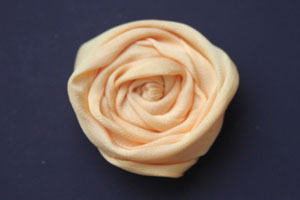
  12. Step 8

    Try the same flower style with pleated or ruffled ribbon.

    Tie a knot at the end of your ribbon piece and cut the short end off.
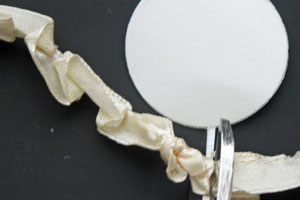
  13. Adhere to the center of a sticky cardstock circle.
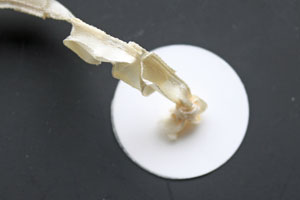
  14. Step 9

    Start adhering the stitched edge of your ribbon to your cardstock and wrap it around your knot.

    Difference:
    You won't twist the ribbon as you go. Just adhere the stitched edge down.
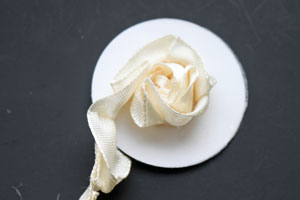
  15. Continue to do so until your entire cardstock circle is covered.
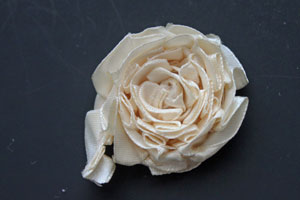
  16. Step 10

    Add adhesive to the back of the cardstock and tape the end of the ribbon down.
  17. Step 11

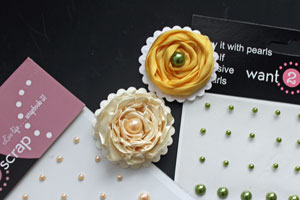
    Add pearls, rhinestones or buttons to the center of your flower.
  18. Step 12

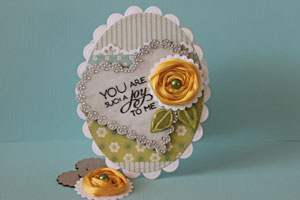
    Use flowers to decorate your project.
Video!

Variations

    Alternative Adhesives:
    -Try using Cosmo Crickets Glubers instead of making your own adhesive cardstock circles
    -Use a glue gun to adhere ribbon down.

    Fabric works too!
    Cut fabric in strips and roll them up instead of ribbon.

Your Turn

You've seen the tutorial, now you try it! We've got a section of the gallery set aside for Rolled Ribbon Flower. Try this technique, then upload your artwork to the gallery. Show us your creations!

***Please note - Internet Explorer/Edge is not a supported browser, and will not allow you to see the videos. Please use Chrome, Firefox or Safari to view our tutorial videos.

Questions and Comments

We'd love to get your feedback or questions. Leave your comment below.

That was awesome! Thank you so much for sharing this-you've definitely sparked some creativity. Oh, the possibilities!!!
Teresa  |  Wed Aug 24, 2011 at 5:52 AM
merci, super
md  |  Wed Aug 24, 2011 at 6:30 AM
This is really super pretty.
Linda  |  Wed Aug 24, 2011 at 6:55 AM
Beautiful project, Beate!! I love the gorgeous ribbon flowers!
Sue (suen)  |  Wed Aug 24, 2011 at 7:11 AM
Beautiful flowers...lovely card. Thanks for charing.
Merian Candioli  |  Wed Aug 24, 2011 at 7:40 AM
just wondering...what kind of ribbon did you use? grograin, satin, taffeta? thanks for any info.
Fran MacDonald  |  Wed Aug 24, 2011 at 10:41 AM
Fran, the yellow ribbon is 1 1/2" wild Silk Ribbon, the second one is ruffled (what looks like) Taffeta ribbon. You can use any ribbon to make those flowers.
beate  |  Wed Aug 24, 2011 at 10:52 AM
WOW!!!!!! Thanks for sharing-these are very beautiful!
heather  |  Wed Aug 24, 2011 at 10:59 AM
Wow - great idea. Thanks for sharing! I have a lot of old ribbon from the projects I did in the 80's and I think I'll use it up doing these flowers.
Elizabeth  |  Wed Aug 24, 2011 at 11:39 AM
Absolutely gorgeous Beate. I have to try this.
Lisa Lara  |  Wed Aug 24, 2011 at 12:58 PM
What a great idea! thanks!

greatings from germany
die hippe
conny  |  Wed Aug 24, 2011 at 1:41 PM
Thank you very much Beate for such an easy tutorial to follow! You made it look as the simpliest thing to do.
Ileana S�nchez-Boschini  |  Wed Aug 24, 2011 at 2:16 PM
Thanks for the tutorial. You make it look so easy. The yellow ribbon is so pretty.
Pam Crusberg  |  Wed Aug 24, 2011 at 2:41 PM
Beate! This is fabulous, not to mention beautiful, AND I just happened to have some Glubers delivered to my door today - wahoo!!
Bonnie Sharp  |  Wed Aug 24, 2011 at 4:25 PM
I love this method! So much easier than the way I was doing it...I also have glue burns. Beate, we are nearly neighbors...how fun! I live about 60 miles south of you...
Traci  |  Wed Aug 24, 2011 at 5:27 PM
Thank you for the lesson on this technique! You make it look so easy, I can't wait to try it!
smadson  |  Wed Aug 24, 2011 at 6:46 PM
Thanks so much for sharing this tutorial. As soon as I saw it I thought of using some 1 1/2 inch nylon knitting ribbon that I had previously gathered in the middle for another project. It looks fantastic, was quick and easy and VERY CHEAP! Thanks again, Im sure I will try this again with different ribbons.
Jane Mann  |  Wed Aug 24, 2011 at 6:54 PM
I have always admired these beautiful flowers but never knew how to make them. This is fantastic!!! I can't wait to give it a try!! smile
Lisa Folley  |  Wed Aug 24, 2011 at 8:48 PM
Wonderful tutorial. Looks like something I can make. Can't wait to try it.
Stephanie  |  Wed Aug 24, 2011 at 10:05 PM
Tres chic! What adorable flowers. Do you think this could be done on a very crisp/stiff cloth base to make pins???
Jayne  |  Thu Aug 25, 2011 at 5:40 AM

Page 1 of 2 pages  1 2 >

You need to be logged in to comment

GET OUR NEWSLETTER


Splitcoaststampers's privacy policy