Quarter Fold Card
by Jana O’Brien
Create a unique card with a box-top closure.
Supplies
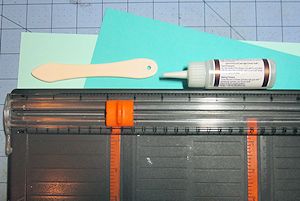
- Paper trimmer
- Scoring tool
- Cardstock (2 sheets in coordinating colors, and smaller pieces for layering)
- Glue
- Other supplies as needed to complete the card
Step-by-Step
-
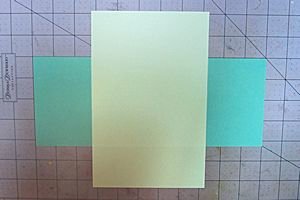
Step 1
Trim a piece of cardstock to 4 1/4" x 11".
This will be the back piece of the card.
-
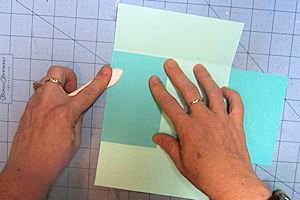
Score along the long side at 2 3/4" and 8 1/4".
(Alternative: score at 2 3/4" then turn cardstock and score at 2 3/4" from the other end.)
TIP:
Score again slightly outside the 2 score measurements on both pieces of cardstock for a better fit.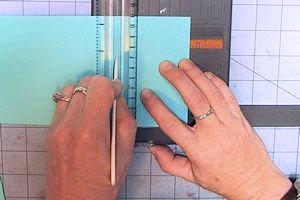
-
Step 2
Trim the second piece of cardstock to 5 1/2" x 8 1/2".
This will be the front piece of the card.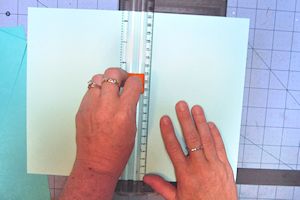
-
Score along the long side at 2 1/8" x 6 3/8".
(Alternative: score at 2 1/8" then turn cardstock and score at 2 1/8" from the other end.)
TIP:
Make this piece a lighter color so it’s easier to stamp or write on the inside of the card.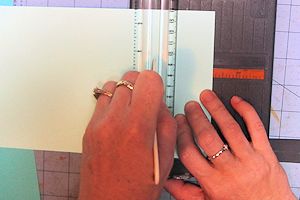
-
Step 3
Adhere the 2 pieces of cardstock together, lining up edges with score lines.
TIP:
Use a liquid glue to allow for adjustments in placement.
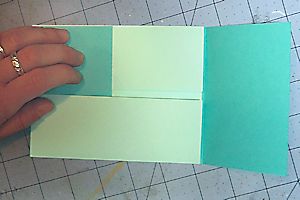
-
Fold both ways at each score line. Folding toward the opposite color first will give the panels enough room to close well without interfering with each other.
-
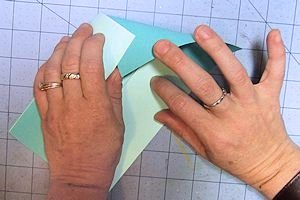
Step 4
Fold the card closed as you would close the top of a packing box. Fold in the left side, fold up the bottom, fold in the right side, then tuck the left corner of the top flap underneath the left side panel.
-
-
Step 5
The folded card should lay flat and look like this.
Decorate the front of the card as desired. The card can be horizontal or vertical.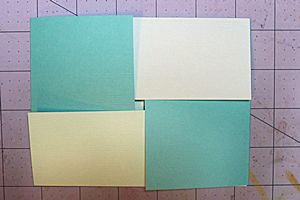
-
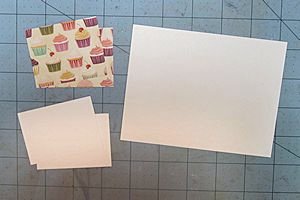
To make layers for the four quarters cut 2 pieces of cardstock to 2" X 2 1/2" and 2 pieces of cardstock to 1 7/8" X 2 5/8". Cut a 4" x 5 1/4" panel for the inside if desired.
-
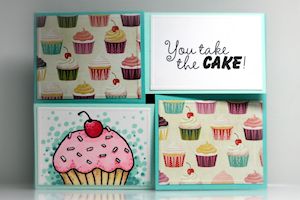
Step 6
Complete the card.
-
Decorate the inside if desired - maybe tuck in some cash or a handful of confetti!
Finished card fits in a standard A2 envelope.
Video!
Your Turn
You've seen the tutorial, now you try it! We've got a section of the gallery set aside for Quarter Fold Card. Try this technique, then upload your artwork to the gallery. Show us your creations!
***Please note - Internet Explorer/Edge is not a supported browser, and will not allow you to see the videos. Please use Chrome, Firefox or Safari to view our tutorial videos.

Questions and Comments
We'd love to get your feedback or questions. Leave your comment below.
Plus, I like your hands!
Thanks for sharing.
I need to try this out for sure~!
~Bev
Thank you!
Page 1 of 1 pages