Pyramid Card
by Kirsteen Gill
Create a card with a Christmas tree inside.
Supplies
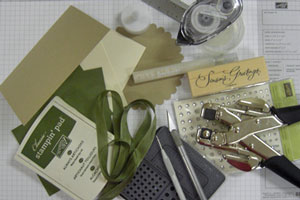
- Three 3 3/4" cardstock squares
- One 5 1/2" x 8 1/2" piece of cardstock scored in half at 4 1/4"
- One 5" scallop cardstock circle
- Embossing Folder
- Adhesive
- Ribbon
- Crop-a-Dile™ or other hole punch
- Paper piercing tool and mat
- Ruler and craft knife
- Rhinestones
- Additional cardstock
- Battery operated tealight
Step-by-Step
-
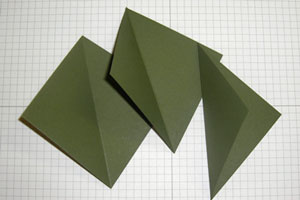
Step 1
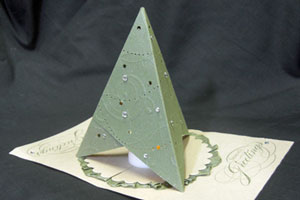
Score each of the 3" squares in half on the diagonal and fold.
-
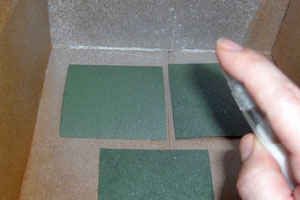
Step 2
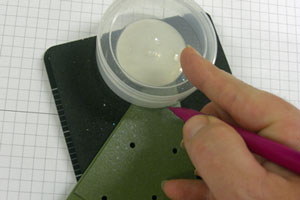
Run each of the squares through the embossing folder and spritz with Smooch Spritz.
-
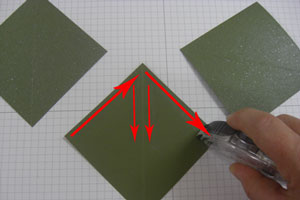
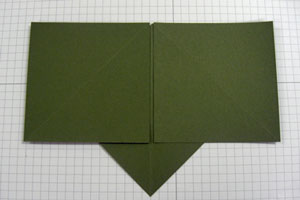
Step 3
Put adhesive on one of the squares as in this diagram.
-
Adhere the 2 remaining squares to the first.
-
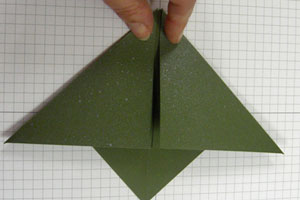
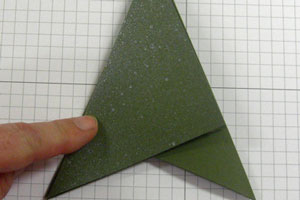
Step 4
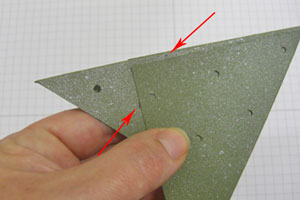
Fold the outer 2 squares over into a triangle then fold that in half.
-
-
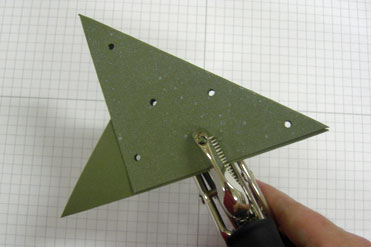
Step 5
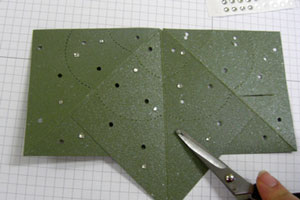
Use the Crop-a-dile™ to punch holes in the tree.
-
Step 6
Use something circular to paper pierce in semi-circular shapes through all layers of the folded card.
-
Step 7
Add rhinestones.
-
Step 8
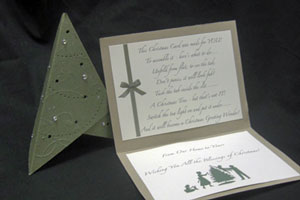
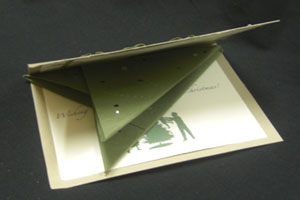
Open up the card and stand it up – overlap the ends and draw a line for the edge of card to fit in so that it stands up.
-
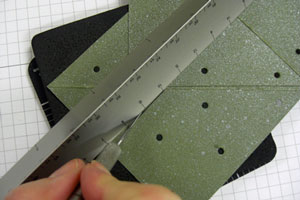
Use the Craft knife to cut the slit.
-
Step 9
Fold the 5 1/2" x 8 1/2" piece of cardstock in half to make the card base.
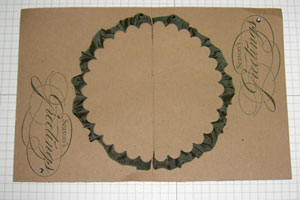
Stamp your chosen sentiment in the bottom right corner of both the front and back of the card.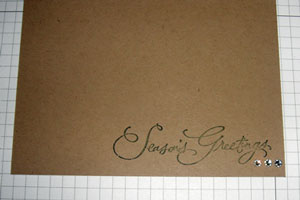
-
Step 10
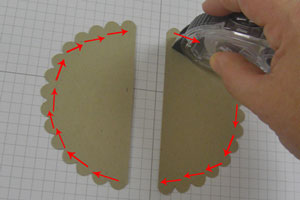
Cut the scallop circle in half.
-
Run adhesive around the outer edge of each of the scallop circle halves.
Adhere the ribbon around each of the outer edges of the scallop circle halves.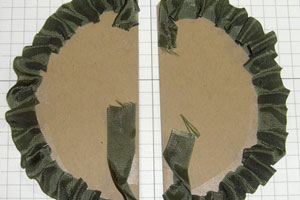
-
Step 11
Adhere the scallop circle halves to each side of fold on the outside of the card base.
-
Step 12
Print out the following poem and adhere to the inside of the card base.
Stamp or decorate the inside of the card, as you desire.
This Christmas card was made for you,
To assemble it here’s what to do:
Unfold from flat, to see the tab
Don’t panic – it will look fab!
Tuck the tab inside the slit –
A Christmas Tree! But that’s not it!
Switch a tea light on and put it under…
It becomes a Christmas Greeting Wonder!!
-
Fold the tree and insert inside card base before posting.
-
Step 13
Your finished card opened up with Christmas tree on top.
Video!
Your Turn
You've seen the tutorial, now you try it! We've got a section of the gallery set aside for Pyramid Card. Try this technique, then upload your artwork to the gallery. Show us your creations!
***Please note - Internet Explorer/Edge is not a supported browser, and will not allow you to see the videos. Please use Chrome, Firefox or Safari to view our tutorial videos.

Questions and Comments
We'd love to get your feedback or questions. Leave your comment below.
I've been making these little 3D pyramid cards and now have another use for them in a pop up card...thank you!
Thanks for sharing your idea - Cal xx
We definitely need to see more of your tutorials on here!!!!!
TFS Kirsteen
Page 1 of 2 pages 1 2 >