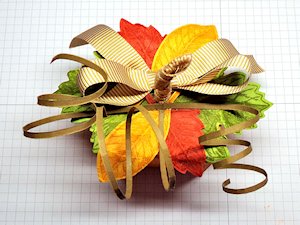
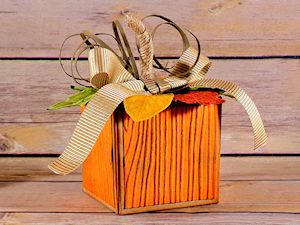
Punch Board Pumpkin
by Christy Fulk
Use the Gift Box Punch Board to make a cute fall decoration.
Supplies
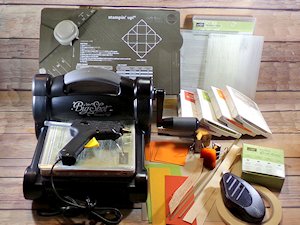
- Cardstock - light brown: 8” x 8”, orange: 4 panels, 2 1/4” x 2 1/4”, brown: 3 strips, 11” x 1/8”, small pieces of green, rust and yellow for leaves (Stampin’ Up!® Crumb Cake, Pumpkin Pie, Soft Suede, Old Olive, Cajun Craze, and Delightful Dijon used here)
- Gift Box Punch Board, scoring board with diagonal plate, or printable box template
- Ink in various colors (SU Crumb Cake, Pumpkin Pie, Old Olive, Cajun Craze, and Delightful Dijon Classic Pads used here)
- Wood grain embossing folder (SU Woodgrain Textured Impressions Embossing Folder used here)
- Burlap ribbon, 6” (SU 5/8” Burlap Ribbon used here)
- Ribbon, 18” (Stampin’ Up!® Delightful Dijon 5/8” Mini Striped Ribbon used here)
- Leaf stamps and coordinating dies (SU Vintage Leaves Stamp Set and Leaflets Framelits used here)
- Sponges
- Spray bottle filled with rubbing alcohol
- Adhesives (Hot glue gun and glue sticks, Glue Dots, Fast Fuse, strong double-sided tape)
Step-by-Step
-
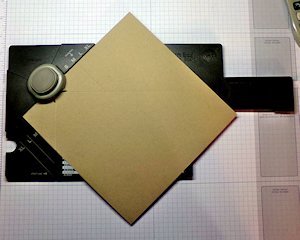
Step 1
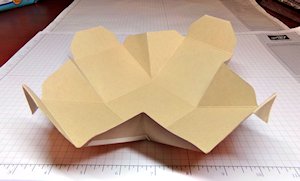
Align the left edge of the 8” x 8” light brown cardstock with the “M” start line on the Gift Box Punch Board and punch. Score the horizontal, vertical, and “M” diagonal score lines. Do the same with the other three sides.
-
Turn the cardstock over. Align the left edge with the “M” start line and punch. Do not score. Do the same with the other three sides.
If not using a punch board:
Score using a diagonal scoring plate at 1-3/4" and 5-3/8" on each side. Then, remove the diagonal plate and score each side at 4", stopping where the first set of score lines intersect. After this, each mini triangle section needs to be cut out. (These are the triangles the punch board punches out.) There are 2 mini-triangles on each side.
OR...
If a diagonal scoring plate is not available, follow THIS TEMPLATE for scoring guides on a 8 1/2" x 10 1/2" sheet of cardstock.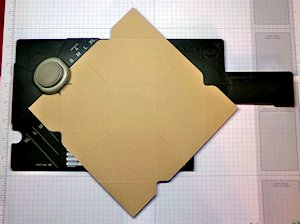
-
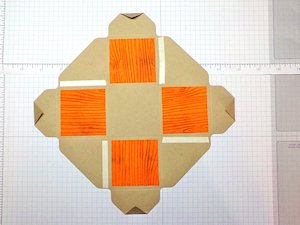
Step 2
Turn the cardstock back over. Emboss the four 2 1/4” x 2 1/4” pieces of orange cardstock with the wood grain embossing folder. Sponge the four pieces using the light brown ink pad. Attach all four pieces to the four outer square sections in the light brown cardstock. Put strong double-sided tape along the right side of the score lines that are on the right of the orange layers. Fold the corners of the light brown piece down so the points line up to the curves on each side of the small triangle sections.
-
Step 3
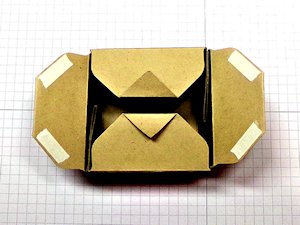
Turn the piece over so the orange cardstock layers are facing down. Fold all of the horizontal and vertical score linse up, and then let it flatten back out. Fold the diagonal score lines in.
-
Step 4
Remove the paper backing from one of the double-sided tape strips, and attach the two sides of the triangle section together, lining the outer score lines together to form a corner of the pumpkin block. Assemble the other three corners the same way.
-
Step 5
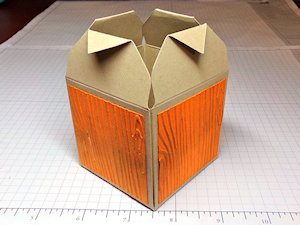
Fold two top flaps that are opposite of each other down. Put double-sided tape onto each angled side of the other two top flaps.
-
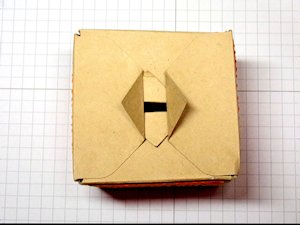
Remove the paper backing from the tape, and attach the last two flaps to the two flaps that are already folded down. Insert the tip of the gift box punch board scoring tool into the hole in the top of the pumpkin block. Put the tip of the tool under each section being attached, and press the flaps together to attach them securely.
-
Step 6
Sponge all of the folded edges of the light brown cardstock showing around the orange layers with an orange ink pad.

-
Step 7
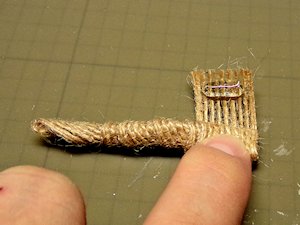
To make the stem, roll the 6” piece of burlap ribbon, going at a slight angle for a little bit, until it’s about 2” long. Then, roll the rest of the ribbon straight to make the base of the stem broader. Before rolling it up completely, put some hot glue onto the burlap ribbon end, and then roll it up the rest of the way.
-
Step 8
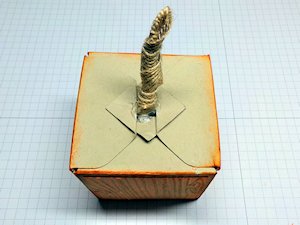
Put hot glue around the base of the stem.

-
Insert the base of the stem into the hole in the top of the pumpkin block, pulling a little on the triangles to get the stem to fit. Make sure the hot glue lines up with the sides of the hole. Attach the two triangle pieces that are sticking up onto the top of the pumpkin block with glue dots.
-
Step 9
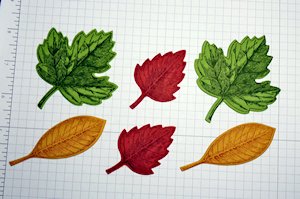
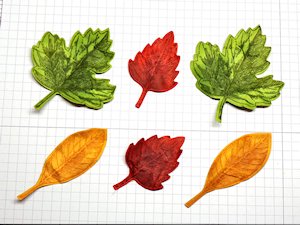
Stamp two large leaves onto the green cardstock using the same green color ink pad. Stamp two long, skinny leaves onto the yellow cardstock using the same yellow color ink pad, and stamp two smaller leaves onto the rust cardstock using the same rust color ink pad. Die cut the leaves with their coordinating dies. If there aren’t any coordinating dies, then cut them out freehand.
-
Step 10
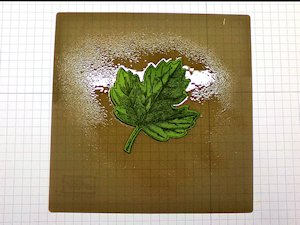
Spray one of the leaves with rubbing alcohol.
-
Crumple the leaf up, and then flatten back out. Repeat this step with all of the leaves.
-
Step 11
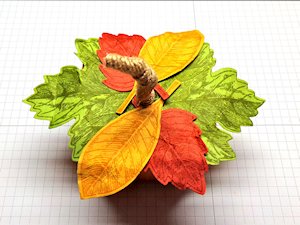
Put double-sided tape onto the bottom of all of the leaves. Remove the paper backing from the two green leaves, and attach them to opposite sides of the pumpkin block top.

-
Remove the backing from a rust leaf and a yellow leaf, and attach them to one empty side of the pumpkin block top. Then, attach the last two leaves onto the opposite side the same way.
-
Step 12
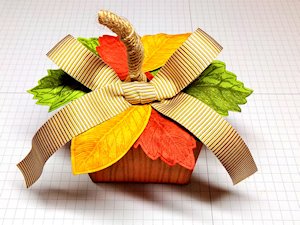
Tie the 18” piece of ribbon into a bow. Put hot glue onto the back of the knot in the bow, and attach the bow to the bottom of the stem, over one of the sides with the two leaves.
-
Step 13
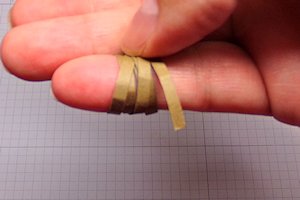
Wrap one of the 11”x 1/8” pieces of brown cardstock around a pinkie finger. Loosen the strip up. Do the same thing to the other two pieces of brown cardstock to make a total of three vines.
-
Put two glue dots onto one of the ends of each vine. Attach the three vines to the opposite side of the stem without the bow. The glued ends should meet directly behind the stem, with one vine going towards the left, one going towards the right, and one going perpendicular to the other two vines.
-
Step 14
Complete the project.
Video!
Your Turn
You've seen the tutorial, now you try it! We've got a section of the gallery set aside for Punch Board Pumpkin. Try this technique, then upload your artwork to the gallery. Show us your creations!
***Please note - Internet Explorer/Edge is not a supported browser, and will not allow you to see the videos. Please use Chrome, Firefox or Safari to view our tutorial videos.

Questions and Comments
We'd love to get your feedback or questions. Leave your comment below.
Page 1 of 1 pages