Pop-Up Stage
by Kim Score
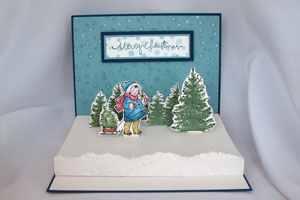
Create a pop-up card with a stage inside.
Supplies
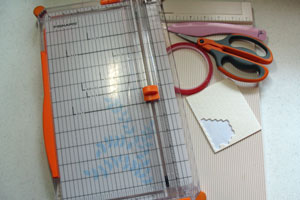
- Paper cutter
- Scoring board
- Bone folder
- Cutting blade
- Strong adhesive
- Dimensionals
- Scissors
- Stamps & ink
- Cardstock , patterned paper and embellishments
Step-by-Step
-
Step 1
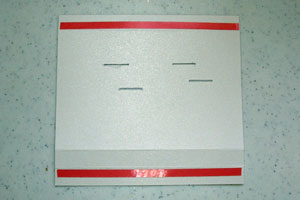
Cut 5 1/2" x 5" cardstock for stage. On 5" side, score at 1/2", 4” and 4-1/2".
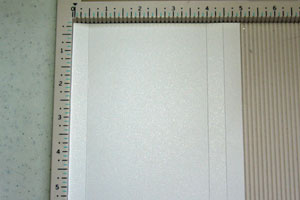
-
Step 2
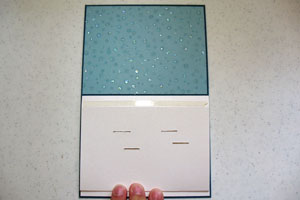
Cut 8 1/2" x 5 1/2" cardstock and fold in half for base.
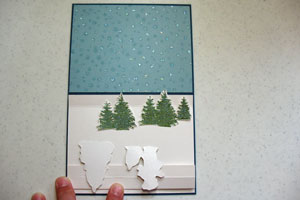
Cut two 5 3/8" x 4 1/8" cardstock or print paper for inside decoration (optional) and attach to inside of card base.
Stamp, color and cut out pop up pieces.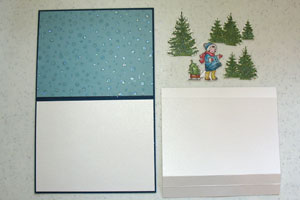
-
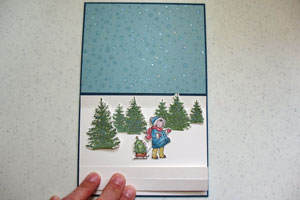
Step 3
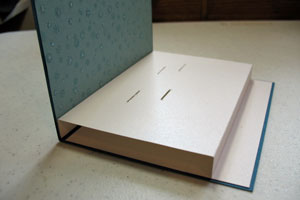
Flip stage piece to wrong side up. Align edge of stage to card center (end with single 1/2" score). Fold other end at 4" score towards center and hold in place. Lay out pieces where you want them. Flip front pieces forward to make sure they don’t go beyond edge of card. Mark stage at base of each piece with pen.
-
-
Step 4
On each of the marks, use paper cutter or craft knife and ruler to cut slots slightly longer than 1/2".

-
Step 5
Apply adhesive along 1/2" and 4 1/2" score lines.
-
Step 6
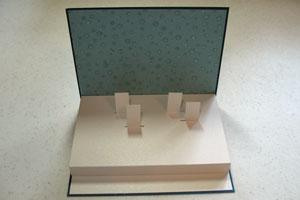
Remove backing from tape. Fold card stock under at 4" score line. Align other end of stage at center of card and press to adhere to card base. Close card and press down at center to adhere tape.
-
-
Step 7
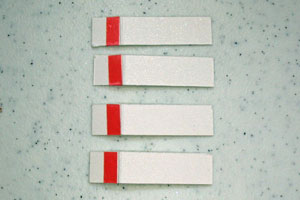
Cut four 1/2" x 2" pieces card stock for pop up tabs. Score each one at 1/2". Add adhesive to tabs.
-
Step 8
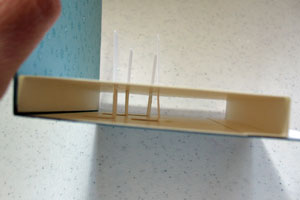
Sharpen crease and remove backing from adhesive. Carefully slip tab through slot with adhesive facing down and tab pointing towards center of card. Holding card open at 90 degree angle, adhere tab straight up and down to base of card.
-
-
Step 9
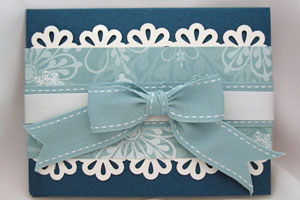
Cut strip of patterned paper 2 1/2" x 12" for belly band. Wrap around card and adhere ends in back. Wrap ribbon around and tie bow.
-
Attach stamped pieces to tabs with dimensionals. Decorate front of stage.

Video!
Your Turn
You've seen the tutorial, now you try it! We've got a section of the gallery set aside for Pop-Up Stage. Try this technique, then upload your artwork to the gallery. Show us your creations!
***Please note - Internet Explorer/Edge is not a supported browser, and will not allow you to see the videos. Please use Chrome, Firefox or Safari to view our tutorial videos.

Questions and Comments
We'd love to get your feedback or questions. Leave your comment below.
The tutorial is great and very helpful to be able to see it done.
Thanks!
Thank you once again!
Page 1 of 3 pages 1 2 3 >