Pop-Up Presents Card
by Julie Davison
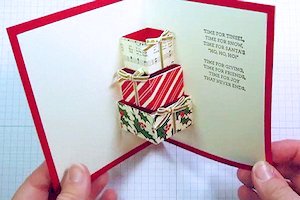
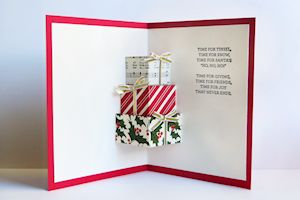
This special pop up card opens to reveal a stack of presents inside.
Supplies
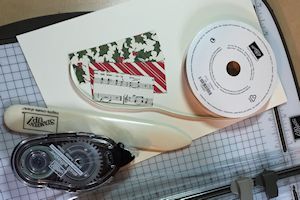
- Cardstock for card base (5 1/2" x 8 1/2")
- Neutral cardstock for inside card (5" x 8")
- Designer paper (various)
- Paper trimmer
- Ribbon
- Scoring tool
- Adhesive
Step-by-Step
-
Step 1
Score the neutral cardstock (5" x 8") in half at 4" and fold on the score line.
-
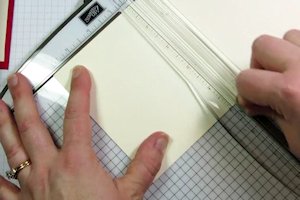
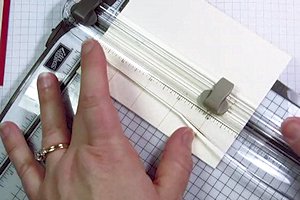
Step 2
With the fold at the top of the paper trimmer, cut the card as follows:
At 1", cut down 1 1/2" from the fold.
At 2", cut down 1 1/2" from the fold.
At 3", cut down 1 1/4" from the fold.
At 4", cut down 1" from the fold.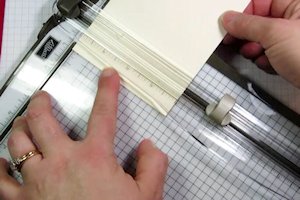
-
After cutting, the card should look like this.
-
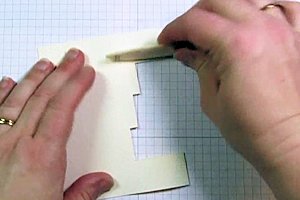
Step 3
Turn the cardstock and line the fold on the left side of the paper trimmer.
-
At 1", score between 1" to 2".
At 1 1/4", score between 2" and 3".
At 1 1/2", score between 3" and 4".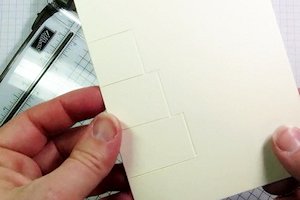
-
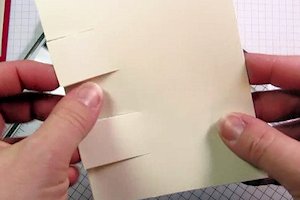
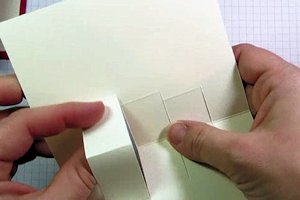
Step 4
Fold on the score lines, and push the flaps out the opposite direction from the card fold.
-
Crease along the score lines so the card folds flat.
-
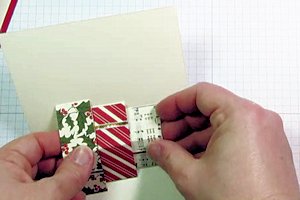
Step 5
Embellish the pop-up boxes with designer paper and ribbon.
-
The dimensions for the presents are as follows:
Top Gift: 1" x 2"
Middle Gift: 1" x 2 1/2"
Bottom Gift: 1" x 3"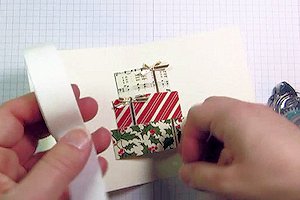
-
Step 6
Glue the neutral cardstock into the card base, aligning the center folds.
-
Step 7
Embellish the front of the card as desired.
-
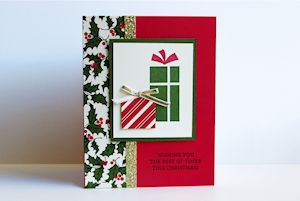
Step 8
Complete the project.
Video!
Your Turn
You've seen the tutorial, now you try it! We've got a section of the gallery set aside for Pop-Up Presents Card. Try this technique, then upload your artwork to the gallery. Show us your creations!
***Please note - Internet Explorer/Edge is not a supported browser, and will not allow you to see the videos. Please use Chrome, Firefox or Safari to view our tutorial videos.

Questions and Comments
We'd love to get your feedback or questions. Leave your comment below.
Thanks for a simple-to-follow & fun project!
You had me worried when you were talking about, now just decorate yiur cards wit the designer paper and ribbon. I was like "Oh no way !" I praised God for the dimentions! BLess you.
Thank you for this wonderful tutorial! I had seen a card like this before and tried to figure out how to do it without much success.
This lends itself to many uses other than Christmas.
Once again, thank you for such clear instructions!
Peace and Love, Nancy
Page 1 of 1 pages