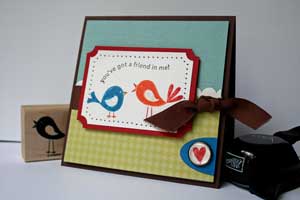
Pop-Up Card

by Beate Johns

Add a special surprise to the inside of your card with a pop-up image.

Supplies

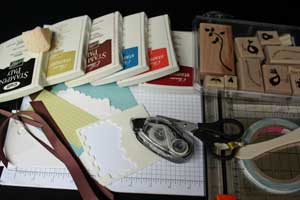
  • Cardstock for card base, here 4 1/4" x 8 1/2" piece of Chocolate Chip cardstock
  • Cardstock for inside of card, here 4" x 8 1/4" piece of Baja Breeze cardstock
  • Additional cardstock for pop up images
  • Paper trimmer
  • Scoring tool
  • Scor-Tape™ or other strong adhesive
  • Scissors
  • Stamps
  • Ink
  • Embellishments

Step-by-Step

  1. Step 1

    Fold the cardstock for the inside of the card in half.

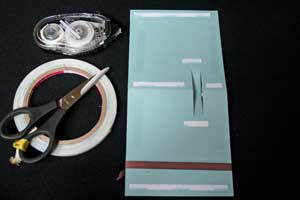
    Place the cardstock with the mountain side of the score line facing up on the paper cutter and cut two parallel lines over the score line with the paper cutter.

    Alternative:
    Use an Xacto knife™ and ruler instead of the paper cutter.

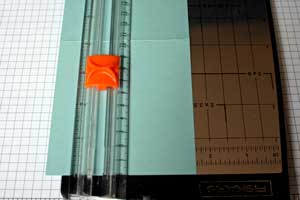
  2. Here, the lines were cut 1" from the left-hand side of the cardstock. The cuts are 2 1/4" long and 3/8" apart.

    Note:
    The longer the cuts, the further into the card the pop up element will be.
    The wider apart the strips are from each other, the thicker the pop up strip will be.
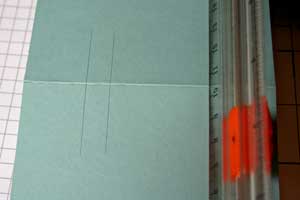
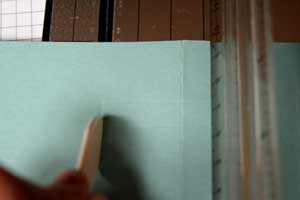
  3. Step 2

    Use a scoring tool to create a score line between the cuts.
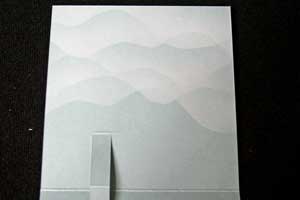
  4. Step 3

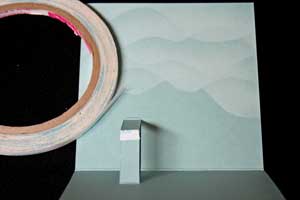
    Push the pop up strip out.

  5. Flip the cardstock over.

    The pop up card base is done.

  6. Step 4

    Decorate the inside of the card.

    Clouds were added by sponging white pigment ink over a hand-cut mask.
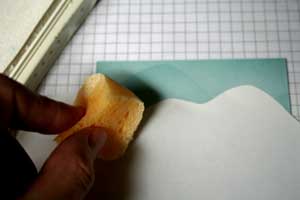
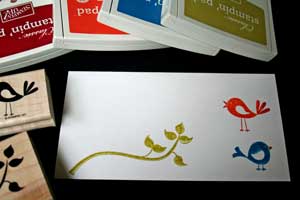
  7. Step 5

    Stamp the images that will pop up when the card opens.
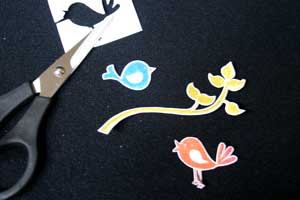
  8. Step 6

    Cut all images.

  9. Step 7

    Add Scor-Tape™ (or other strong adhesive) to the top of the pop up strip.

  10. Step 8

    Adhere cut out image to the pop up strip.
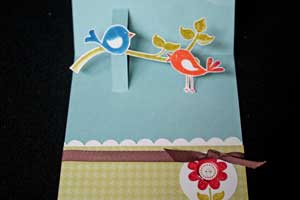
  11. Step 9

    Finish decorating the card inside.

  12. Step 10

    Add adhesive to the back of the card inside.
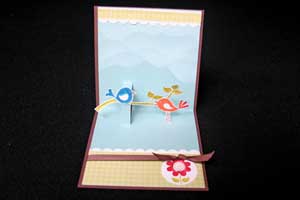
  13. Step 11

    Adhere the card inside to the card base.

  14. Step 12

    Decorate the card front.

Video!

Variations

  1. Punch, not Cut
    Use Stampin' Up!'s Window Word punch to punch two parallel slots. Score the top and bottom between the slots to make the pop up strip.
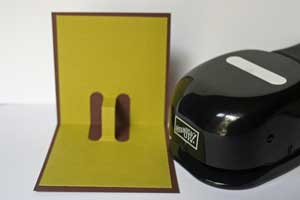
  2. Add Tabs instead
    Instead of cutting or punching slots, cut a strip of cardstock, score it three times, and adhere to the center of the card over the score.

    Adhere image to tab.

Your Turn

You've seen the tutorial, now you try it! We've got a section of the gallery set aside for Pop-Up Card. Try this technique, then upload your artwork to the gallery. Show us your creations!

***Please note - Internet Explorer/Edge is not a supported browser, and will not allow you to see the videos. Please use Chrome, Firefox or Safari to view our tutorial videos.

Questions and Comments

We'd love to get your feedback or questions. Leave your comment below.

truly lovely, beate! thank you!
abrazos,mirabella
bella  |  Wed Feb 18, 2009 at 8:56 AM
Beate, I love these cards and they are so much fun to make. Thanks for bringing this one back.

Judi
Judi Harvey  |  Wed Feb 18, 2009 at 9:06 AM
wow this is pretty i lovei t now i'm going to try i t with a set i have for saint patrick day card yippie can't wait count down till my birthday on this sunday smile)
Roberta  |  Wed Feb 18, 2009 at 9:16 AM
There are many pop-up card directions on You tube, yes, You Tube. Put "Stampin up" in the search box!
Pattyo_stamp  |  Wed Feb 18, 2009 at 10:59 AM
If I had half as many good ideas as you have, I might get really good at this stuff. smile
Renee  |  Wed Feb 18, 2009 at 11:13 AM
Wonderful tutorial, Beate!! Those birds are perfect for your pop-up design!! I love your variations too!! Thanks!!
Rose Ann  |  Wed Feb 18, 2009 at 11:35 AM
GREAT card... I was pondering ordering that stamp set and now I've decided smile
Jen  |  Wed Feb 18, 2009 at 11:51 AM
Wow! Thank you! For the step by step and the use of this punch. I've had it for a couple of years but have only used it a few times.
Pam Dean  |  Wed Feb 18, 2009 at 1:06 PM
What an amazing card! I've done pop up cards before, but this one takes the cake. I JUST ordered this set, too. I can't wait to try it. Wahoo!
Roberta Lebedda  |  Wed Feb 18, 2009 at 3:43 PM
I'm new to this site and have been stamping for about a year, having loads of fun and you gals are fantastic. Thanks for the new idea, it is great.
Loco  |  Wed Feb 18, 2009 at 6:46 PM
I have this set out trying to decide what to do and I find this! Wow, I've never done a pop up card before and can't wait to give this a try. Thanks Beatte - you are incredible!
Bev Victory  |  Wed Feb 18, 2009 at 9:39 PM
This is an awesome tuorial, I love it... and my father will love it... gone make a card for him!! Thanks Beate - another great workshop from you!
antje  |  Thu Feb 19, 2009 at 12:17 AM
Gracias por el tutorial, es un trabajo precioso y muy bien explicado. Estoy aprendiendo mucho con vosotros y me encanta. Enhorabuena.
Monika  |  Thu Feb 19, 2009 at 3:33 AM
Cute card. You make it look so easy. Now I really want that set.
Flo Stevens  |  Thu Feb 19, 2009 at 6:19 AM
Absolutely amazing, tutorial !!!! Once again....you've amazed us all smile
Corinne (aka Roxy)  |  Thu Feb 19, 2009 at 10:59 AM
Gorgeous! I love pop ups and this set... Thanks for a great card
ann  |  Sat Feb 21, 2009 at 7:44 AM
Got right busy. Followed your directions. I'm so pleased with my card. Thank you!
karan  |  Sat Feb 21, 2009 at 7:02 PM
Very cute. Good instructions. Pop-up cards are great to send. They're full of surprises!
Della  |  Thu Mar 5, 2009 at 9:01 PM
Cute pop-up card!
Janihe  |  Thu Mar 4, 2010 at 5:37 PM
This is the cutest thing ever! Doesn't seem so difficult but has a WOW factor that will surely impress my Stampin Up group! Thank you!
Stacey  |  Wed Apr 21, 2010 at 7:49 PM

Page 1 of 2 pages  1 2 >

You need to be logged in to comment

GET OUR NEWSLETTER


Splitcoaststampers's privacy policy