Pentagon Treat Tube
by Kim Score
Create a treat tube with a few score lines and flower punch.
Supplies
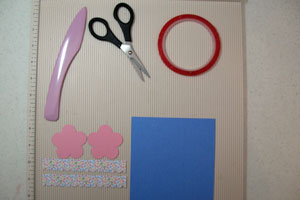
- Score Board, or another scoring tool (Martha Stewart Crafts used here)
- One 5" square heavy patterned paper or cardstock
- Two 1" x 5" strips of heavy patterned paper or cardstock
- Strong Adhesive
- Stampin' Up! Fancy Flower Punch
- Border punch (optional)
- Additional cardstock, to punch flowers and decorate tube
- Embellishments
Step-by-Step
-
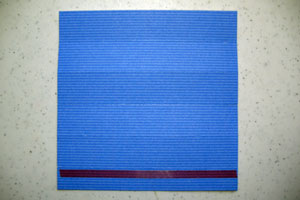
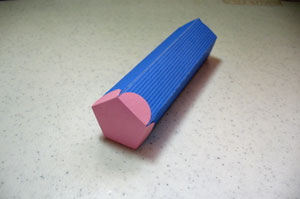
Step 1
Score 5" x 5" paper at 7/8", 1 3/4", 2 5/8", 3 1/2" and 4 3/8. Prefold score lines.
Add strong adhesive along right side of 4 3/8" score line.
-
Punch 2 Fancy Flowers.
Score from inside point to inside point on each petal to form a pentagon in center of flower. Prefold score lines.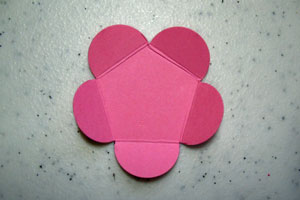
-
Step 2
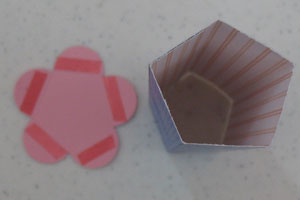
Attach ends of 5" x 5" piece to form pentagon tube.
Add strong adhesive to each petal of both flowers. For bottom flower, the adhesive goes on INSIDE of petals. For top flower, sticky strip goes on OUTSIDE of petals.
-
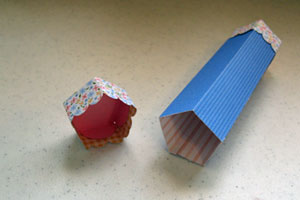
Attach each petal onto side of box, working clockwise around. Stick bone folder inside box to help press side firmly down.
-
Step 3
Border punch the edge of your 1" x 5" paper strip (optional).
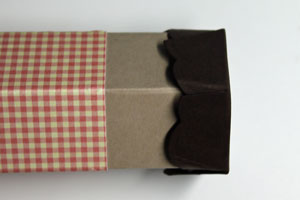
Starting at the edge of one side, wrap 1" x 5"' paper around box, pinching at each corner to define score marks.
Wrap strong adhesive all around lower edge of box. Starting at one edge, secure paper in place, working clockwise around.
Variation:
For removable box top, wrap 1" x 5" paper around box and pinch to define score marks. While holding fancy flower in place on top of box (adhesive facing OUT), adhere paper to outside of box.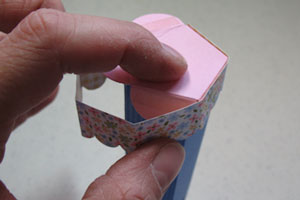
-
Step 4
Remove top and fill box with treats.
-
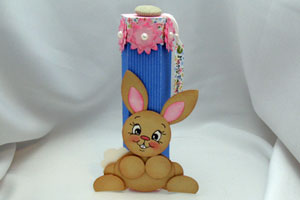
Step 5
Embellish outside of box.
Video!
Variations
-
Make it clear
Try making box with a window sheet so the treats are visible.
Different height
Adjust height of box by changing one dimension on the 5” x 5” paper.
No Flower Punch, no problem
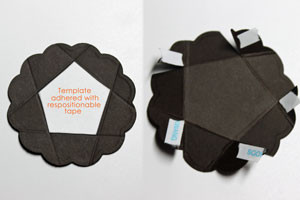
After making your treat tube, trace the shape of the Pentagon on a piece of scrap cardstock. Cut out.
Punch or die cut scallop circles or other shapes bigger then 2 1/2".
Adhere your Pentagon shape with repositionable adhesive or trace in the center of your shape.
Score outside those lines or right next to your Pentagon shape.
Cut one of the score lines where score lines overlap.
-
Adhere the flaps you created to the bordering side to create your lid.
Your Turn
You've seen the tutorial, now you try it! We've got a section of the gallery set aside for Pentagon Treat Tube. Try this technique, then upload your artwork to the gallery. Show us your creations!
***Please note - Internet Explorer/Edge is not a supported browser, and will not allow you to see the videos. Please use Chrome, Firefox or Safari to view our tutorial videos.

Questions and Comments
We'd love to get your feedback or questions. Leave your comment below.
http://www.paperpunchaddiction.com/2011/04/peachy-keen-spring-stamp-release-blog.html
Dianne
thanks,
kat
Aloha
http://dreamcreateandshare.blogspot.com/2010/06/treat-box-variations.html
Fun!
I love it :>
Page 1 of 2 pages 1 2 >