Paper Molding
by Deb Valder
Turn a stamped image into a molded, dimensional embellishment.
Supplies
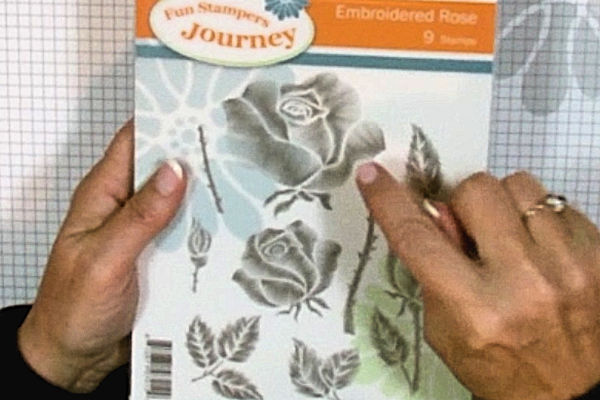
- Stamp image with dimensional sections (Fun Stampers Journey Embroidered Rose set used here)
- Cardstock cut in strips, 3x longer than the image for folding
- Ink (Pomegranate Splash used here)
- Scissors
- Thick liquid or tacky glue (Journey Craft Glue used here)
- Acrylic glaze or clear varnish
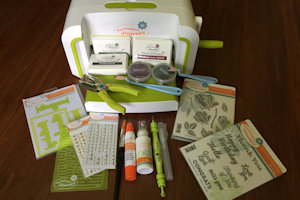
- Other supplies as needed to complete the project (Fun Stampers Journey products used here: Die cutting machine; Designer Frames Die; Corrugated Board embossing folder; Silver/Gold Fashion Pearls; Journey Paintbrush; Journey Craft Glue; Journey Glaze; Bloom Tool; Spritzer; Pan Pastels; Sofft Tools; Heart Hand-held Punch; Crease Tool; Easy Glide Adhesive; Detail Pro Shears; plastic plate ; Fresh Foliage and Black Licorice inks)
Step-by-Step
-
Step 1
Select a stamp image with sections that can be given dimension. Floral images work well for this technique.
-
Step 2
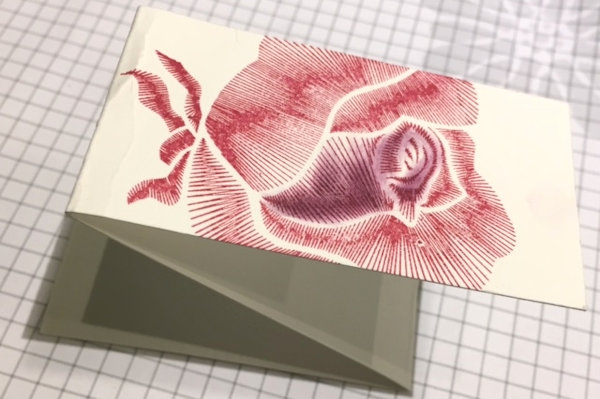
Identify each section of the image and stamp the sections separately on long scrap pieces of cardstock. Stamp a full image on a piece of cardstock for the base image.
Color the sections as desired. -
Step 3
Fold the first long strip into 3 layers.
NOTE:
Work with each section one at a time. -
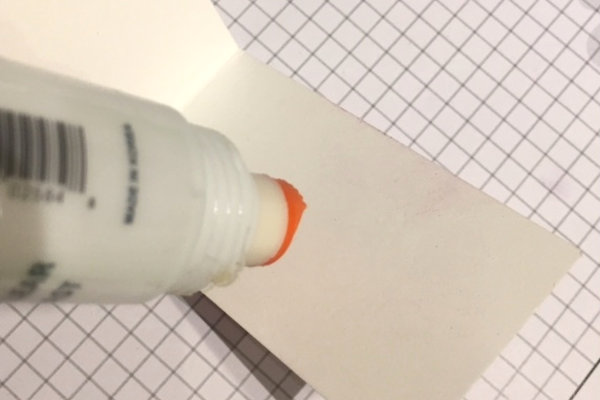
Step 4
Glue the layers together, taking care to apply glue over the entire area of the fold.
-
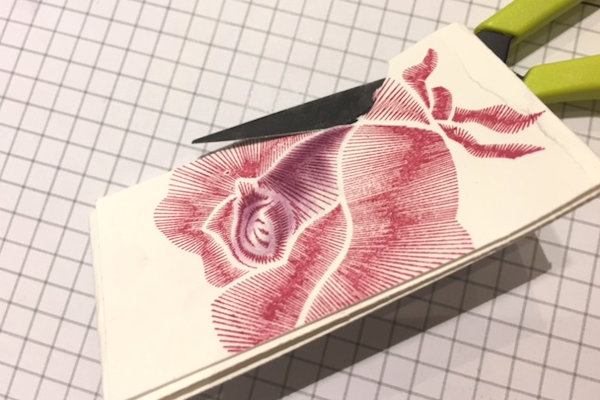
Step 5
While the glue is still wet, cut out the shape.
-
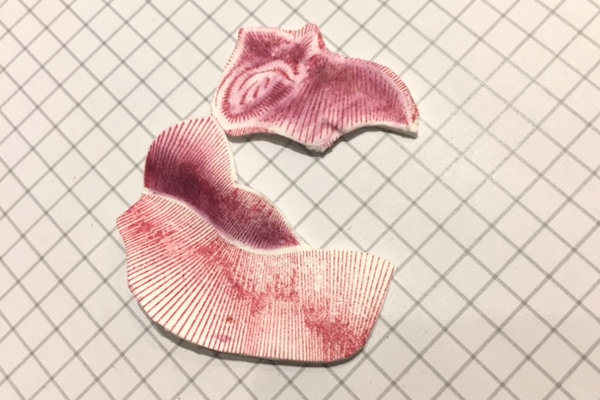
Step 6
Before the glue dries, mold and shape the cutout. Set it aside to dry and harden.
Repeat the process with the remaining pieces. -
Step 7
Layer and glue the pieces onto the base image. Trim around the edge.
-
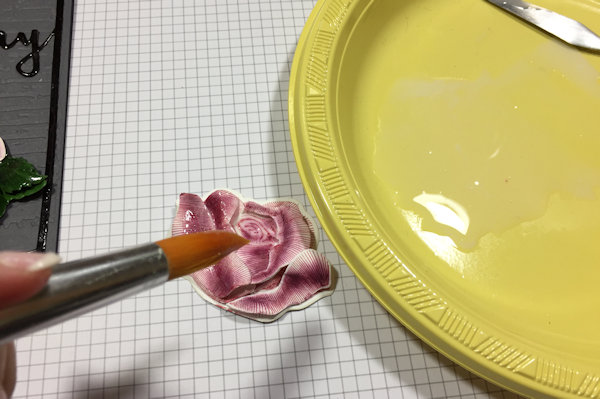
Step 8
Brush the finished piece with a liquid varnish or clear acrylic glaze.
-
Step 9
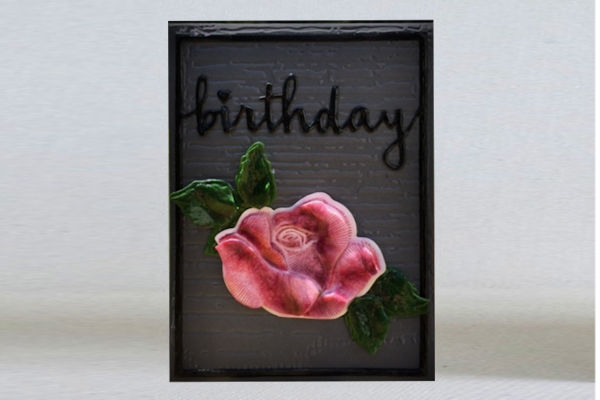
Use the molded piece to complete a card or other project.


Your Turn
You've seen the tutorial, now you try it! We've got a section of the gallery set aside for Paper Molding. Try this technique, then upload your artwork to the gallery. Show us your creations!
***Please note - Internet Explorer/Edge is not a supported browser, and will not allow you to see the videos. Please use Chrome, Firefox or Safari to view our tutorial videos.

Questions and Comments
We'd love to get your feedback or questions. Leave your comment below.
Carole from Chicago
Page 1 of 1 pages