Paper Tole Flower
Spice up your project with this three-dimensional paper flower.
Supplies
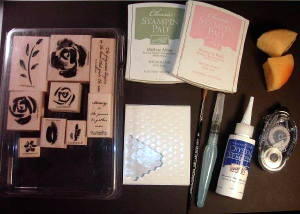
- Stamps of choice
- Sponges
- Small-handled Paint Brush
- Aqua Painter™
- Tape
- Scissors
- Mouse Pad
- Neutral Cardstock
- Spray bottle
Step-by-Step
-
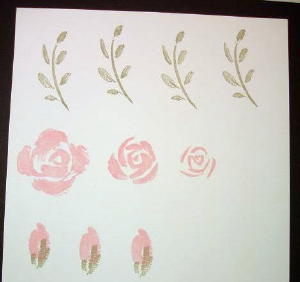
Step 1
Stamp images on your neutral cardstock.
-
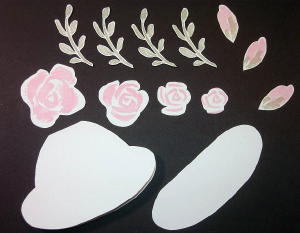
Step 2
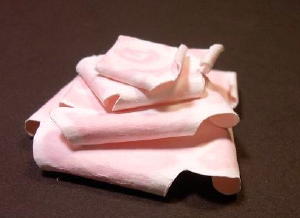
Cut out your images using your scissors (note also in the photo the hat template that I like to use with these flowers).
-
Step 3
Place one of the stamped flower pieces on a mouse pad. Spritz with your water bottle.
Tips: Use a lot of water; so much that the paper will start to curl on its own. A spongy mouse pad absorbs the excess water and keeps things neat!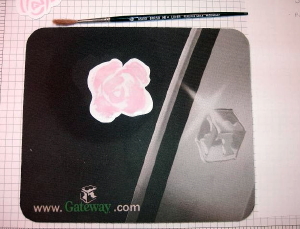
-
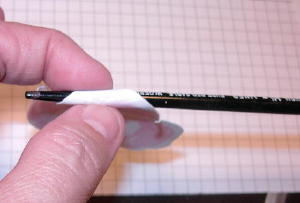
Step 4
Roll the edges of your stamped pieces around the small-handled paint brush. Roll tightly for the best effect.
-
Step 5
Because the paper petal will try to unroll, I use my fingers to continue rolling and hold in place for a few seconds, until I get it to stay the size I like.
Set the petal aside to dry while working on the rest of the flower pieces in the same fashion.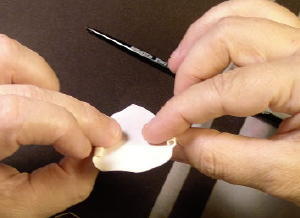
-
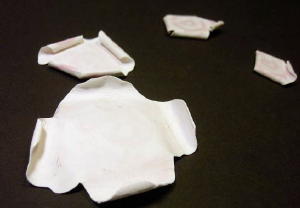
This is how my flower pieces look from the back after rolling.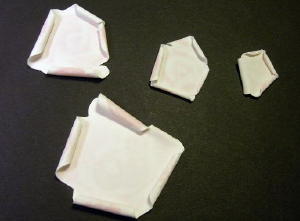
-
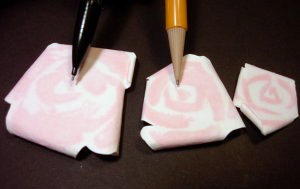
Step 6
Try to line up the flower centers so they are going in the same direction.
-
Step 7
Stack all the pieces to see how the petals look.
Note: Nothing has been taped at this point, stacking the petals just gives me an idea how the flower will look, and allows me to change them around if I want.
-
Step 8
Begin to unroll your paper while it is still a little damp.
-
Step 9
With the flower centers still facing the same direction, you can see that the flower is starting to take shape. One thing to remember, because the paper is still a little damp, tape will not stick to it. If you are in a hurry, dry the petals with a heating tool. Otherwise, let them sit over night.
-
Step 10
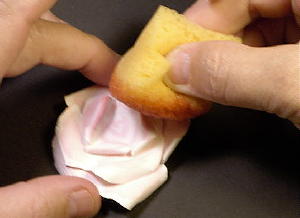
When dry, tape the petals together and use your sponge to start adding color to the edges.
-
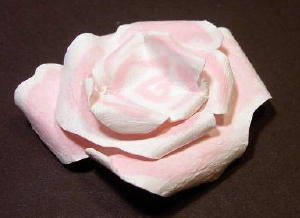
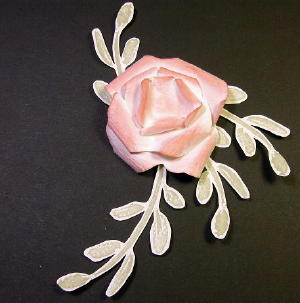
Step 11
Finally, you have a beautiful paper rose.
Video!
Variations
More color?
At step 10, you may want to add color to the center - not just the edges - of the flower pieces; use your aqua painter to do this. I did not do that to this flower because I liked the way it was turning out, but if you want deep color more toward the centers now is the time to paint with the Aqua Painter™. One thing you have to remember with this technique is that a lot of the final outcome is going to depend on you. As many times as I have made this little flower, no two are ever alike. Have fun and experiment!
Are you a visual learner?
Here's a how-to video from Linda!
Your Turn
You've seen the tutorial, now you try it! We've got a section of the gallery set aside for Paper Tole Flower. Try this technique, then upload your artwork to the gallery. Show us your creations!
***Please note - Internet Explorer/Edge is not a supported browser, and will not allow you to see the videos. Please use Chrome, Firefox or Safari to view our tutorial videos.
Questions and Comments
We'd love to get your feedback or questions. Leave your comment below.