Paper Piecing
by Beate Johns
Use patterned paper to add color and patterns to line images.
Supplies

- Outline stamp
- Ink
- Patterned Paper
- Cardstock
- Scissors
- Adhesive
Step-by-Step
-
Step 1
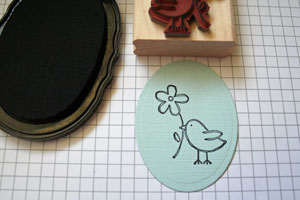
Stamp image on cardstock.
-
Step 2
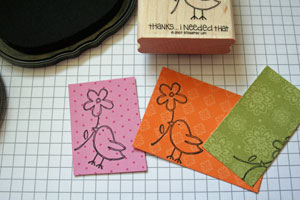
Stamp same image onto patterned paper.
-
Step 3
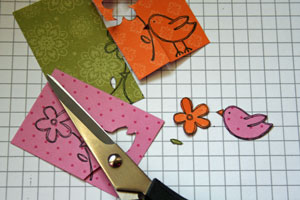
Cut image pieces out of patterned paper.
-
Step 4
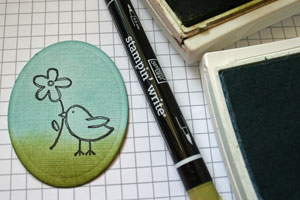
Sponge and/or color parts of the cardstock image that won't be covered with the patterned paper pieces.
-
Step 5
Adhere patterned paper pieces over the card stock image.
-
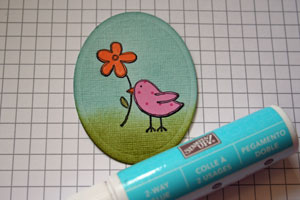
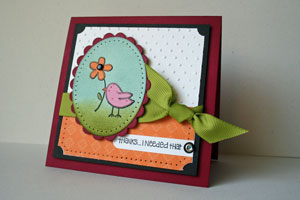
Step 6
Finished project.
Video!
Your Turn
You've seen the tutorial, now you try it! We've got a section of the gallery set aside for Paper Piecing. Try this technique, then upload your artwork to the gallery. Show us your creations!
***Please note - Internet Explorer/Edge is not a supported browser, and will not allow you to see the videos. Please use Chrome, Firefox or Safari to view our tutorial videos.
Questions and Comments
We'd love to get your feedback or questions. Leave your comment below.
the tutorial only shows step by step instructions for the technique, not how I finished the card. Yes, I paper pierced the edges of the oval. You can always find all the supplies I used for my tutorial cards in the gallery listed on the bottom of the tutorial.
You can see how to paper pierce in the first step of the Faux Stitching tutorial.
You can read a mini tutorial on paper piercing curves here.
I use Nestabilities die templates with my Cuttlebug to cut all my shapes and most of my scalloped borders.
Read which Nestabilities I have, how I store and use them and where I bought them here
So sorry to have failed you on this ... but at last we have a gallery for paper-piecing!!
((((hugs))))
Tex
Page 1 of 2 pages 1 2 >