PanPastel Lily
by Kittie Caracciolo
Learn to add realistic details to a die cut flower.
Supplies
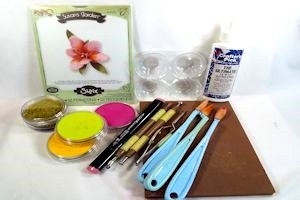
- Floral dies (Sizzix® Thinlits Die Set 12PK - Flower, Lily used here)
- Cardstock
- Pastels (PanPastel® Magenta, Diarylide Yellow, and Bright Yellow Green used here)
- Shaping tools and tweezers (Sizzix® Susan's Garden Tool Kit used here)
- Blending tool or other applicator (PanPastel® Sofft Knives and Covers used here)
- Marker for adding details (Copic® Rose Red R85 used here)
- High-tack glue (Crafter’s Pick™ Ultimate Glue used here)
- Drying tray
- Embellishments (Flower Soft™ Leaf Green used here)
Step-by-Step
-
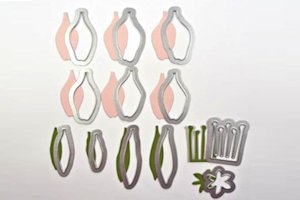
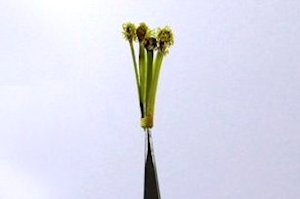
Step 1
Die cut flower petals and parts.
-
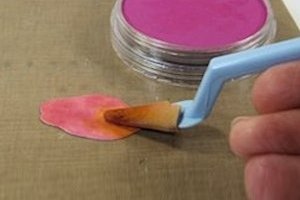
Step 2
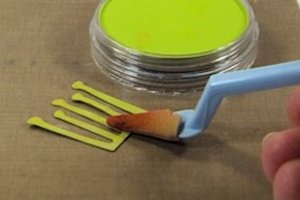
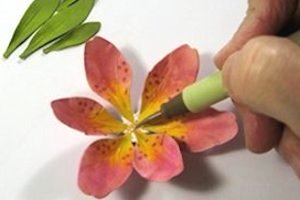
Lightly apply yellow pastel toward the center of each petal using a blending tool.
Note:
Chalks or inks can also be used.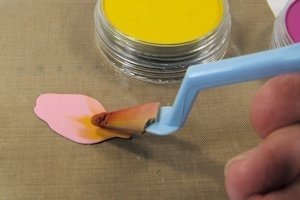
-
Blend magenta pastel over the petal, into the yellow area.
-
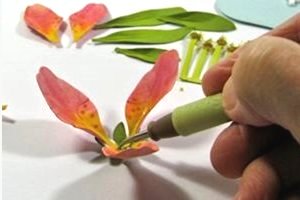
Step 3
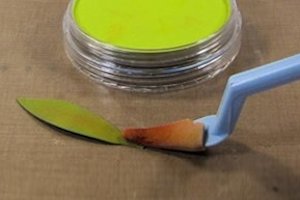
Apply yellow green pastel to the lower portion of the petals.

-
Lightly apply yellow green pastel to the stamen piece.
-
Step 4
Lightly apply yellow green pastel to the leaves.
-
Step 5
Color the tips of the stamen on both sides with a marker. Apply a few dots to each petal with the marker.

-
Step 6
Place the petals on a foam molding pad and run a loop tool or other rounded tool from the tip of the petal down the center to the bottom, lightly pushing down to create a natural curved form. Repeat the step by running the tool down the sides of the petal to turn them up.

-
Step 7
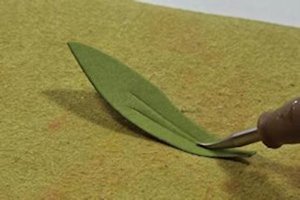
Score the leaves with a leaf tool or stylus on a foam pad to create a few natural lines.
-
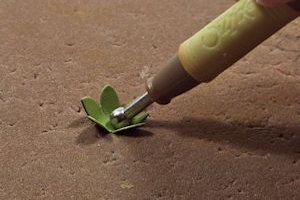
Form the calyx using the large stylus, pushing into the molding pad and moving in a light circular motion until the small petals turn up.
-
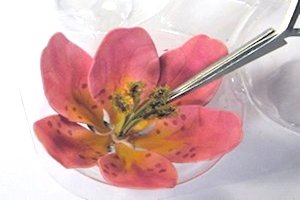
Step 8
Dip the petals into a little glue and attach them to the flower base, alternating every other opening.
-
Repeat the steps to attach the remaining petals.
-
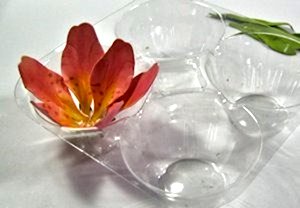
Step 9
Place the assembled lily into the flower pot tray or other form, to maintain the flower's shape as the glue dries.
-
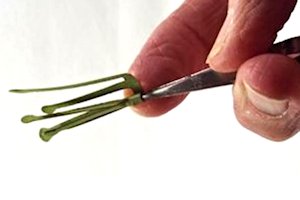
Step 10
Roll the stamen around a tweezers tip and apply glue to hold it closed.
-
Apply glue to the tips of the stamen; apply green Flower Soft and allow to dry.
-
Step 11
Apply glue to the base of the stamen and attach the piece to the center of the lily. Hold it in place until it adheres well enough to stay in place on its own. Let glue dry.
-
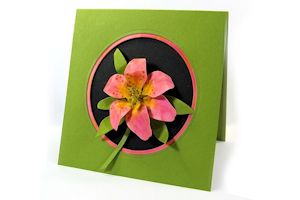
Step 12
Attach the leaves to the flower base, and complete the project.
Video!
Your Turn
You've seen the tutorial, now you try it! We've got a section of the gallery set aside for PanPastel Lily. Try this technique, then upload your artwork to the gallery. Show us your creations!
***Please note - Internet Explorer/Edge is not a supported browser, and will not allow you to see the videos. Please use Chrome, Firefox or Safari to view our tutorial videos.

Questions and Comments
We'd love to get your feedback or questions. Leave your comment below.
Thanks for sharing.
Hugs from SPAIN
I found the PanPAstel to be much easier for me to use because of the ease of blending, wiping off to lighten color, to be able to layer color over color and even the ability to erase. Erasing was very useful to me as I htried playing and learning to use the pastels.
I'm going to copy and paste the description I found on the PanPastel site. I sure hope it helps.
"PanPastel Colors are professional artists� quality soft pastel colors packed in a unique pan format (cake-like). The special qualities of PanPastel Colors mean that artists can blend and apply dry color like fluid paint"
"Each PanPastel Color is loaded with the highest quality artists� pigments; and is made using a unique manufacturing process requiring minimal binder, resulting in rich, ultra soft and low dust colors. PanPastel Colors can be mixed for an infinite palette of colors."
Page 1 of 2 pages 1 2 >