No-Line Piercing

by Dina Kowal

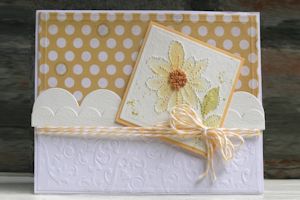
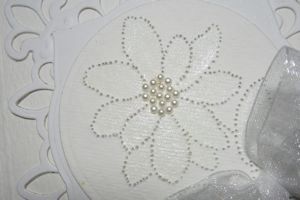
Use a stamped image as a piercing template, then embellish the pierced image with French knots.

Supplies

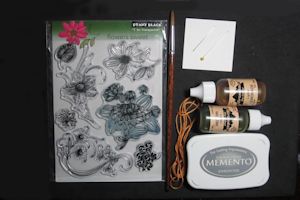
  • Watercolor paper or heavy cardstock (at least 110#)
  • Stamp image (clean line art is best - Penny Black Flowers Sweet clear set used here)
  • Medium-colored ink
  • Needle or fine piercing tool
  • Embroidery floss, flat-backed pearls or other embellishments
  • Watercolor paints or dye reinkers & brush (or coloring medium of your choice)
  • Foam pad to protect your work surface
  • Tape

Step-by-Step

  1. Step 1

    Stamp a clean line image on the back side of a watercolor paper panel.

    Hint:
    Use a light or medium ink so both lines and piercing will be visible as you work. The stamped image will not show on the completed project. Black ink is not recommended.

  2. Step 2

    Using a pin or other piercing tool, pierce along the outline of the image. Keep pierced holes close together and evenly spaced, about every 1/16”. Also pierce details that help to complete the image on the other side.

    Notes:
    It is not necessary to pierce along every line or include every detail of the image. Also, details can be added that are not on the stamped image.

    Remember that the image will be reversed when complete.
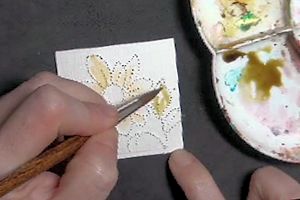
  3. Step 3

    Add color to the front of the panel, if desired.

  4. Step 4

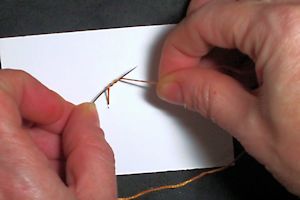
    To add dimension to the panel, embellish with embroidered French knots. Begin by threading 3 strands of embroidery floss through a fine, sharp needle.

    Secure the end to the back of the watercolor paper with tape and pull the thread through to the front. Pierce a second hole about 1/16” from your entry point.
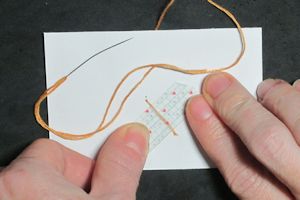
  5. Step 5

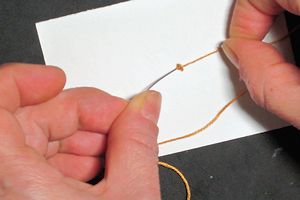
    Hold the needle in one hand and the floss in the other. Hold the floss taut, about 1” away from the paper.

  6. Wrap this 1” length around the needle 3 times.

  7. Step 6

    Slide the tip of the needle into the second hole, still keeping the floss taut. Pull the loops of thread snugly around the needle and down close to the paper.
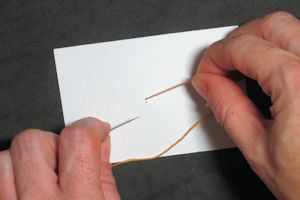
  8. Step 7

    Pull the needle through to secure the knot, holding the end of the thread taut until it pulls through to the other side.

    Note:
    Be gentle - forceful pulling can tear the paper or pull the knot through the hole.
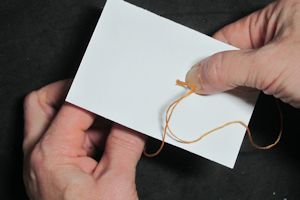
  9. Step 8

    Repeat this process until the area is full.

  10. Step 9

    Assemble and finish the card.

Video!

Variations

  1. Use pearl paints or flat-backed pearls to add detail.

Your Turn

You've seen the tutorial, now you try it! We've got a section of the gallery set aside for No-Line Piercing. Try this technique, then upload your artwork to the gallery. Show us your creations!

***Please note - Internet Explorer/Edge is not a supported browser, and will not allow you to see the videos. Please use Chrome, Firefox or Safari to view our tutorial videos.

Questions and Comments

We'd love to get your feedback or questions. Leave your comment below.

This would be lovely on a Christmas card with poinsettias or holly.. Thank you for your design. It is truly beautiful. The center is very nicely done as well.
Jackie Parker  |  Wed Mar 5, 2014 at 4:52 AM
Thank you so much for sharing this Dina. It is really gorgeous and can be accented in so many ways! Love the center stitching!
Karen Shirey  |  Wed Mar 5, 2014 at 6:00 AM
Thank you, Dina. That is a great tutorial; will probably try this out. Blessings.
MH  |  Wed Mar 5, 2014 at 6:28 AM
I love your idea and I hope to give it a try soon. Thanks for sharing.
carolb  |  Wed Mar 5, 2014 at 7:33 AM
Thanks Dina. Your tutorial was so clear and useful. Beautiful cards. smile
Leanne Cyr  |  Wed Mar 5, 2014 at 7:52 AM
Dina, this is fabulous! Gorgeous samples!
Dawn Easton  |  Wed Mar 5, 2014 at 7:56 AM
Beautiful work, loved this tutorial
Isabel M Dorfner  |  Wed Mar 5, 2014 at 8:33 AM
Thanks Dina---excellent "tutty" (nickname for tutorial! smile
Susanne Gleason  |  Wed Mar 5, 2014 at 8:34 AM
Dina, this is just fabulous smile
Stacy Sheldon  |  Wed Mar 5, 2014 at 8:35 AM
What a great tutorial on French knots! It saved many trial and error attempts! Thanks. smile
Donna Moore  |  Wed Mar 5, 2014 at 8:47 AM
Love this Dina!!!
Allison Cope  |  Wed Mar 5, 2014 at 9:00 AM
what a wonderful design. I am sure whoever will recieve this card will appreciate all you hard work. TFS
Jane  |  Wed Mar 5, 2014 at 10:25 AM
This is so pretty, I will be doing this for a ATC swap I am doing it will blow their minds. I hope mine will come out looking half as good as yours. Thank you so much.
debbie horve  |  Wed Mar 5, 2014 at 10:40 AM
I LOVE doing hand embroidery on my paper cards! It's an embellishment that is truly personal...can't be purchased in the store. Thread or ribbon embroidery adds something very special to my projects. Thank you for this featured technique!
Martie Rollin  |  Wed Mar 5, 2014 at 1:58 PM
I love this and it is so clean and simple.
Thank you for the great video. Hope to see more
Thanks!
Sharon Roloff  |  Wed Mar 5, 2014 at 2:25 PM
Thank you for the tutorial. I love the look of watercolor on cards and the French knots are a great idea for texture. Thank you.
Barbara C.  |  Wed Mar 5, 2014 at 9:09 PM
great technique and one I haven't tried; thanx for the inspiration!
Sue B  |  Fri Mar 7, 2014 at 12:18 PM
This is a really impressive card. I LOVE this technique and I can't wait to show it to my card club this month! Thank you!!!
Melissa  |  Tue Mar 11, 2014 at 7:22 PM
Wow. Thanks Dina for this challenging technique. I will be trying it out with a different few images.
Annette  |  Fri Mar 14, 2014 at 8:40 AM
That was a lovely project I will definitely be trying this.
anne young  |  Tue Mar 18, 2014 at 5:01 AM

Page 1 of 2 pages  1 2 >

You need to be logged in to comment

GET OUR NEWSLETTER


Splitcoaststampers's privacy policy