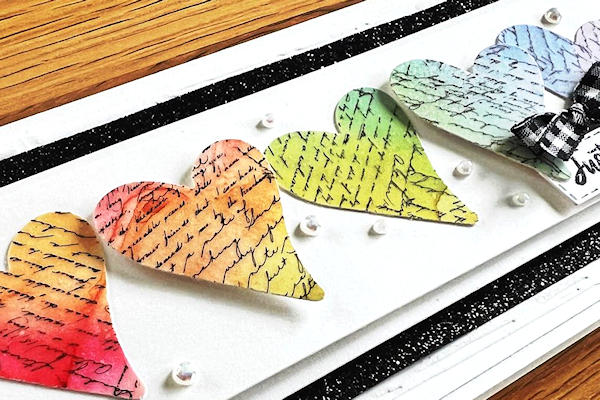
Misted Marker Vellum
by Cindy Coutts
Color and mist alcohol ink on vellum for a softened translucent effect.
Supplies
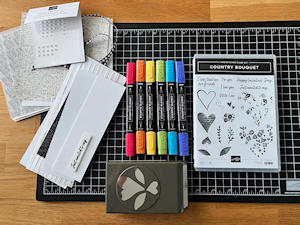
- Cardstock (Stampin’ Up!® cardstocks used here in Basic White Regular and Basic White Thick)
- Plain or printed vellum (SU Black Scripty Vellum Paper used here)
- Adhesive sheet
- Alcohol markers (SU Stampin’ Blends Markers in Sweet Sorbet Dark, Pumpkin Pie Dark, Daffodil Delight Dark, Granny Apple Green Dark, Tahitian Tide Dark, Highland Heather Dark)
- Spritz bottle
- Household isopropyl alcohol
- Dies or punches (SU Country Bouquet Punch used here)
- Other supplies as needed to complete the project (SU products used here: Iridescent Pearls Basic Jewels, Black and White Gingham Ribbon, Black Glimmer paper, Black Scripty Country Bouquet Stamp Set; Stitched Rectangles Die-Cuts; Stripes Embossing Folder, Die-Cutting Machine, Tear & Tape, Tombow Multipurpose Liquid Glue, Mini Glue Dots, Paper Trimmer, Scoring Tool, Scissors)
Step-by-Step
-
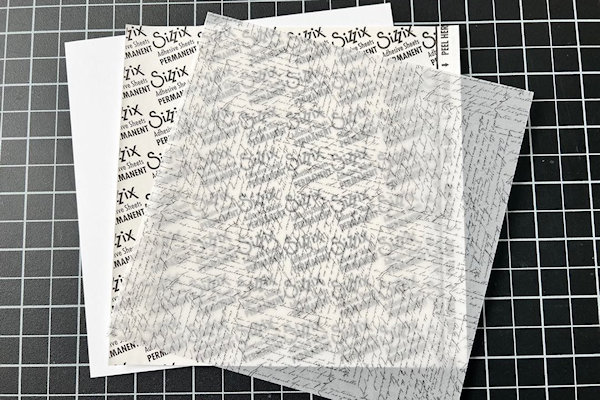
Step 1
Cut white cardstock, adhesive sheet. and vellum paper to the same size. Adhere the papers together with the adhesive sheet.
-
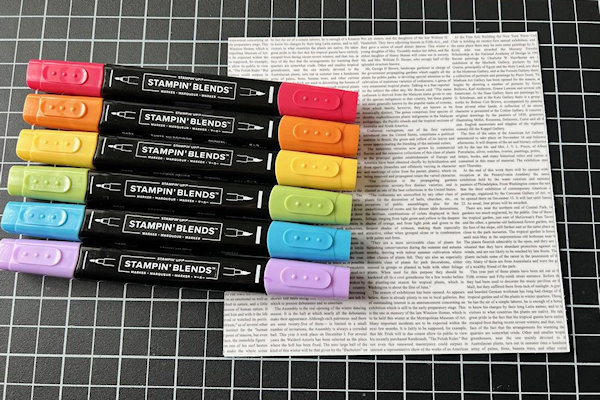
Step 2
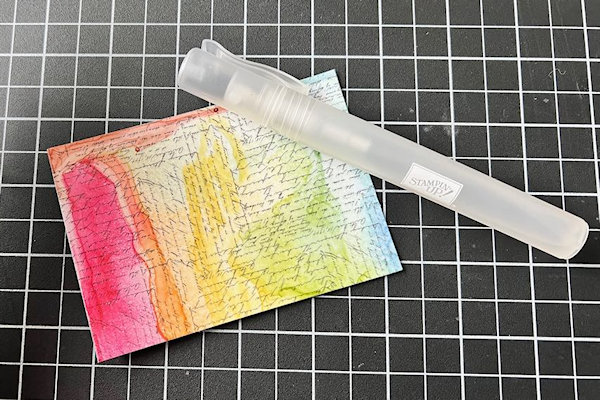
Choose your alcohol marker colors and create blocks of color on the vellum surface.
Spray the panel liberally with isopropyl alcohol. -
Step 3
Move color around with a heat tool to create blends, edges, and interest.
-
Step 4
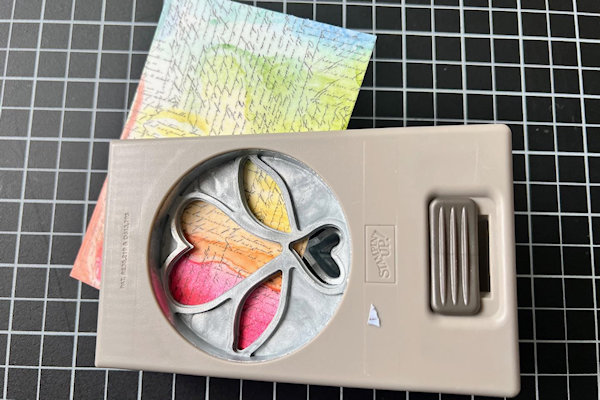
Punch or die cut shapes from the panel.
-
Step 5
Use the cut pieces to complete a card or other project.
Video!
Your Turn
You've seen the tutorial, now you try it! We've got a section of the gallery set aside for Misted Marker Vellum. Try this technique, then upload your artwork to the gallery. Show us your creations!
***Please note - Internet Explorer/Edge is not a supported browser, and will not allow you to see the videos. Please use Chrome, Firefox or Safari to view our tutorial videos.

Questions and Comments
We'd love to get your feedback or questions. Leave your comment below.
Card base: Top-folding 8-1/4 x 3-1/2
Embossed panel: 8 x 3-1/4
Glimmer paper mat: 6 x 2-3/4
Image mat: 7 x 2-1/4
Image panel: 6-3/4 x 2
Thanks. Loved the technique and your card.
(Note: for those commenters struggling with curled paper - try placing the piece under something heavy, such as a dictionary as it completes it's drying time. I myself have a meat press with a flat bottom (yes, I'm not joking - it's a Lodge, cast iron legitimate meat press) that I stack on top of pieces that need help to straighten back out if they've curled for whatever reason. Thanks to my mom for figuring that out and gifting me one!!!) :0)
Blessings & hugs,
Chrissy
@Superannuated It depends on the thickness of the CS.
@meatballsspaghetti I would stamp on the vellum before and heat emboss to keep the print crisp.
Page 1 of 1 pages