Mini Treat Bags
by Debby Hughes
Make a cute treat bag for a holiday gift or place setting.
Supplies
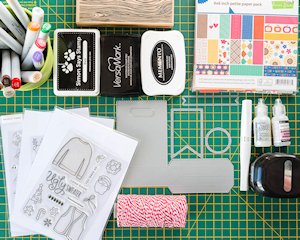
- Sturdy cardstock for bag (Neenah Desert Storm 100lb used here)
- Die cutting machine and cutting plates
- Scoring tools and bone folder
- Punch for handle opening (Stampin’ Up! Word Window punch used here)
- Adhesive and foam tape
- Marker-friendly cardstock for accent pieces (Neenah solar white 80lb used here)
- Patterned paper (Lawn Fawn Sweater Weather & Lawn Fawn Peace Joy Love used here)
- Steel wafer dies (Lawn Fawn Goodie Bag, Simon Says Stamp Bundle of Stitched Shapes, Simon Says Stamp Thanksgiving Feast used here)
- Stamps (Simon Says Stamp Ugly Sweater and Sweater Words and Appliques, Hero Arts Designer Woodgrain, Simon Says Stamp/Clearly Besotted Winter Friends used here)
- Inks (Memento Tuxedo Black, Versamark, and Simon Says Stamp Black used here)
- Other supplies as needed to complete the project (Copic Markers, Zig Wink of Stella clear glitter pen, Stickles Star Dust glitter glue, Ranger Glossy Accents, and baker’s twine used here)
Step-by-Step
-
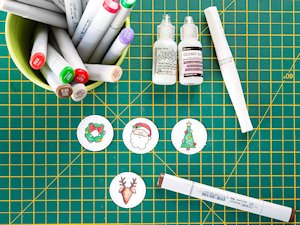
Step 1
Die cut accent pieces from white cardstock. Stamp images, and color and embellish as desired. Set aside.
-
Step 2
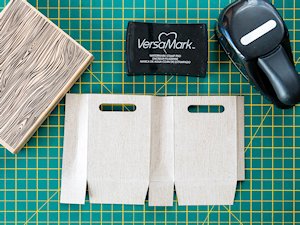
Die cut 2 goodie bag pieces from sturdy cardstock (see instructions beginning in step 5 below for making the bag without dies). Cut banners from patterned paper, and sentiment banners from white cardstock.
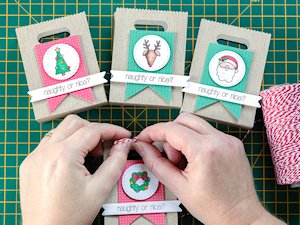
Stamp sentiments in black and assemble banners with foam adhesive.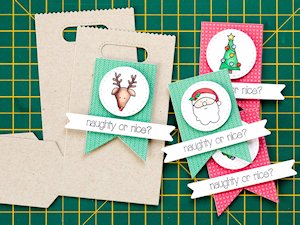
-
Step 3 (Optional)
Stamp a background pattern onto the bag.
TIP:
Use Post-It notes to mask areas you don’t want to stamp.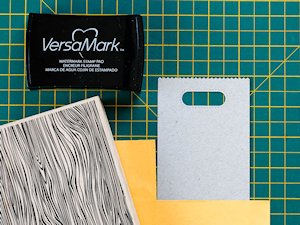
-
Step 4
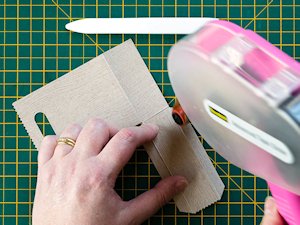
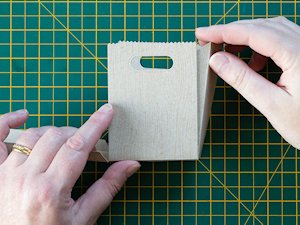
Crease all the folds of the goodie bags with a bone folder and then run adhesive along the tabs.
-
Adhere the two sides of the bag together.
-
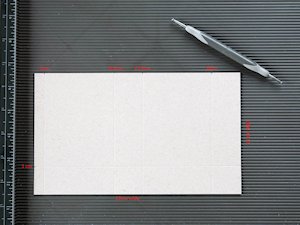
Step 5
To make the bag without a die, cut cardstock to 5" x 8 1/2". Stamp if desired, then score at 1/2", 3 1/4", 4 1/2", and 7 1/4" along the long side. Along the short side score at 1 1/4" from the bottom.
-
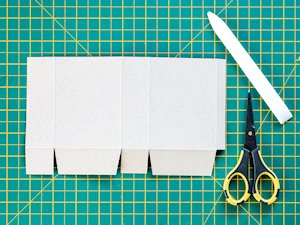
Step 6
Cut along the lines from the base to the horizontal score as shown to create tabs for the base. Use a bone folder to sharpen the score lines.
-
To create gussets on the side panels of the bag add a score line part way down at 3 7/8" and 7 7/8", then score at angles from the end of the score line to the bottom corners of the panel so that the bag can be pinched closed. Fold in and adhere bottom tabs.
-
Step 7
Using foam adhesive, attach the banners to the front of the bag. Tie closed with baker’s twine.
-
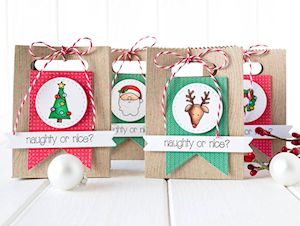
Step 8
Fill with a holiday treat for a party favor, hostess gift, or place setting.
Video!
Your Turn
You've seen the tutorial, now you try it! We've got a section of the gallery set aside for Mini Treat Bags. Try this technique, then upload your artwork to the gallery. Show us your creations!
***Please note - Internet Explorer/Edge is not a supported browser, and will not allow you to see the videos. Please use Chrome, Firefox or Safari to view our tutorial videos.

Questions and Comments
We'd love to get your feedback or questions. Leave your comment below.
I'm so glad you made another video! I really love your cards and your videos are just awesome!
Page 1 of 1 pages